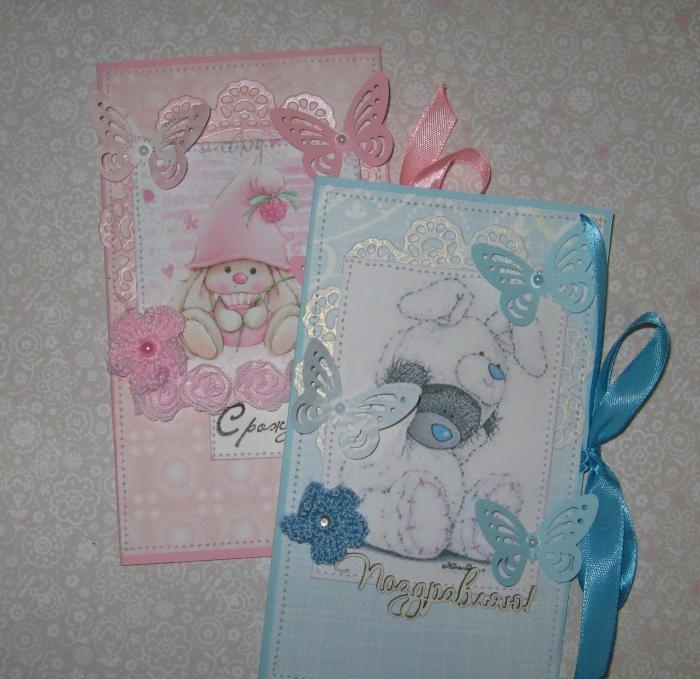
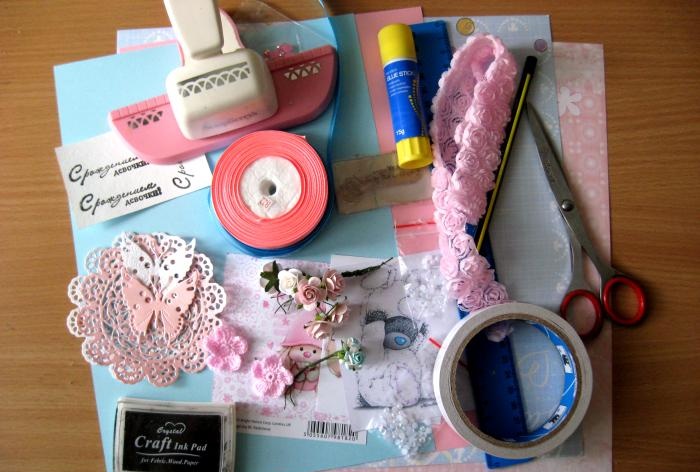
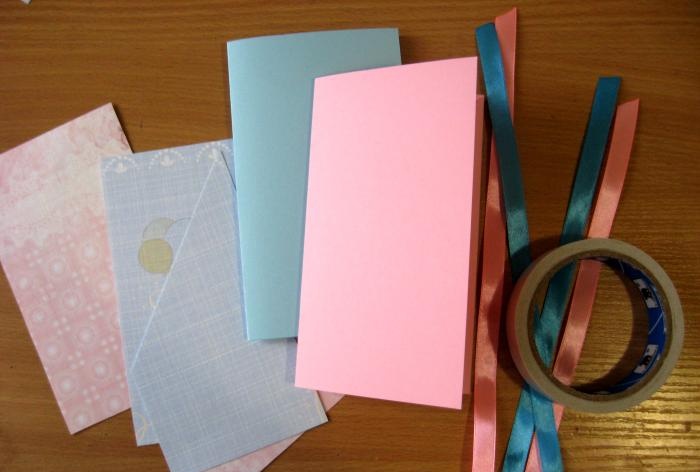
So, for production we need to take:
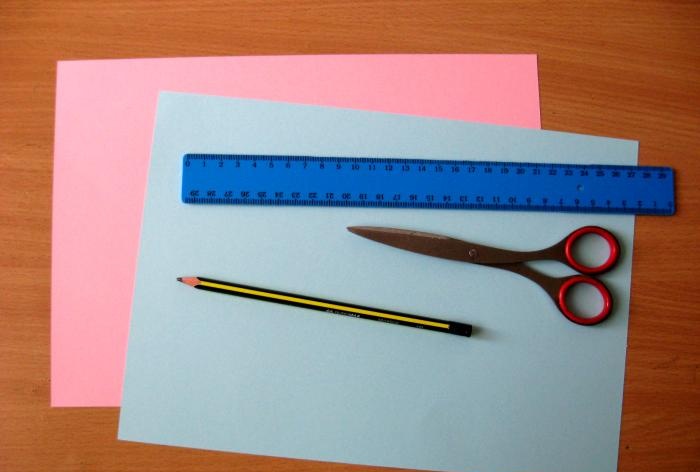
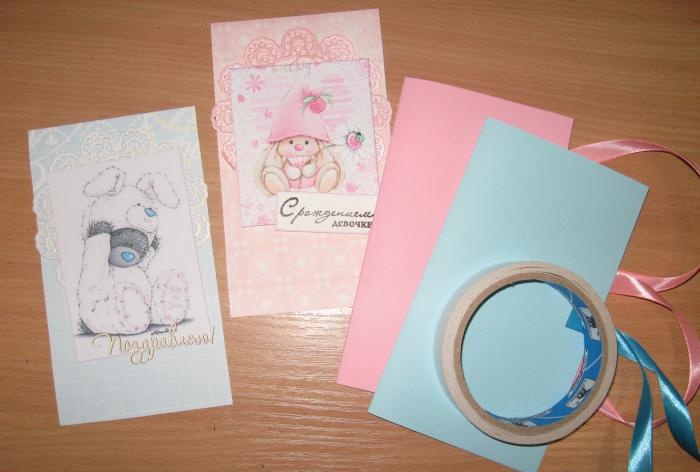
- Pink and blue cardboard on A4 sheet;
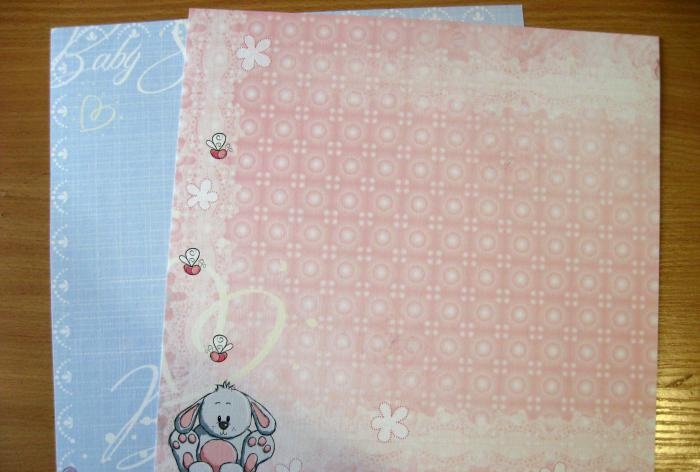
- Accordingly, the scrapbooking paper is pink and blue;
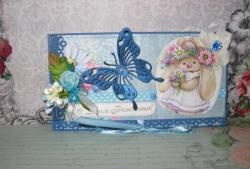
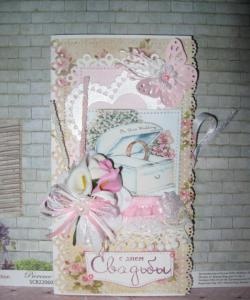
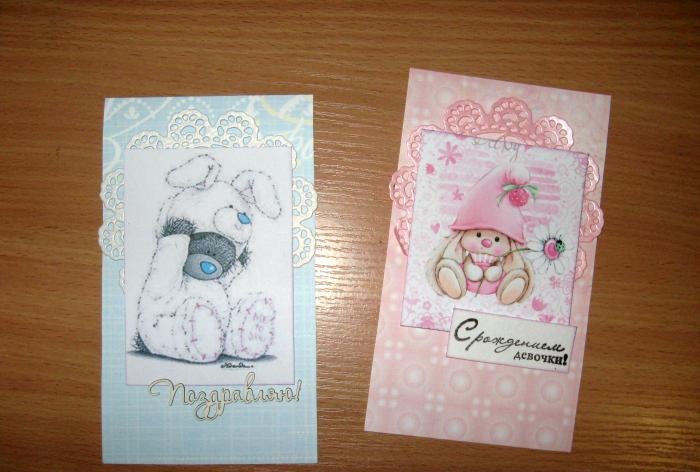
- Pictures with a pink bunny and a teddy bear;
- Die-cut small butterflies and openwork napkins made of pearlescent white and pink paper;
- Pink and white pearl half beads of different sizes;
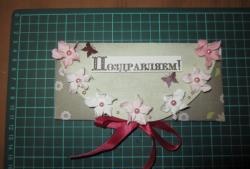
- Stamp and ink for it “Happy birth of a daughter”;
- Chipboard “Congratulations”;
- Satin pink and blue ribbons 12 mm wide"
- Lighter for burning;
- Light pink ribbon with roses;
- Knitted flowers blue and pink;
- Glue stick;
- Double-sided tape;
- Ruler, pencil and scissors.
![Handmade birthday envelopes](https://i.washerhouse.com/images/21/277-konverty-ruchnoy-raboty-na-rozhdenie.jpg)
![Handmade birthday envelopes](https://i.washerhouse.com/images/21/278-konverty-ruchnoy-raboty-na-rozhdenie.jpg)
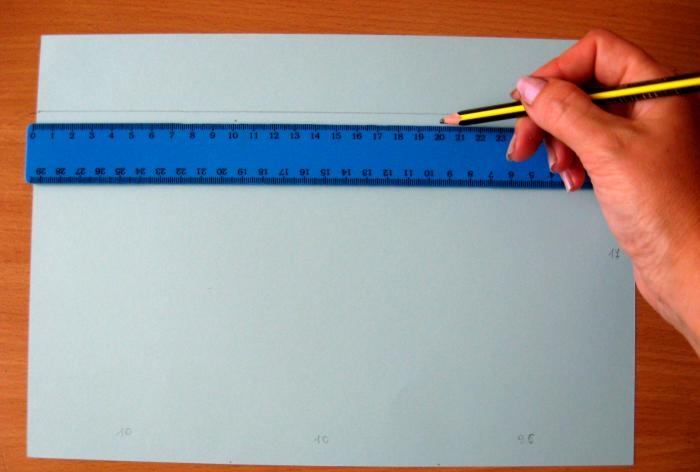
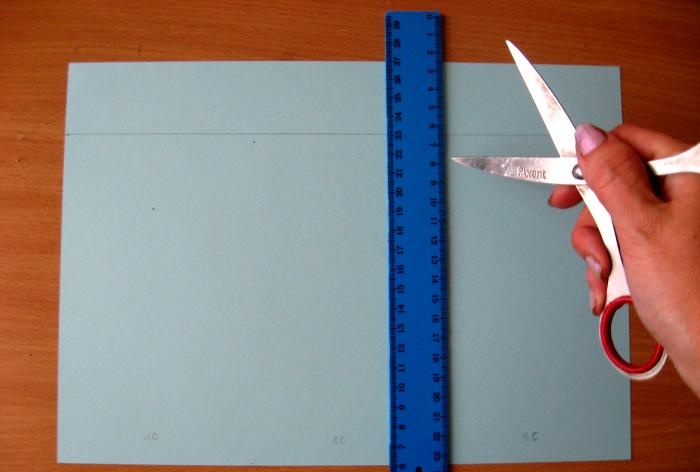
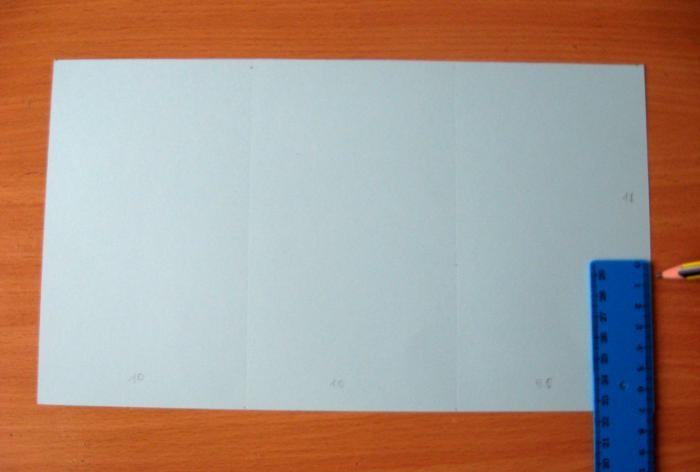
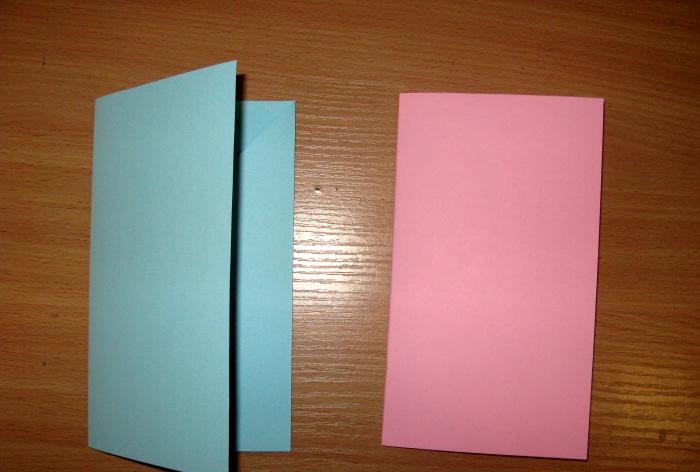
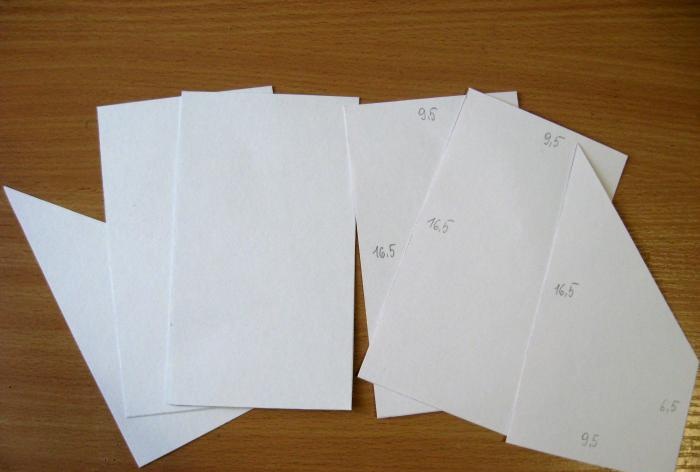
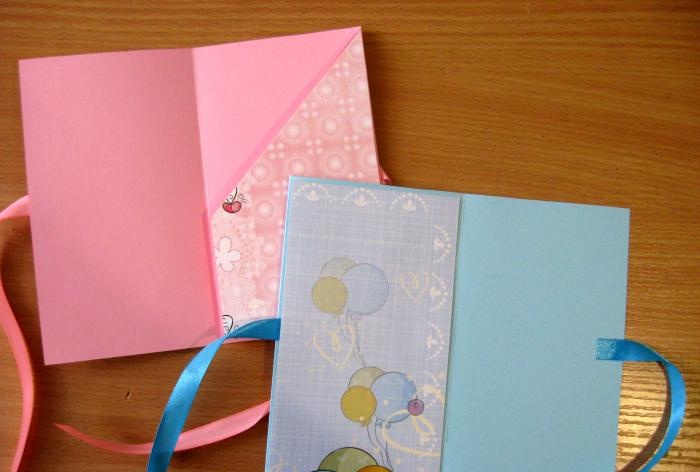
Let's begin. We take cardboard, unfold it horizontally, measure 17 cm in height, and divide the width into parts 10 cm, 10 cm and 9.6 cm.
![Handmade birthday envelopes](https://i.washerhouse.com/images/21/279-konverty-ruchnoy-raboty-na-rozhdenie.jpg)
![Handmade birthday envelopes](https://i.washerhouse.com/images/21/280-konverty-ruchnoy-raboty-na-rozhdenie.jpg)
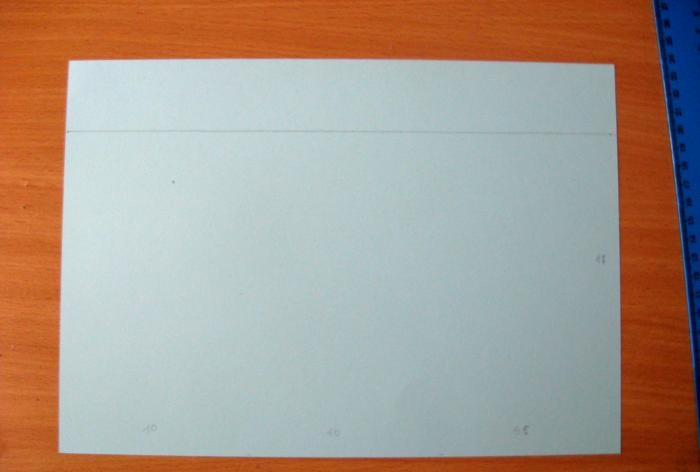
We draw vertical lines for the bends and cut off the extra piece of paper on top. You can then use it to punch butterflies if you have a hole punch.
![Handmade birthday envelopes](https://i.washerhouse.com/images/21/281-konverty-ruchnoy-raboty-na-rozhdenie.jpg)
![Handmade birthday envelopes](https://i.washerhouse.com/images/21/282-konverty-ruchnoy-raboty-na-rozhdenie.jpg)
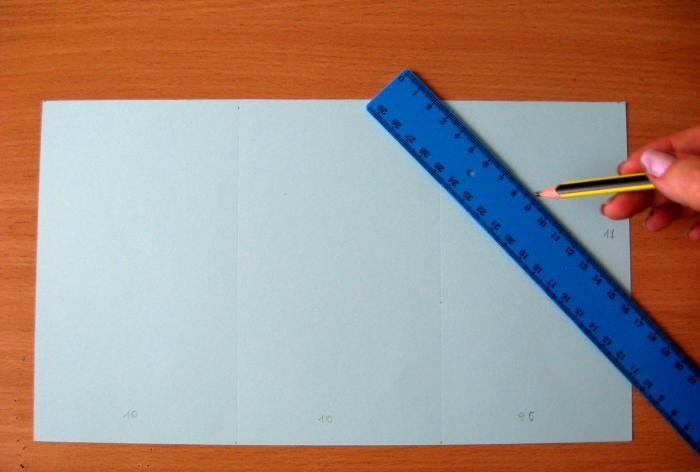
From the bottom right we retreat 7 cm up and connect it to the corner of the inside of the envelope, draw a line and cut it.
![Handmade birthday envelopes](https://i.washerhouse.com/images/21/283-konverty-ruchnoy-raboty-na-rozhdenie.jpg)
![Handmade birthday envelopes](https://i.washerhouse.com/images/21/284-konverty-ruchnoy-raboty-na-rozhdenie.jpg)
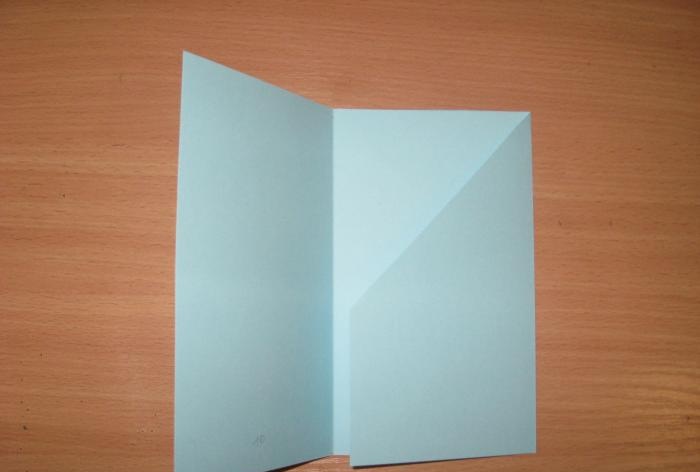
We fold it and get the base for the envelope in blue. We mark and prepare the base for the pink envelope in the same way.
![Handmade birthday envelopes](https://i.washerhouse.com/images/21/285-konverty-ruchnoy-raboty-na-rozhdenie.jpg)
![Handmade birthday envelopes](https://i.washerhouse.com/images/21/286-konverty-ruchnoy-raboty-na-rozhdenie.jpg)
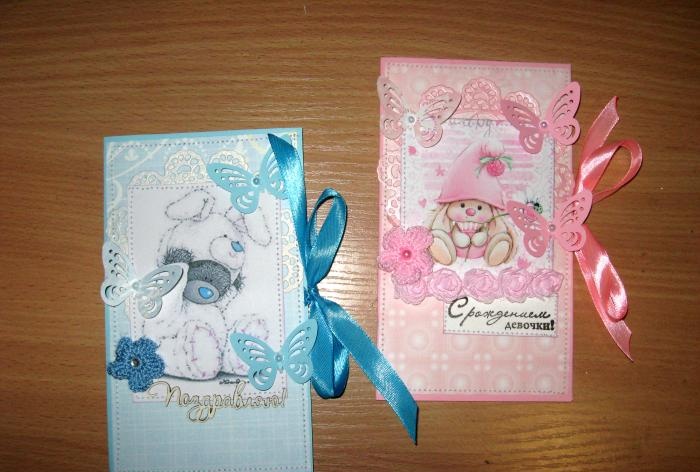
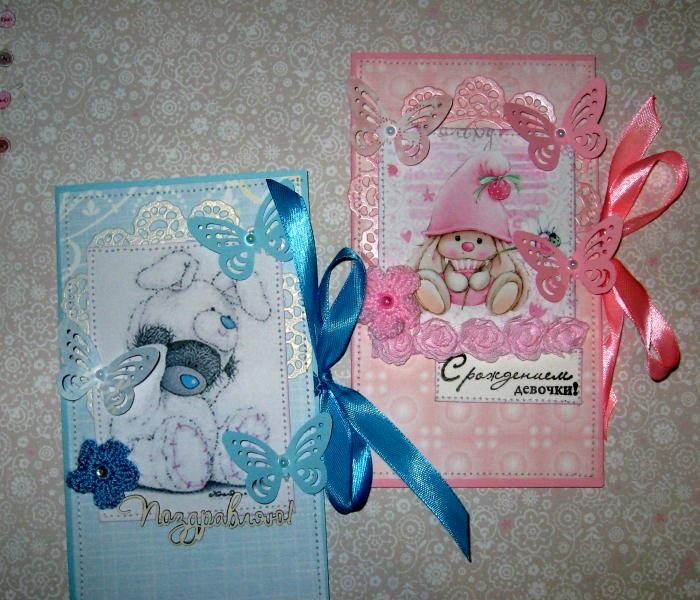
Now we take scrap paper, for each envelope we cut out three elements of the appropriate sizes, as in the photo.
![Handmade birthday envelopes](https://i.washerhouse.com/images/21/287-konverty-ruchnoy-raboty-na-rozhdenie.jpg)
![Handmade birthday envelopes](https://i.washerhouse.com/images/21/288-konverty-ruchnoy-raboty-na-rozhdenie.jpg)
We cut two pieces of 17-18 cm long from satin ribbons, burn the edges and glue them to the center of each base of our envelopes with pieces of double-sided tape.
![Handmade birthday envelopes](https://i.washerhouse.com/images/21/289-konverty-ruchnoy-raboty-na-rozhdenie.jpg)
![Handmade birthday envelopes](https://i.washerhouse.com/images/21/290-konverty-ruchnoy-raboty-na-rozhdenie.jpg)
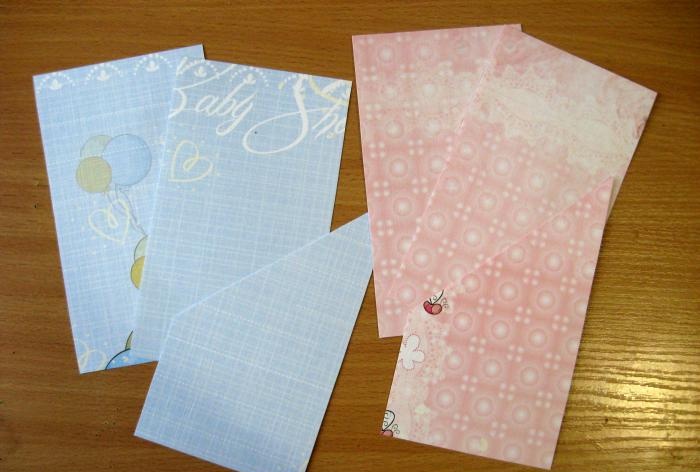
The inner and back parts of scrap paper can also be immediately glued onto double-sided tape. But we will decorate the outer parts with pictures, inscriptions and napkins.
![Handmade birthday envelopes](https://i.washerhouse.com/images/21/291-konverty-ruchnoy-raboty-na-rozhdenie.jpg)
![Handmade birthday envelopes](https://i.washerhouse.com/images/21/292-konverty-ruchnoy-raboty-na-rozhdenie.jpg)
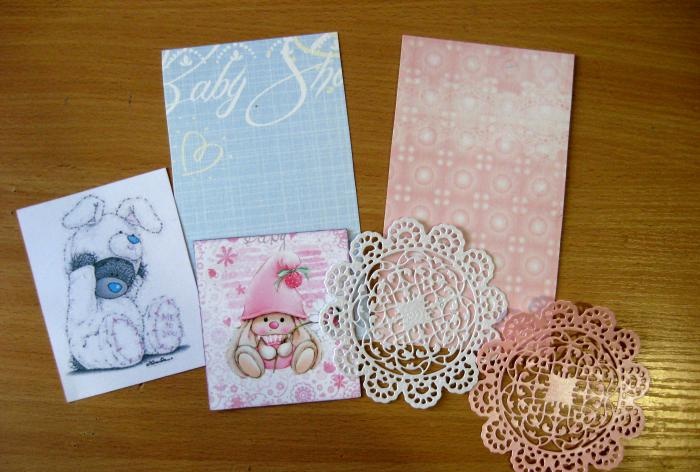
We stamp the inscription on a white sheet and cut it out, tinting its edges. We glue the napkins onto the scrap paper first, then the inscriptions.
![Handmade birthday envelopes](https://i.washerhouse.com/images/21/293-konverty-ruchnoy-raboty-na-rozhdenie.jpg)
![Handmade birthday envelopes](https://i.washerhouse.com/images/21/294-konverty-ruchnoy-raboty-na-rozhdenie.jpg)
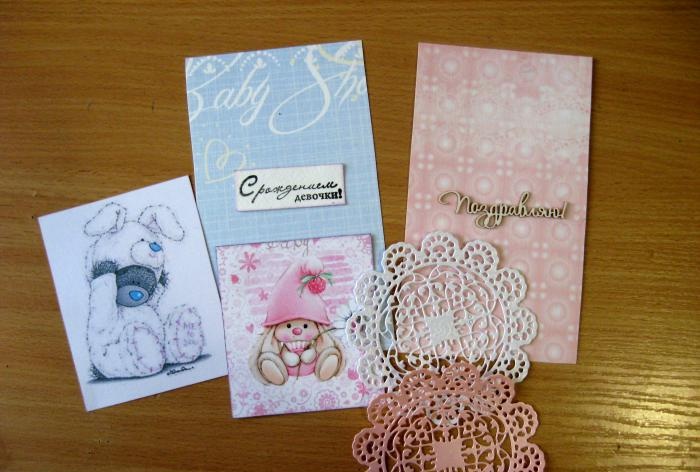
We sew on the pictures and the inscription using a typewriter. Now we also glue these scrap parts onto the bases. We sew the outer parts separately, and the inner and back parts together, thus getting pockets for money inside.
![Handmade birthday envelopes](https://i.washerhouse.com/images/21/295-konverty-ruchnoy-raboty-na-rozhdenie.jpg)
![Handmade birthday envelopes](https://i.washerhouse.com/images/21/296-konverty-ruchnoy-raboty-na-rozhdenie.jpg)
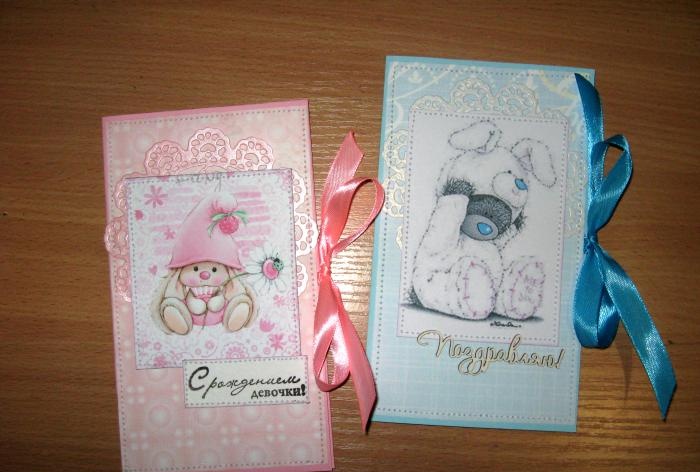
All that remains is to decorate our envelopes. We glue the butterflies, in the center there are half beads. Then add a flower with a half bead and you’re done. We tie bows and you can congratulate the happy parents. Thank you for your attention and see you again!
![Handmade birthday envelopes](https://i.washerhouse.com/images/21/297-konverty-ruchnoy-raboty-na-rozhdenie.jpg)
![Handmade birthday envelopes](https://i.washerhouse.com/images/21/298-konverty-ruchnoy-raboty-na-rozhdenie.jpg)