Necessary materials:
- Yarn "Iris" in white and red colors.
- Transparent red ribbon.
- Two black beads.
- One red bead for the nose.
- Filler.
- Needle.
- Fishing line.
- Hook No. 0.75.
- How to make a snowman.
A small snowman is quite simple to make: first you need to tie the head to the body, then the hat. All elements are assembled into a single whole and decorated.
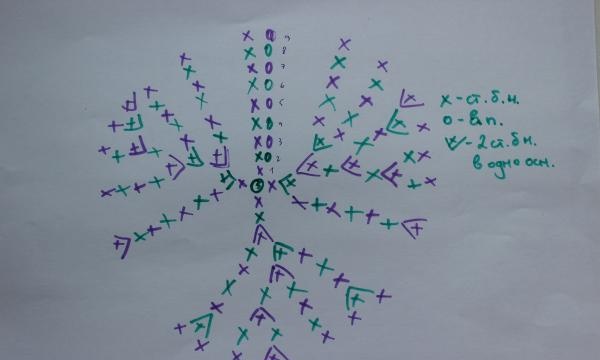
The work begins with the manufacture of the body of the product. You need to rely on this diagram:
![Snowman crochet Christmas tree toy](https://i.washerhouse.com/images/13/2440-snegovik-elochnaya-igrushka-kryuchkom.jpg)
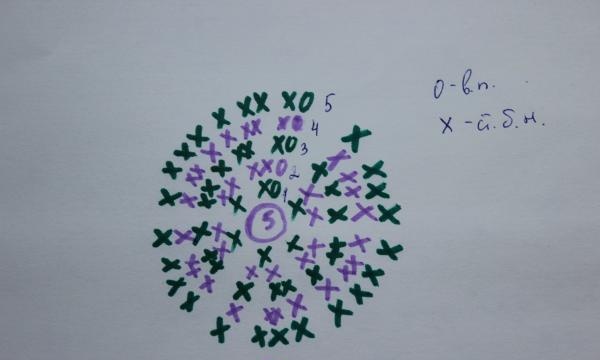
Here's what the piece looks like when four rows of single crochets are completed:
![Snowman crochet Christmas tree toy](https://i.washerhouse.com/images/13/2441-snegovik-elochnaya-igrushka-kryuchkom.jpg)
The fifth row is performed without adding columns:
![Snowman crochet Christmas tree toy](https://i.washerhouse.com/images/13/2442-snegovik-elochnaya-igrushka-kryuchkom.jpg)
Next, the element is performed based on the following diagram:
![Snowman crochet Christmas tree toy](https://i.washerhouse.com/images/13/2437-snegovik-elochnaya-igrushka-kryuchkom.jpg)
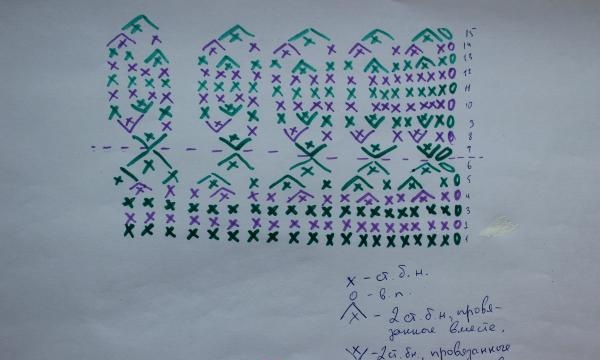
After the first three are connected, you will get this detail:
![Snowman crochet Christmas tree toy](https://i.washerhouse.com/images/13/2444-snegovik-elochnaya-igrushka-kryuchkom.jpg)
In the fourth row the loops begin to decrease:
![Snowman crochet Christmas tree toy](https://i.washerhouse.com/images/13/2443-snegovik-elochnaya-igrushka-kryuchkom.jpg)
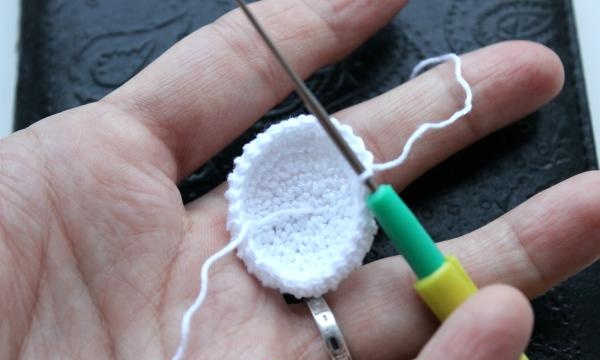
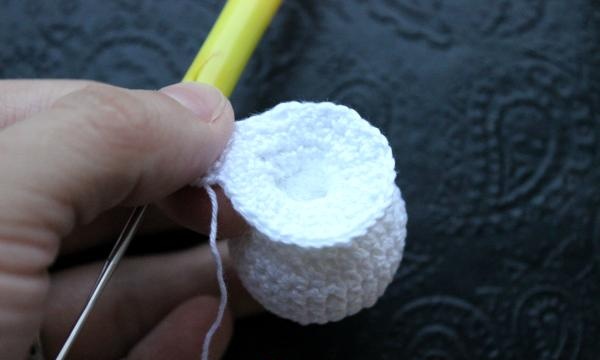
After completing the fifth row, the hole becomes very small:
![Snowman crochet Christmas tree toy](https://i.washerhouse.com/images/13/2445-snegovik-elochnaya-igrushka-kryuchkom.jpg)
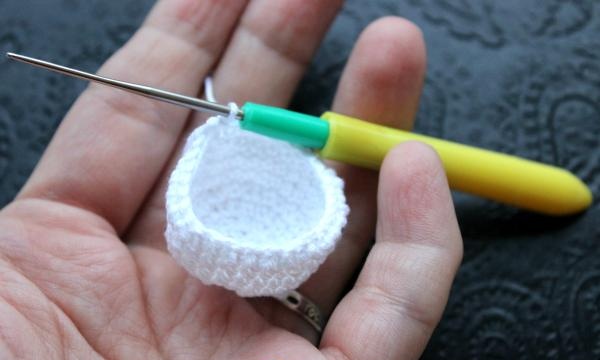
Now you can take the filler:
![Snowman crochet Christmas tree toy](https://i.washerhouse.com/images/13/2446-snegovik-elochnaya-igrushka-kryuchkom.jpg)
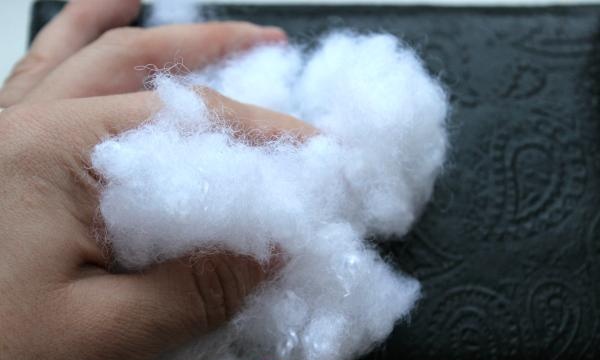
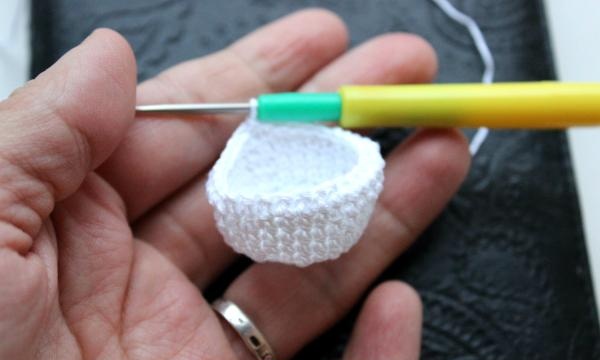
The body is stuffed and ready for further work:
![Snowman crochet Christmas tree toy](https://i.washerhouse.com/images/13/2447-snegovik-elochnaya-igrushka-kryuchkom.jpg)
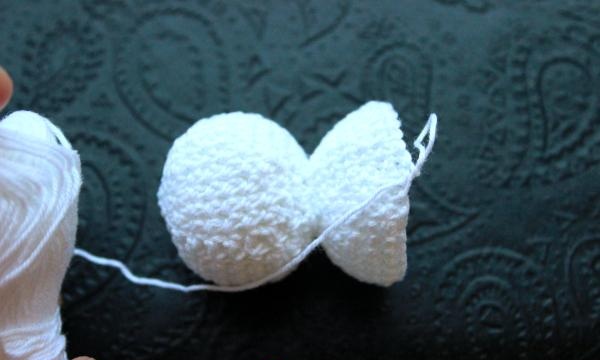
In the sixth row the number of columns decreases even more:
![Snowman crochet Christmas tree toy](https://i.washerhouse.com/images/13/2448-snegovik-elochnaya-igrushka-kryuchkom.jpg)
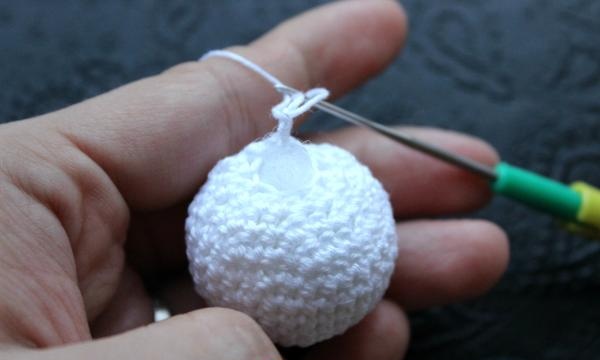
That's it, the body is ready. There is no need to cover the hole completely. Instead, you should jump straight to creating the snowman's head. In the seventh row, two single crochets must be made in each loop of the base:
![Snowman crochet Christmas tree toy](https://i.washerhouse.com/images/13/2449-snegovik-elochnaya-igrushka-kryuchkom.jpg)
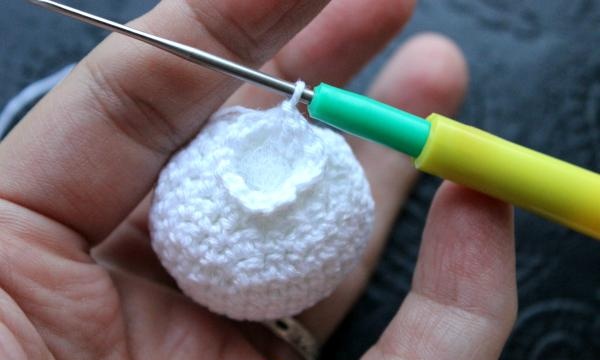
This is what the element on the ninth row looks like:
![Snowman crochet Christmas tree toy](https://i.washerhouse.com/images/13/2450-snegovik-elochnaya-igrushka-kryuchkom.jpg)
Detail on the twelfth row:
![Snowman crochet Christmas tree toy](https://i.washerhouse.com/images/13/2451-snegovik-elochnaya-igrushka-kryuchkom.jpg)
From the thirteenth row the number of loops is reduced again:
![Snowman crochet Christmas tree toy](https://i.washerhouse.com/images/13/2452-snegovik-elochnaya-igrushka-kryuchkom.jpg)
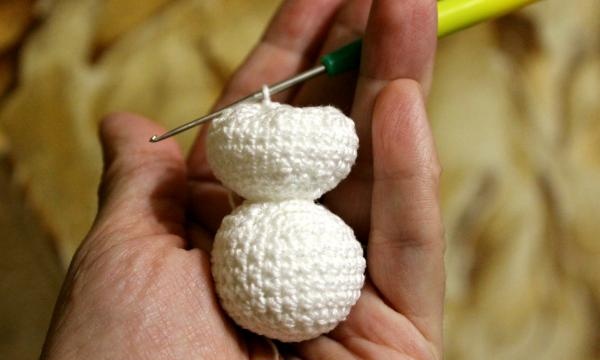
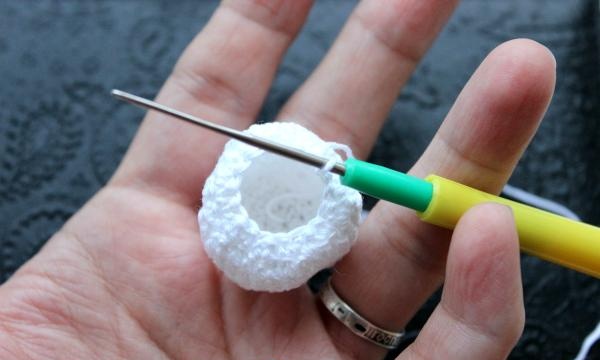
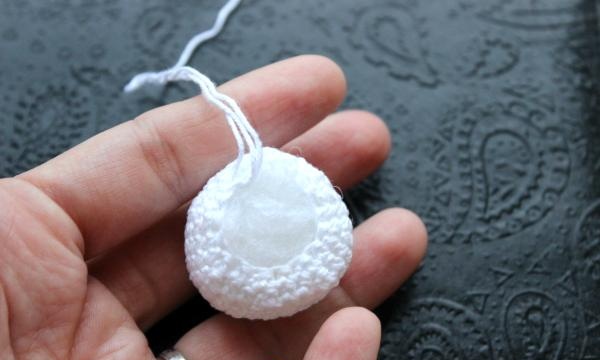
Having knitted fourteen rows, you can stuff your head:
![Snowman crochet Christmas tree toy](https://i.washerhouse.com/images/13/2453-snegovik-elochnaya-igrushka-kryuchkom.jpg)
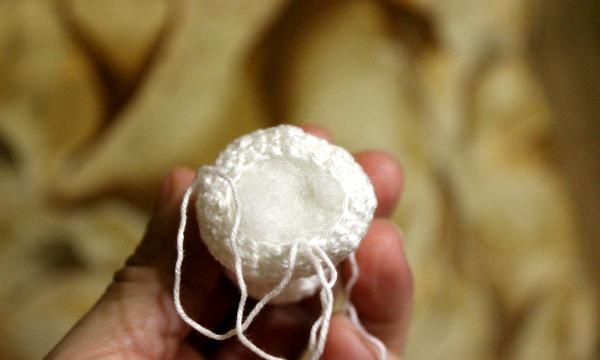
After the fifteenth row, the hole is completely closed. That's it, the base for the snowman is ready:
![Snowman crochet Christmas tree toy](https://i.washerhouse.com/images/13/2454-snegovik-elochnaya-igrushka-kryuchkom.jpg)
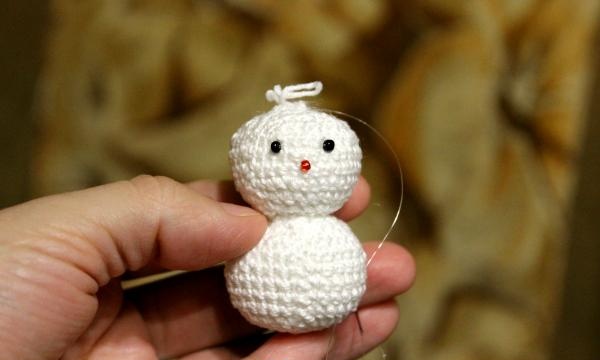
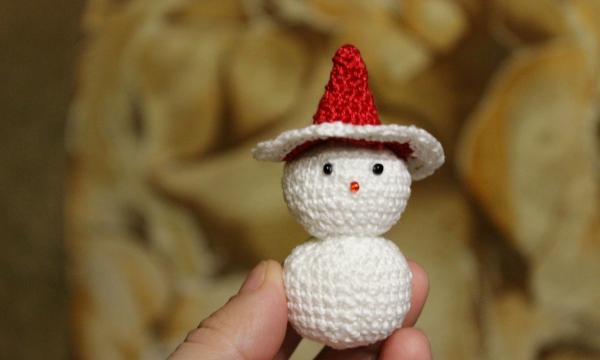
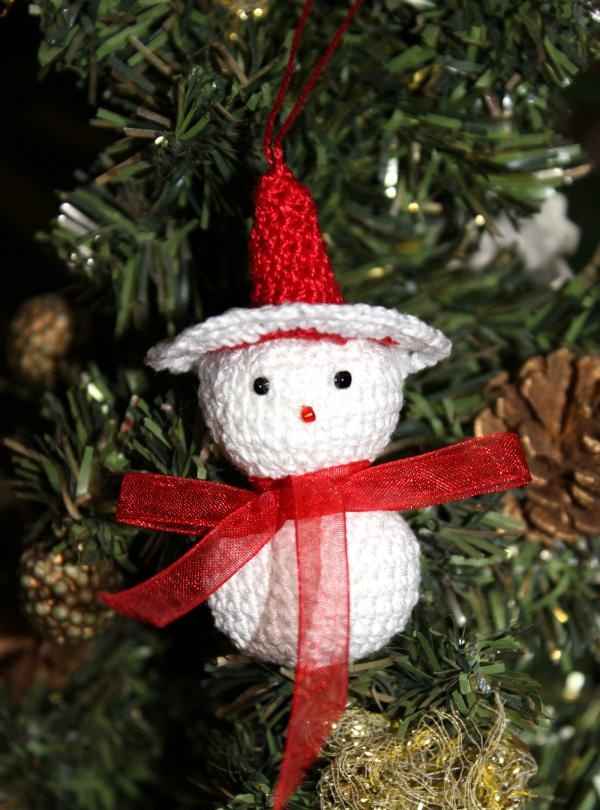
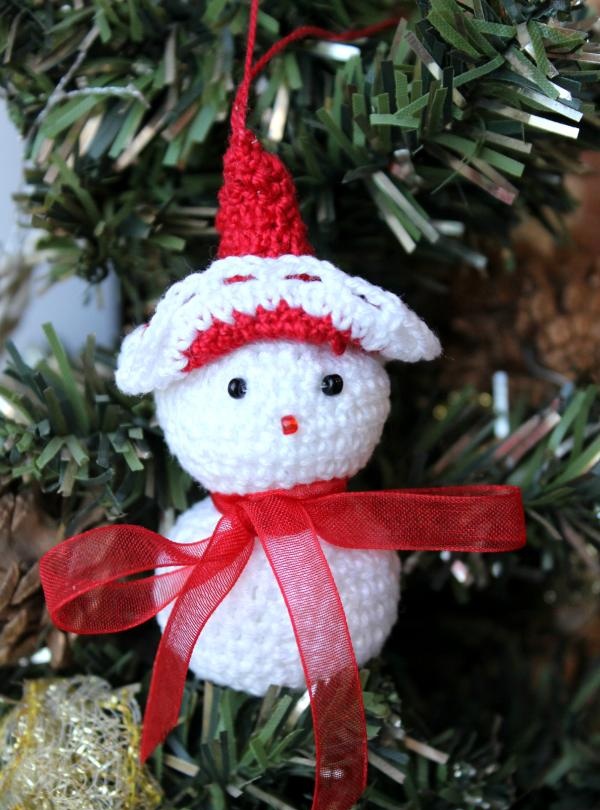
Using a needle and fishing line, black eye beads and a red nose bead are carefully sewn on:
![Snowman crochet Christmas tree toy](https://i.washerhouse.com/images/13/2458-snegovik-elochnaya-igrushka-kryuchkom.jpg)
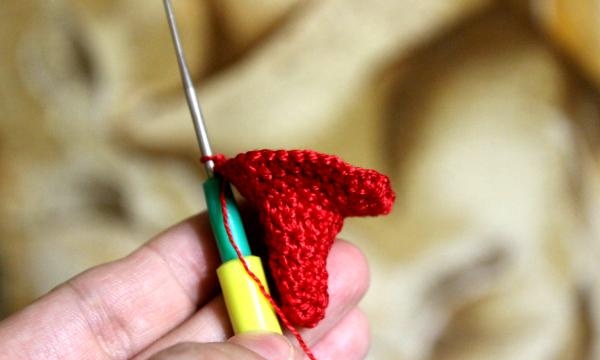
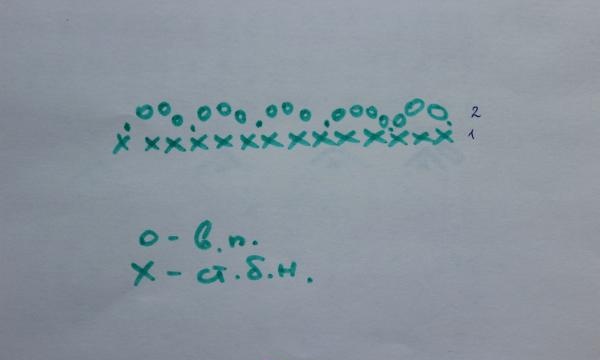
The figurine’s pointed hat is made with a red “Iris” according to the pattern below:
![Snowman crochet Christmas tree toy](https://i.washerhouse.com/images/13/2439-snegovik-elochnaya-igrushka-kryuchkom.jpg)
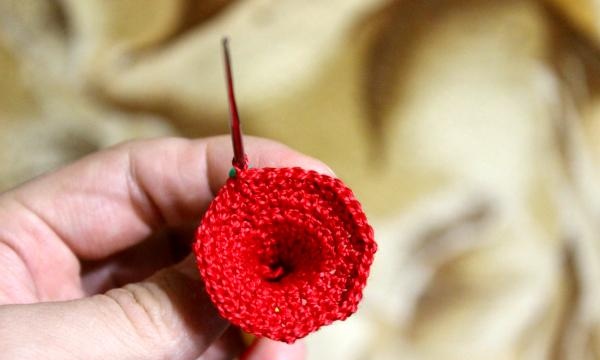
This is what the cap should look like:
![Snowman crochet Christmas tree toy](https://i.washerhouse.com/images/13/2455-snegovik-elochnaya-igrushka-kryuchkom.jpg)
![Snowman crochet Christmas tree toy](https://i.washerhouse.com/images/13/2456-snegovik-elochnaya-igrushka-kryuchkom.jpg)
The edges of the element are tied with white yarn according to this pattern:
![Snowman crochet Christmas tree toy](https://i.washerhouse.com/images/13/2438-snegovik-elochnaya-igrushka-kryuchkom.jpg)
The snowman's hat is ready:
![Snowman crochet Christmas tree toy](https://i.washerhouse.com/images/13/2457-snegovik-elochnaya-igrushka-kryuchkom.jpg)
Now you need to sew it to the main part:
![Snowman crochet Christmas tree toy](https://i.washerhouse.com/images/13/2459-snegovik-elochnaya-igrushka-kryuchkom.jpg)
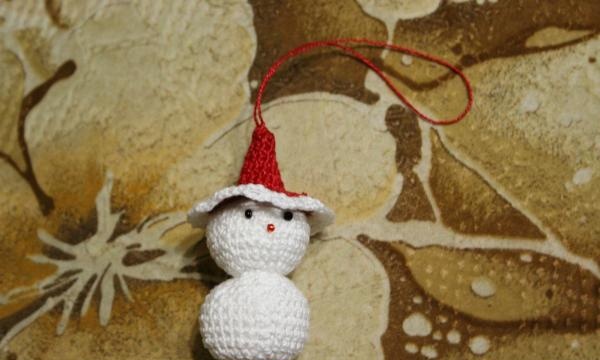
A thread for hanging is attached to the tip of the cap:
![Snowman crochet Christmas tree toy](https://i.washerhouse.com/images/13/2460-snegovik-elochnaya-igrushka-kryuchkom.jpg)
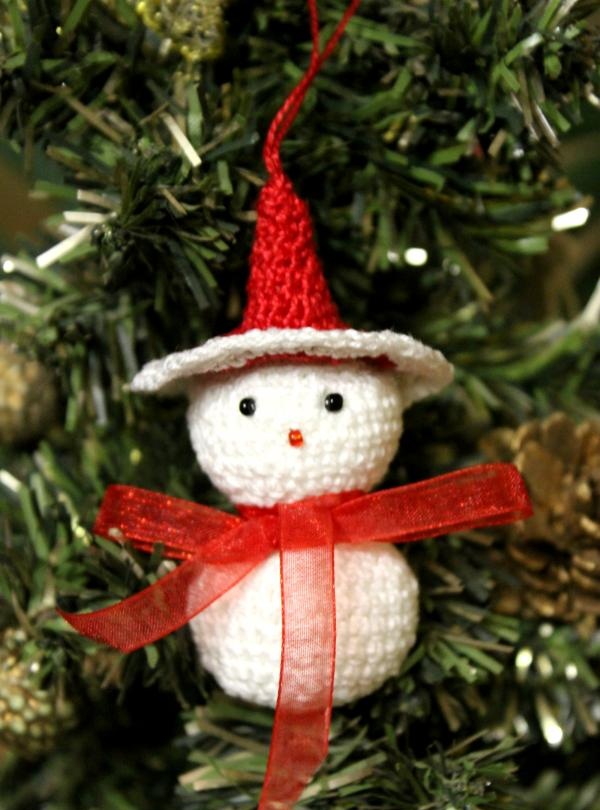
The figurine will be much more beautiful if you tie a bright ribbon around its neck. In this case, a transparent red stripe tied with a bow was used:
![Snowman crochet Christmas tree toy](https://i.washerhouse.com/images/13/2461-snegovik-elochnaya-igrushka-kryuchkom.jpg)
![Snowman crochet Christmas tree toy](https://i.washerhouse.com/images/13/2462-snegovik-elochnaya-igrushka-kryuchkom.jpg)
If desired, the snowman's hat can be folded in a pirate style:
![Snowman crochet Christmas tree toy](https://i.washerhouse.com/images/13/2463-snegovik-elochnaya-igrushka-kryuchkom.jpg)
A bright, beautiful snowman will decorate any interior and give a feeling of celebration.