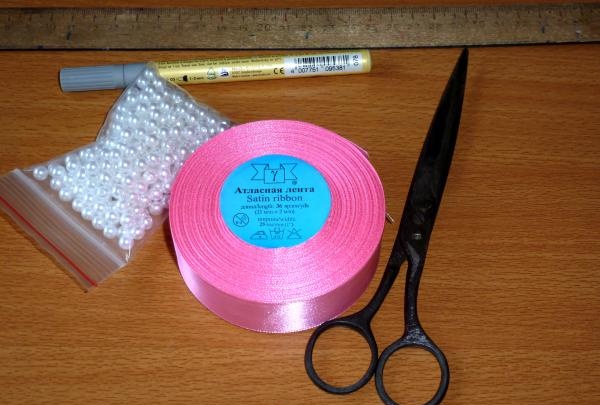
- satin ribbon 2.5 cm wide;
- scissors;
- ruler;
- pencil;
- beads;
- glue gun;
- hairpin base;
- two circles of leather.
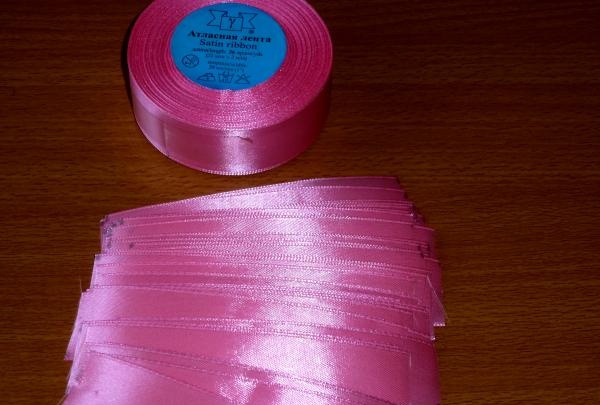
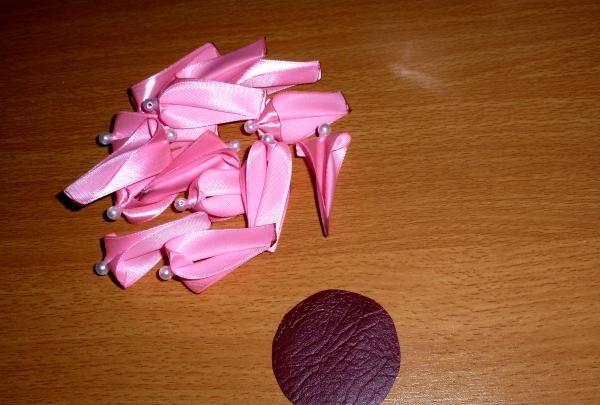
First of all, we need to cut the tape into 11cm long pieces. We will need about 60 such pieces.
Let's start creating. The piece needs to be folded in half, right side inward.
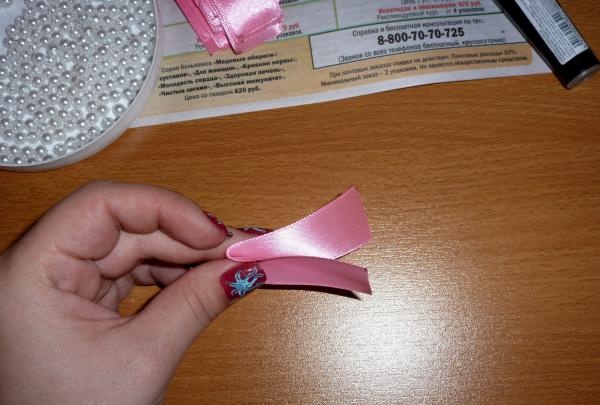
Place a drop of glue on the fold, preferably in the center, and press well.

When the glue has dried a little, fold the edges in half again, also facing inward.

Now they need to be combined with each other so that they are layered.
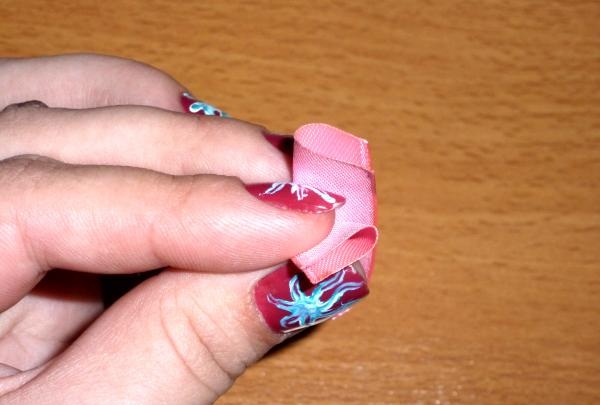
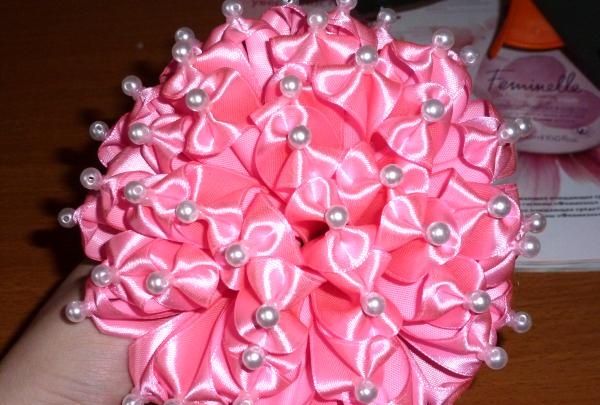
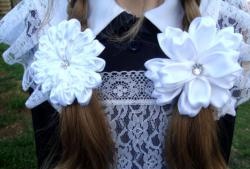
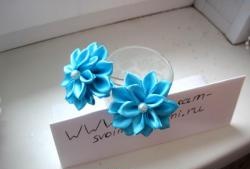
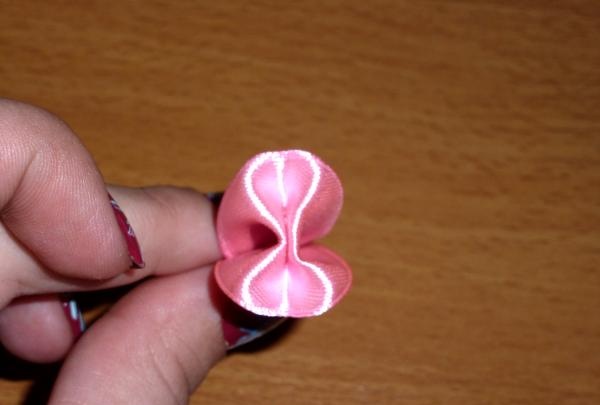
We singe the ends with fire, thereby gluing all the edges together. If everything was done correctly, the top of your head should look like this.
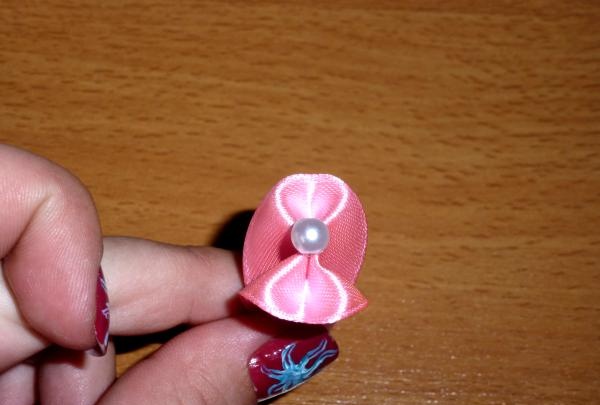
Then, on the place where the tape is stuck together, we glue a bead.
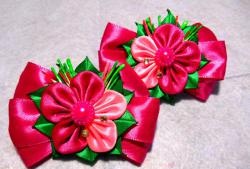
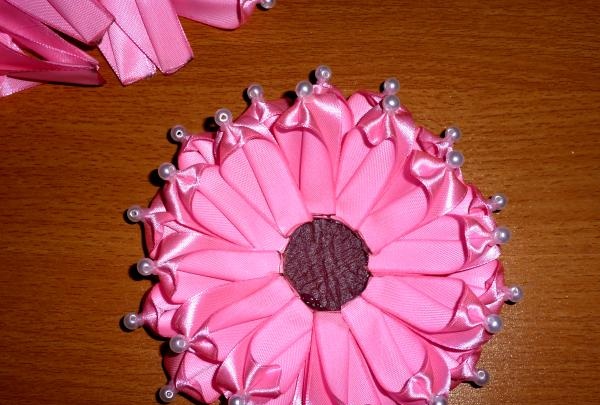
We carry out this procedure with all pieces of tape. When all the pieces are prepared, we begin to assemble the bow. For this I use leather.
We begin gluing from the outer edge of the circle to the center.

I decided to glue it to the beautiful side, because another such circle will be used, which will hide all the imperfections on the wrong side. It is better to stick the second and subsequent rows in a checkerboard pattern, relative to the previous one, then the bow will be more magnificent.
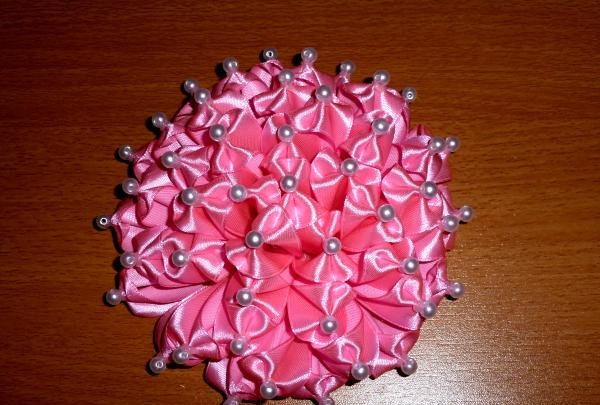
When it came time to make the center, I simply poured a lot of glue into it and inserted the blanks into it.
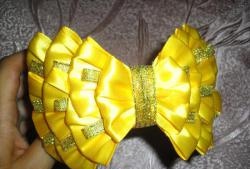
The bow is ready, all that remains is to secure it to the base for the pin. To do this, I decided to use a second piece of leather of the same size. In it, having previously measured along the hairpin, we make two cuts, drag the edges of the hairpin through and glue it to the first piece of leather with a bow.
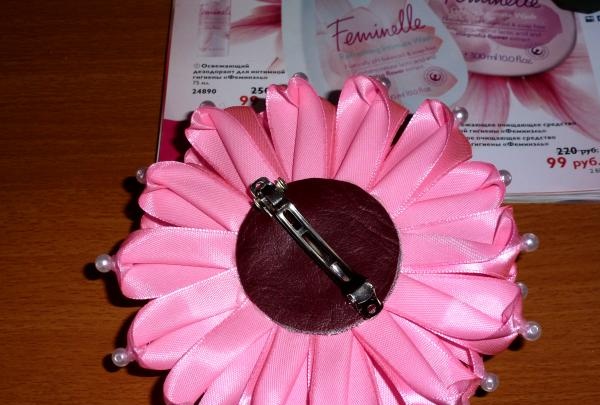
As a result, a wonderful bow will decorate the princess’s head.