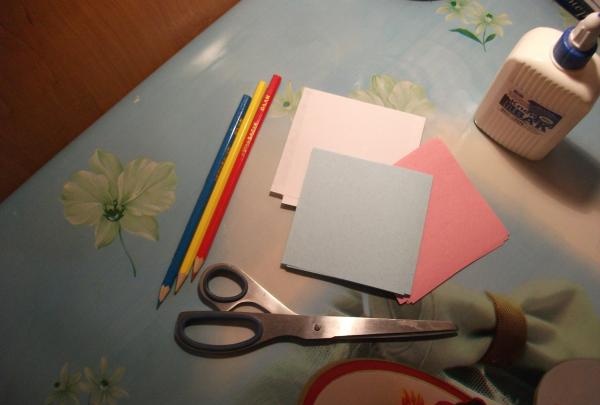
Materiale necesare:
Pentru a face acest lucru, trebuie să luăm note de culori diferite. Aveam albastru, roșu și alb, precum și verde - pentru tulpini și frunze. Pentru a crea un cadru de flori, trebuie să pregătiți și un creion. Pentru a lipi petalele avem nevoie de lipici.
Descrierea muncii:
Floare.
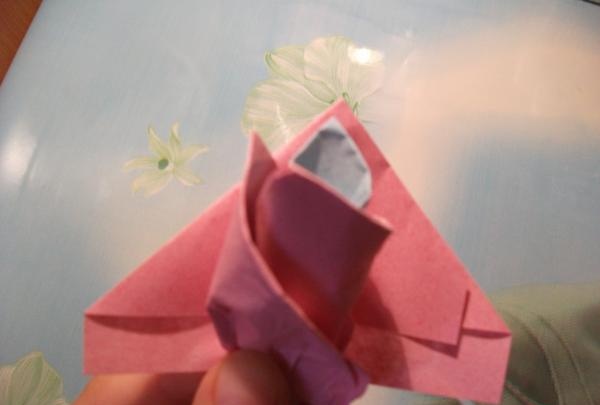
Luați o notă, îndoiți colțul din dreapta sus,

asa cum se vede in poza. Apoi îndoim colțul din stânga sus și obținem o petală.

Trebuie să faceți o mulțime din aceste petale - în culori diferite.
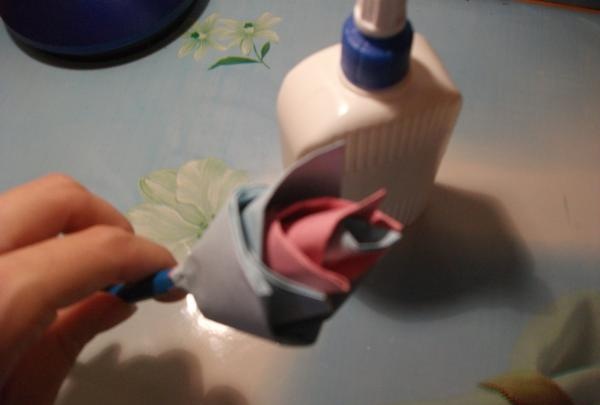
Înfășurăm petala în jurul creionului.

Apoi atașăm următoarea petală, lipind marginile libere de floare după cum este necesar pentru a o menține pe loc. Așa formăm un boboc pe un creion. După ce am primit o floare suficient de luxuriantă, fixăm marginile libere cu lipici.


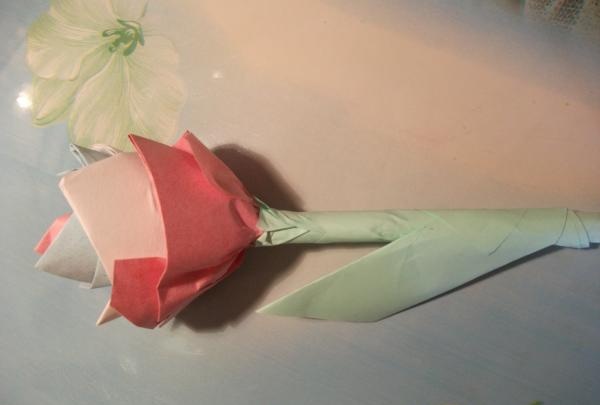
Tulpina si frunza
Luați hârtia verde și înfășurați-o strâns în jurul creionului, acoperind ușor baza mugurului pentru a ascunde marginile neuniforme.


Așezăm a doua bucată de hârtie verde în diagonală, așa cum se arată în figură.

Aplicați puțin lipici pe el și înfășurați-l în jurul tulpinii, lăsând o bucată de margine liberă.

Apoi ia o altă frunză verde și îndoiește-o în jumătate pe diagonală, făcând un triunghi. Atașăm acest triunghi la marginea liberă rămasă pe tulpina florii, așa cum se arată în figură.

Fixăm marginea liberă împreună cu lipiciul turnat pe tulpină și îndoim marginea inferioară a triunghiului, formând o frunză.

Lipim foaia astfel încât să fie solidă.
Gata, ambarcațiunea este gata.


Lăsăm câteva ore pentru ca lipiciul să se usuce bine și scoatem creionul din mijloc.
Poti face o floare atat de simpla cu copiii tai, iti va oferi multa placere si emotii placute.