![Origami modular Coelho alegre](https://i.washerhouse.com/images/7/1041-modulnoe-origami-veslyy-zaychishka.jpg)
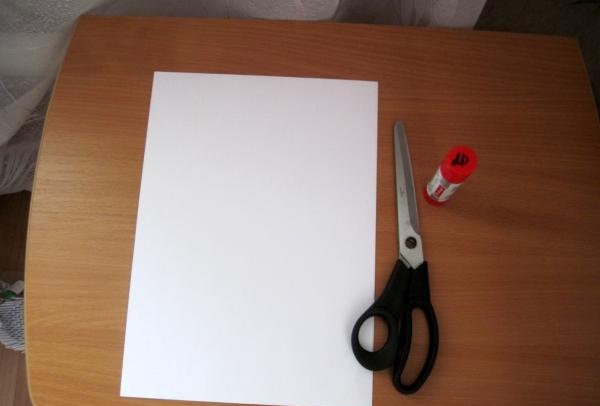
Você pode dominar a técnica de fabricação de módulos com bastante facilidade usando as fotos abaixo. Para começar, a partir de folhas de papel A4 é necessário cortar folhas para os próprios módulos conforme mostrado na figura.
![Origami modular Coelho alegre](https://i.washerhouse.com/images/7/1042-modulnoe-origami-veslyy-zaychishka.jpg)
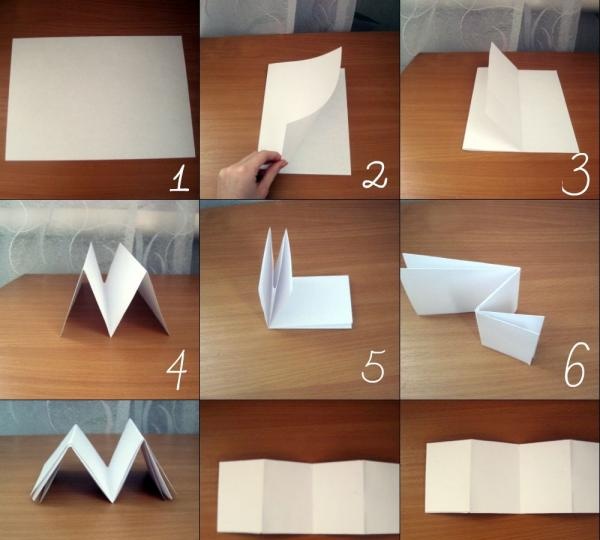
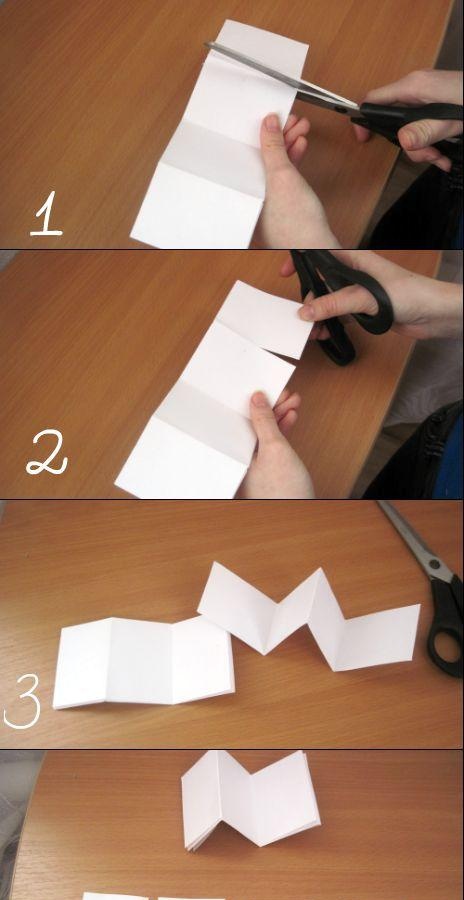
E corte em partes iguais (Fig. 1-4) Uma folha deve render 16 folhas pequenas.
![Origami modular Coelho alegre](https://i.washerhouse.com/images/7/1043-modulnoe-origami-veslyy-zaychishka.jpg)
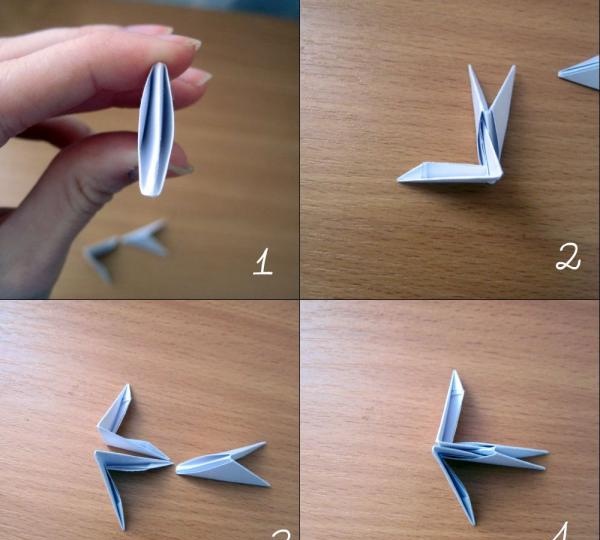
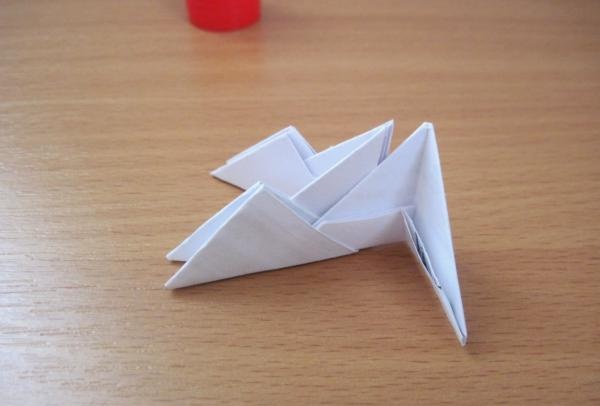
A seguir mostramos como dobrar o módulo corretamente. Usei folha A4 para facilitar a visualização.
![Origami modular Coelho alegre](https://i.washerhouse.com/images/7/1044-modulnoe-origami-veslyy-zaychishka.jpg)
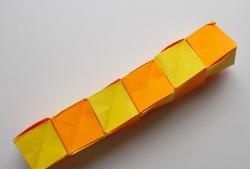
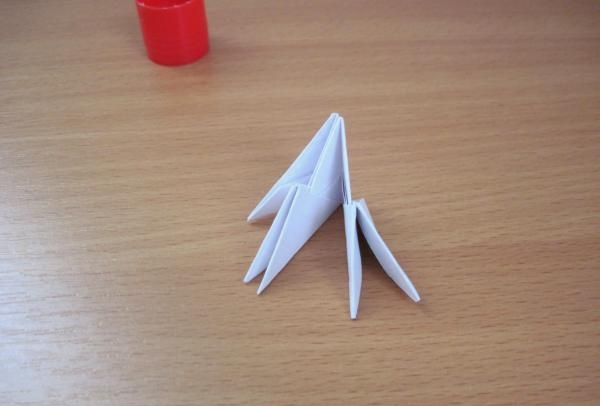
A figura mostra como conectar corretamente os módulos entre si.
![Origami modular Coelho alegre](https://i.washerhouse.com/images/7/1045-modulnoe-origami-veslyy-zaychishka.jpg)
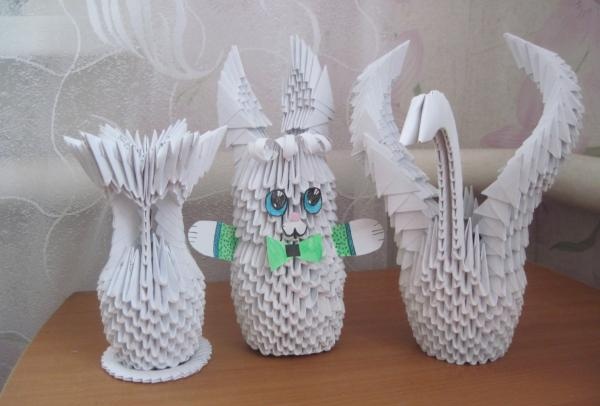
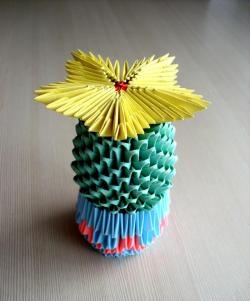
Agora que você conhece todos os fundamentos do origami modular, pode começar a fazer uma lebre.
Para trabalhar precisamos:
- Folhas de papel A4.
- Tesoura.
- Cola.
![Origami modular Coelho alegre](https://i.washerhouse.com/images/7/1046-modulnoe-origami-veslyy-zaychishka.jpg)
Vamos ao trabalho.
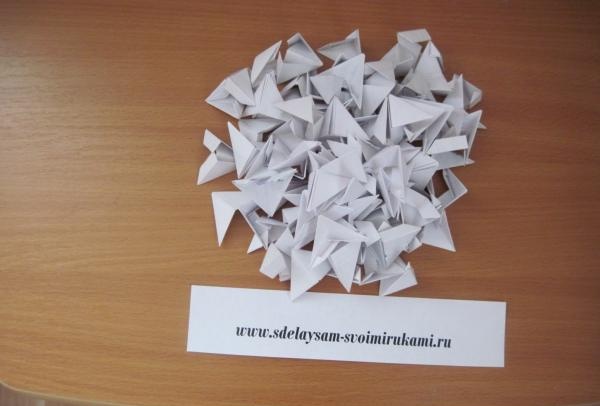
1) Primeiro você precisa fazer um grande número de módulos, quanto mais, melhor.
![Origami modular Coelho alegre](https://i.washerhouse.com/images/7/1047-modulnoe-origami-veslyy-zaychishka.jpg)
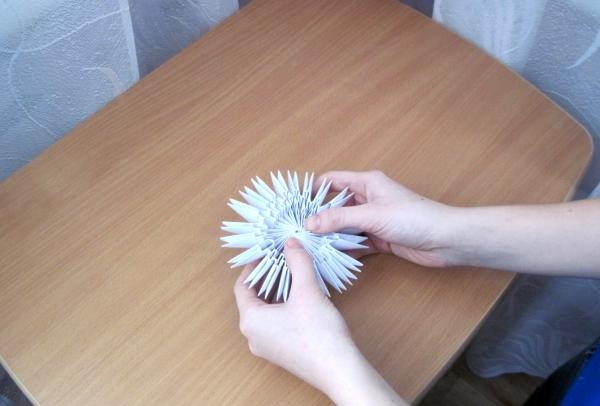
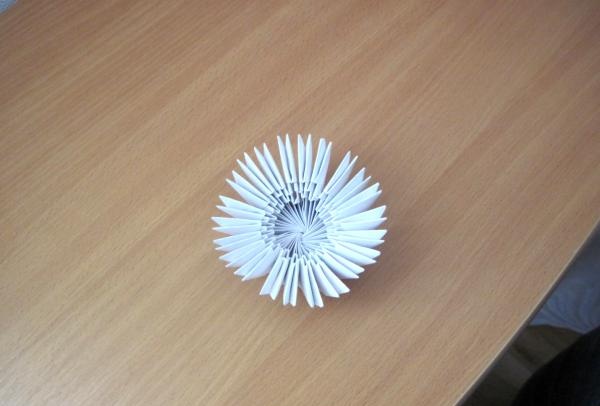
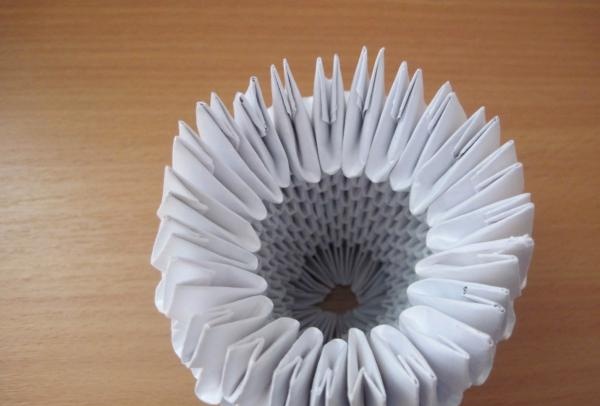
2) Pegue 22 módulos (qualquer número par é possível) e conecte-os em um círculo e cole-os (apenas a primeira linha).
![Origami modular Coelho alegre](https://i.washerhouse.com/images/7/1048-modulnoe-origami-veslyy-zaychishka.jpg)
![Origami modular Coelho alegre](https://i.washerhouse.com/images/7/1049-modulnoe-origami-veslyy-zaychishka.jpg)
![Origami modular Coelho alegre](https://i.washerhouse.com/images/7/1050-modulnoe-origami-veslyy-zaychishka.jpg)
![Origami modular Coelho alegre](https://i.washerhouse.com/images/7/1051-modulnoe-origami-veslyy-zaychishka.jpg)
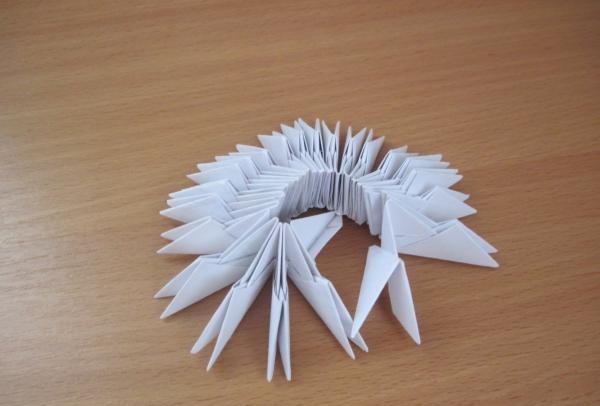
3) Montamos a primeira linha, conectando duas partes de módulos diferentes. Assim, fazemos toda a linha.
![Origami modular Coelho alegre](https://i.washerhouse.com/images/7/1052-modulnoe-origami-veslyy-zaychishka.jpg)
![Origami modular Coelho alegre](https://i.washerhouse.com/images/7/1053-modulnoe-origami-veslyy-zaychishka.jpg)
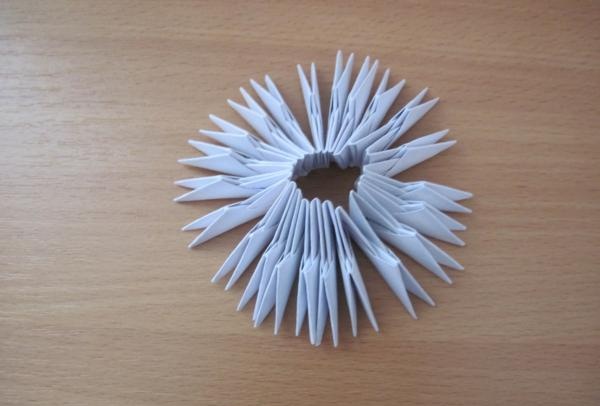
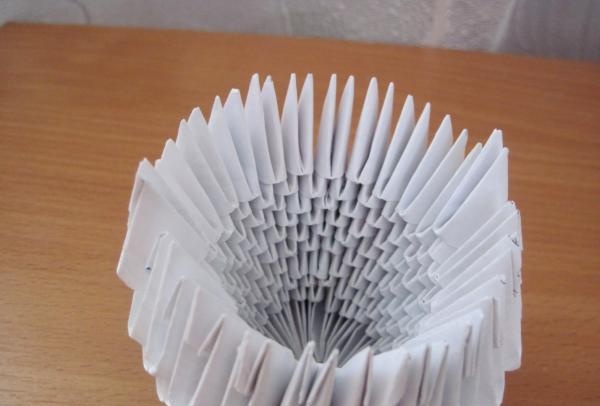
4) Coletamos mais 2-3 linhas.
![Origami modular Coelho alegre](https://i.washerhouse.com/images/7/1054-modulnoe-origami-veslyy-zaychishka.jpg)
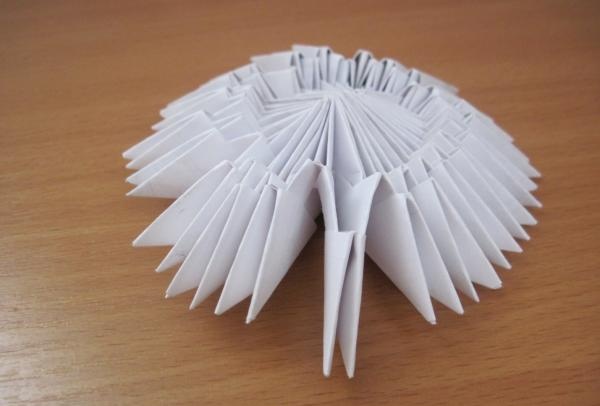
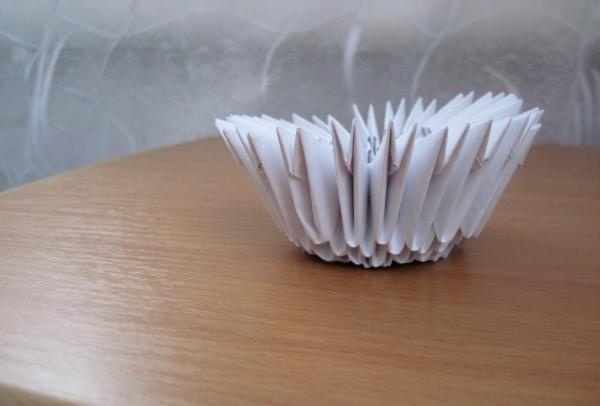
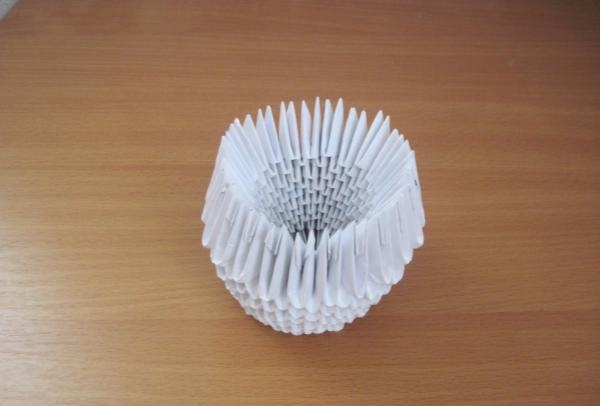
5) Vire com cuidado nosso círculo para que fique no formato de uma tigela.
![Origami modular Coelho alegre](https://i.washerhouse.com/images/7/1055-modulnoe-origami-veslyy-zaychishka.jpg)
![Origami modular Coelho alegre](https://i.washerhouse.com/images/7/1056-modulnoe-origami-veslyy-zaychishka.jpg)
![Origami modular Coelho alegre](https://i.washerhouse.com/images/7/1057-modulnoe-origami-veslyy-zaychishka.jpg)
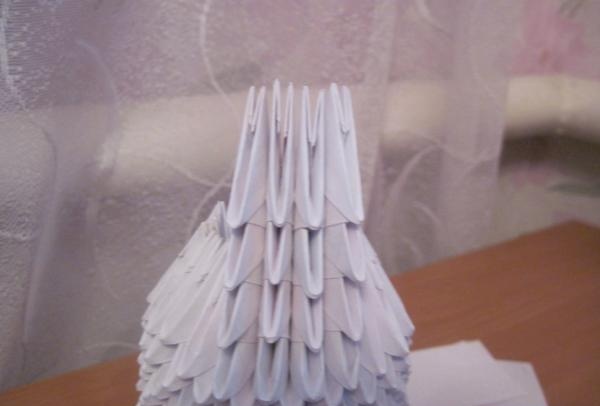
6) Montamos várias linhas para formar um corpo.
![Origami modular Coelho alegre](https://i.washerhouse.com/images/7/1058-modulnoe-origami-veslyy-zaychishka.jpg)
![Origami modular Coelho alegre](https://i.washerhouse.com/images/7/1059-modulnoe-origami-veslyy-zaychishka.jpg)
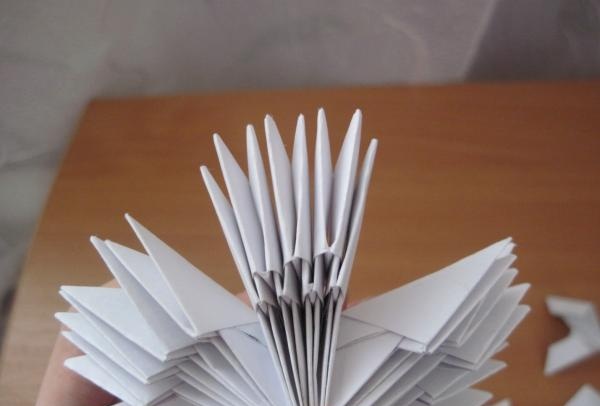
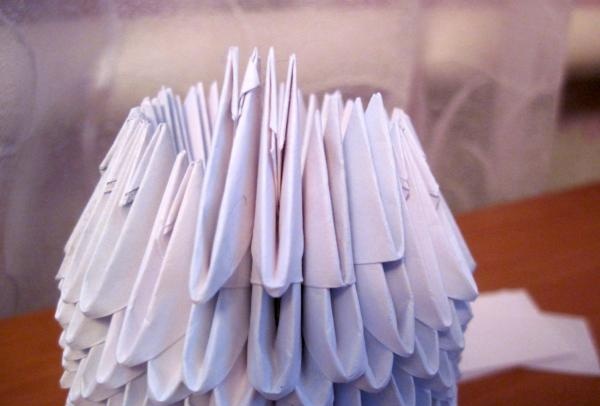
17) Vamos começar a montar o cabeçote. Para isso, colocamos os módulos dentro do nosso corpo, conforme mostra a figura.
![Origami modular Coelho alegre](https://i.washerhouse.com/images/7/1060-modulnoe-origami-veslyy-zaychishka.jpg)
![Origami modular Coelho alegre](https://i.washerhouse.com/images/7/1061-modulnoe-origami-veslyy-zaychishka.jpg)
Então fazemos a linha inteira.
![Origami modular Coelho alegre](https://i.washerhouse.com/images/7/1062-modulnoe-origami-veslyy-zaychishka.jpg)
![Origami modular Coelho alegre](https://i.washerhouse.com/images/7/1063-modulnoe-origami-veslyy-zaychishka.jpg)
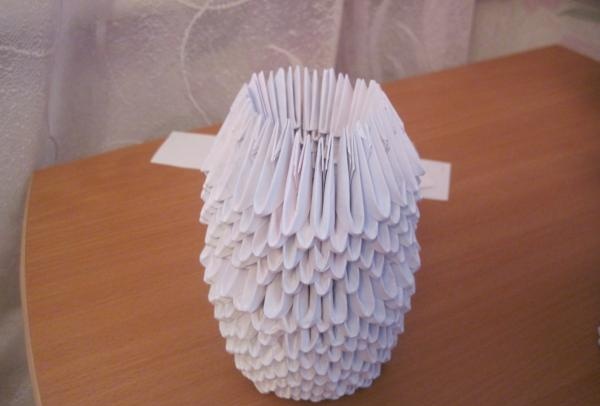
8) Organizamos as linhas restantes da maneira usual (deve haver mais 4-5)
![Origami modular Coelho alegre](https://i.washerhouse.com/images/7/1064-modulnoe-origami-veslyy-zaychishka.jpg)
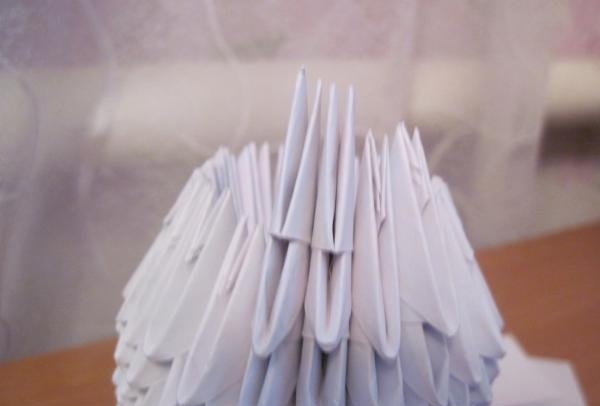
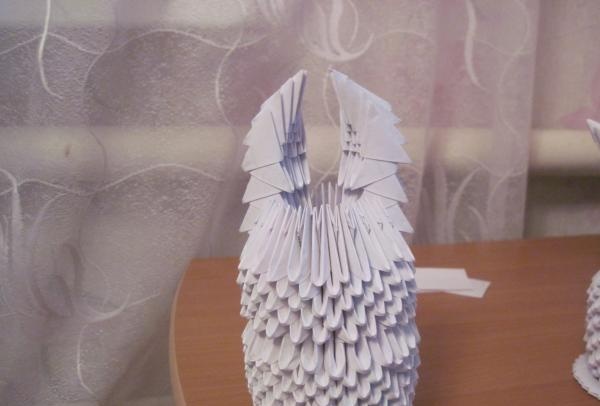
9) Agora você precisa apertar um pouco a cabeça para que ela fique com o formato oval.
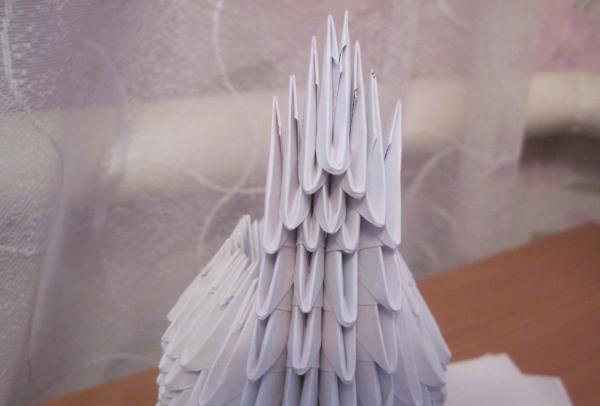
10) Vamos começar a recolher as orelhas. Eles não deveriam estar muito distantes um do outro. Escolhemos um número ímpar de módulos, e fazemos como mostram as fotos, a partir da 5ª linha começamos a diminuir
![Origami modular Coelho alegre](https://i.washerhouse.com/images/7/1065-modulnoe-origami-veslyy-zaychishka.jpg)
![Origami modular Coelho alegre](https://i.washerhouse.com/images/7/1066-modulnoe-origami-veslyy-zaychishka.jpg)
![Origami modular Coelho alegre](https://i.washerhouse.com/images/7/1067-modulnoe-origami-veslyy-zaychishka.jpg)
![Origami modular Coelho alegre](https://i.washerhouse.com/images/7/1068-modulnoe-origami-veslyy-zaychishka.jpg)
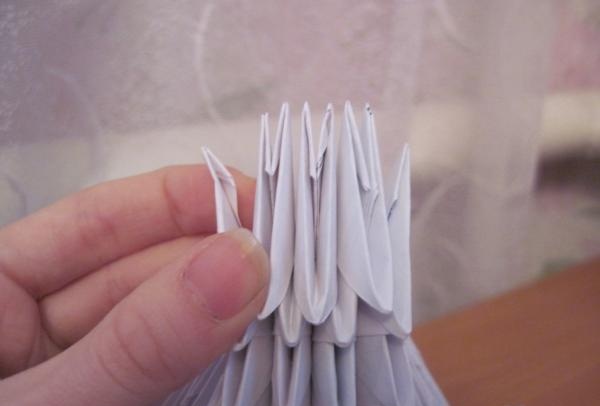
11) Faça o mesmo para a segunda orelha.
![Origami modular Coelho alegre](https://i.washerhouse.com/images/7/1069-modulnoe-origami-veslyy-zaychishka.jpg)
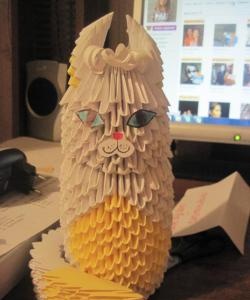
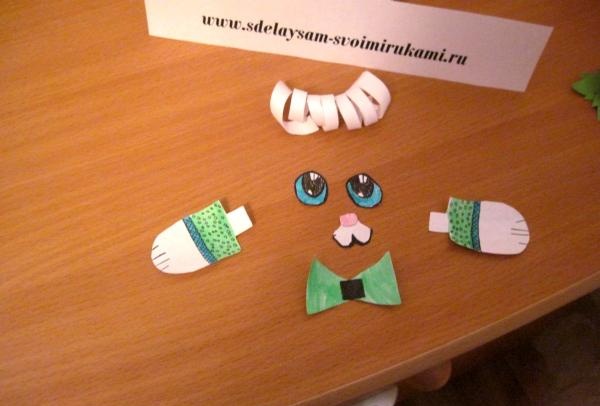
12) Desenhei os olhos, patas, arco e focinho, recortei do papel e colei.
![Origami modular Coelho alegre](https://i.washerhouse.com/images/7/1070-modulnoe-origami-veslyy-zaychishka.jpg)
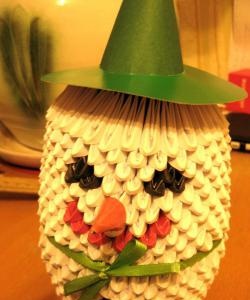
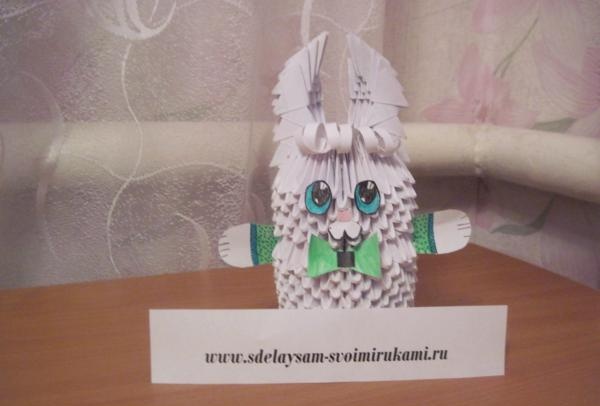
13) Como resultado, ganhei um coelhinho engraçado. Tenho certeza que pode ser um ótimo presente ou apenas decorar um ambiente.
![Origami modular Coelho alegre](https://i.washerhouse.com/images/7/1071-modulnoe-origami-veslyy-zaychishka.jpg)