So, so that you get this decoration

you will need:

From the ribbons you need to cut 13 squares of 5 cm × 5 cm for one rose. Remember that the tape itself is already 5 cm wide. Burn the squares so that the tape does not fray.

You can cut squares not only with scissors, but also with a burner.

First fold each square diagonally, then you need to bend the corners towards the center slightly overlapping. Like this:


The tip of the folded “square” must be trimmed

When scorching the cut edge while it is hot, squeeze it well with tweezers or your fingers so that the edges stick together. Now one petal is ready. In total you need to make 13 petals for one rose.

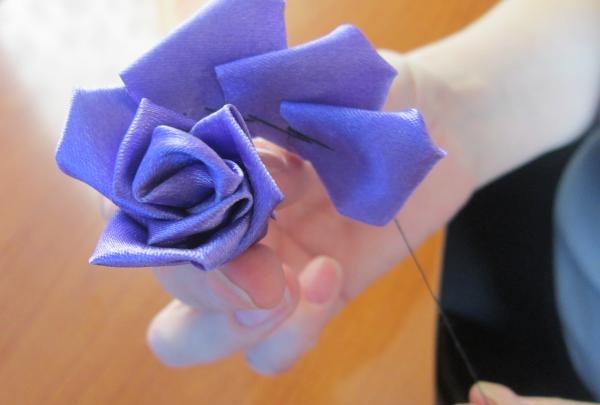
You need to start making a rose by twisting the first petal with a tube, which is secured with thread - this will be the center of the “rosette”

The remaining 12 petals are placed on a thread. Don’t break the thread at the end, it will come in handy later.


The resulting strip of petals is wrapped around the central petal and secured with thread so that the flower does not unwind.

In total you need to make 7 roses of each of 4 colors. Each seven will form a line along the fold.


The mesh is laid in folds so that it turns from a square into a triangle (like a half-sun with rays). There will be a total of 8 folds that need to be ironed and secured along the edges - this will help the decoration keep its shape. And one more little tip: sew an elastic band to the top of the folds, and make a hem at the bottom, into which the elastic is also inserted. The rubber band will later help secure the decoration to the hood of the car. Lay out and attach roses in rows, starting with darker colors and gradually moving to lighter shades. In this case, you should skip the first fold, and start with 2, then 4, 6, 8. As a result, the hood of the car will be decorated like this:

Such an elegant and beautiful car will make the newlyweds’ journey to the registry office spectacular and enjoyable!