![Beautiful and gentle card](https://i.washerhouse.com/images/20/1982-krasivaya-i-nezhnaya-otkrytka.jpg)
For this we need:
- colored sheet A4 (lilac, white, pink, green);
- glue;
- pencil (felt-tip pen);
- regular and curly scissors.
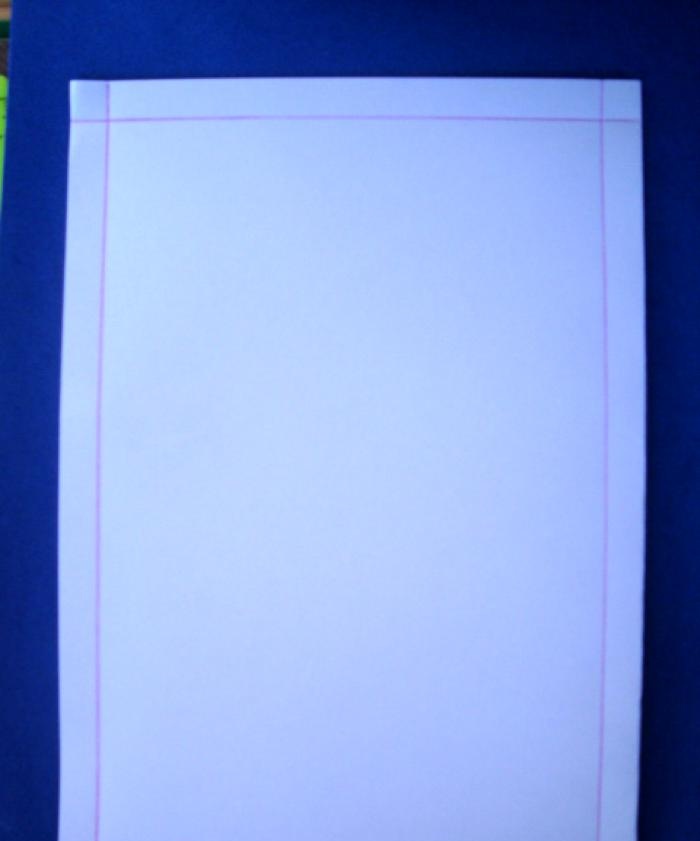
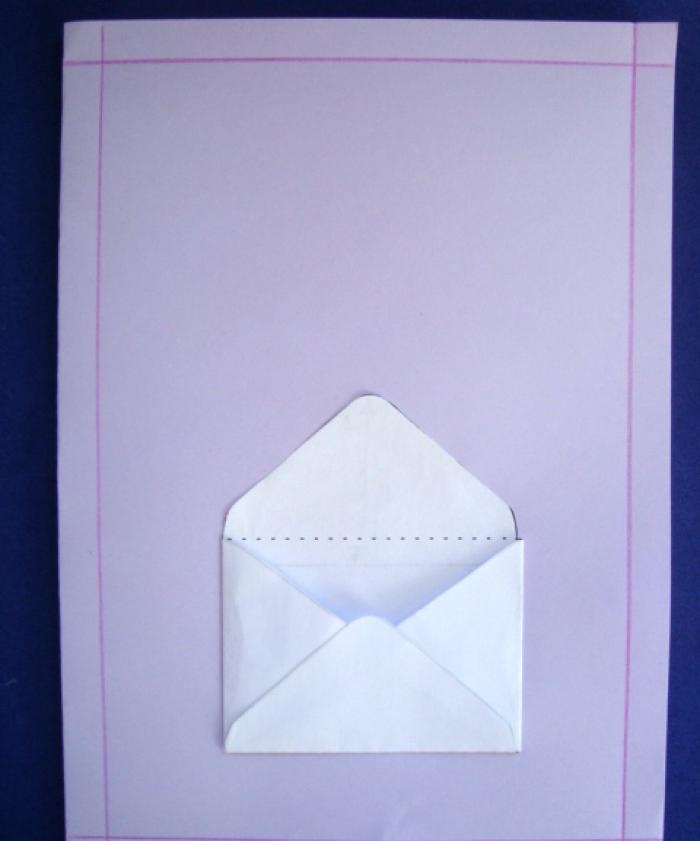
Step 1. Fold the lilac sheet in half, retreating 1 cm along the edges, draw a frame.
![Beautiful and gentle card](https://i.washerhouse.com/images/20/1964-krasivaya-i-nezhnaya-otkrytka.jpg)
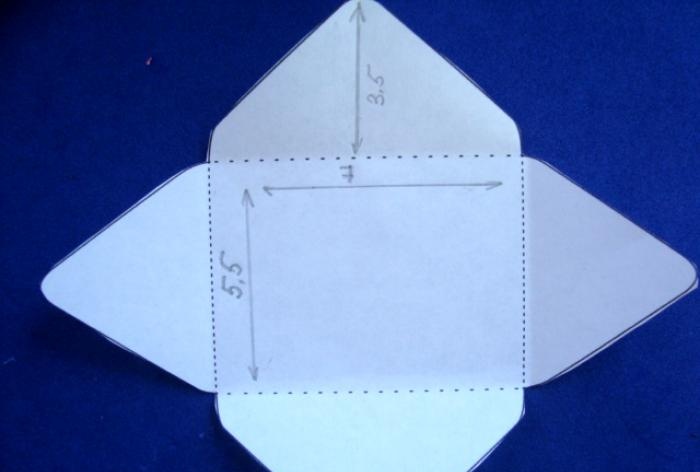
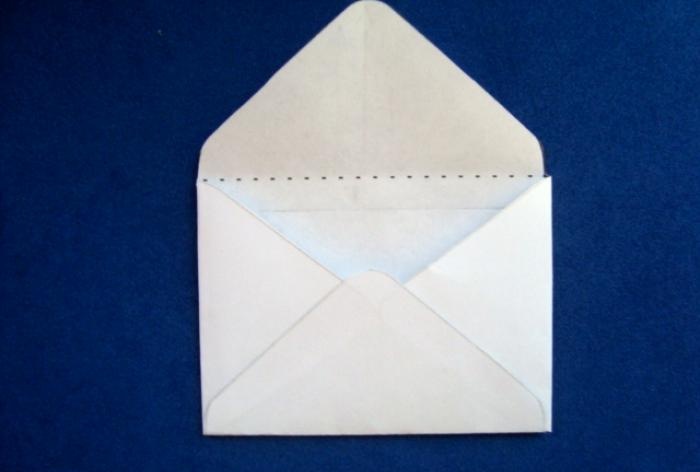
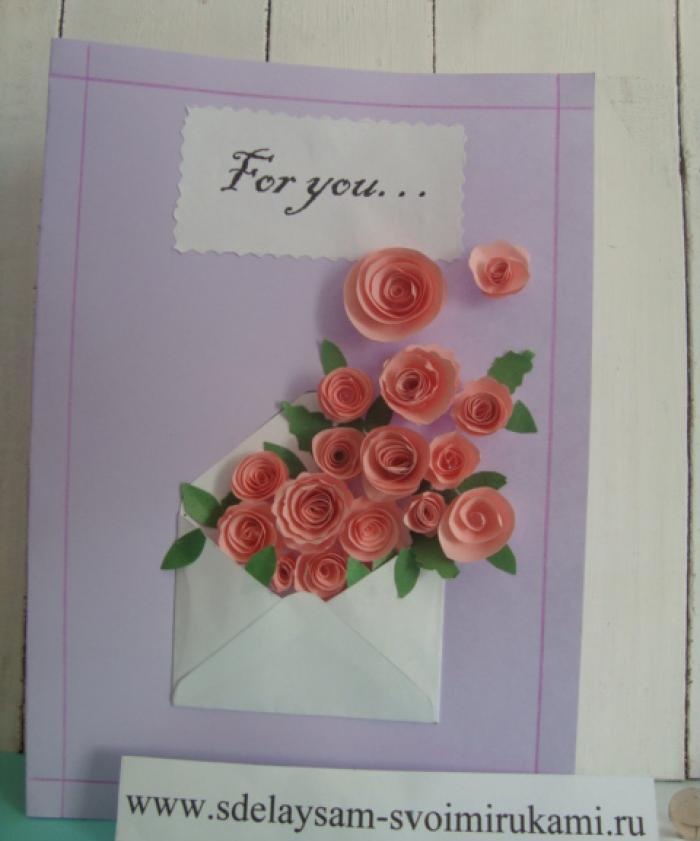
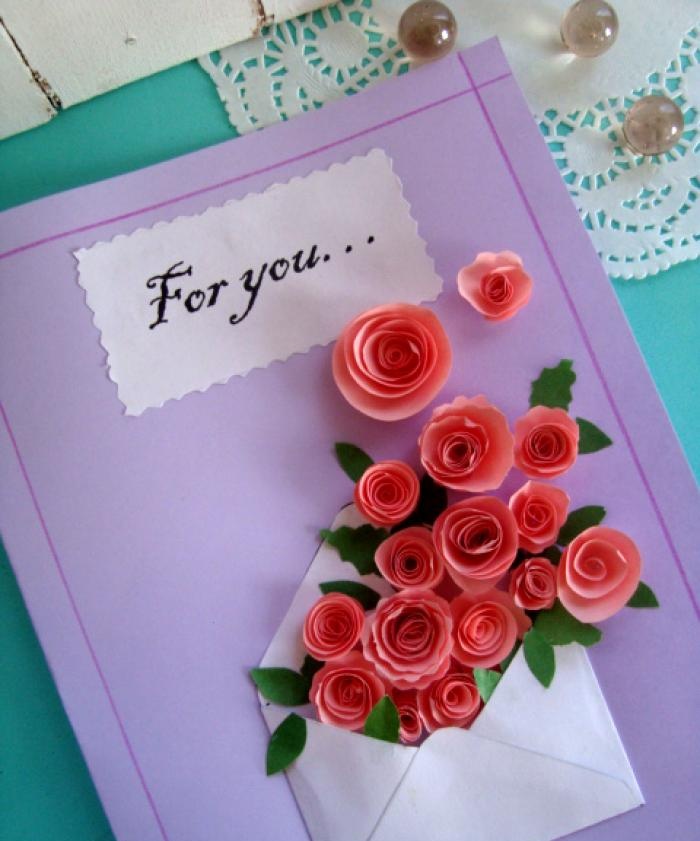
Step 2. Draw an envelope as shown in the photo.
![Beautiful and gentle card](https://i.washerhouse.com/images/20/1965-krasivaya-i-nezhnaya-otkrytka.jpg)
Step 3. Glue the envelope and glue it to the postcard base.
![Beautiful and gentle card](https://i.washerhouse.com/images/20/1966-krasivaya-i-nezhnaya-otkrytka.jpg)
![Beautiful and gentle card](https://i.washerhouse.com/images/20/1967-krasivaya-i-nezhnaya-otkrytka.jpg)
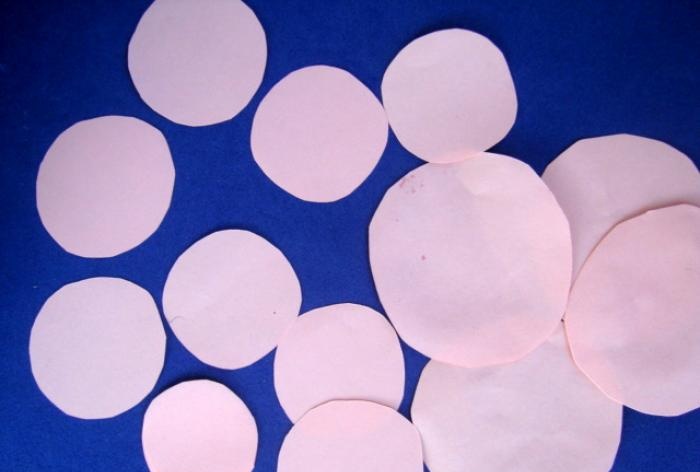
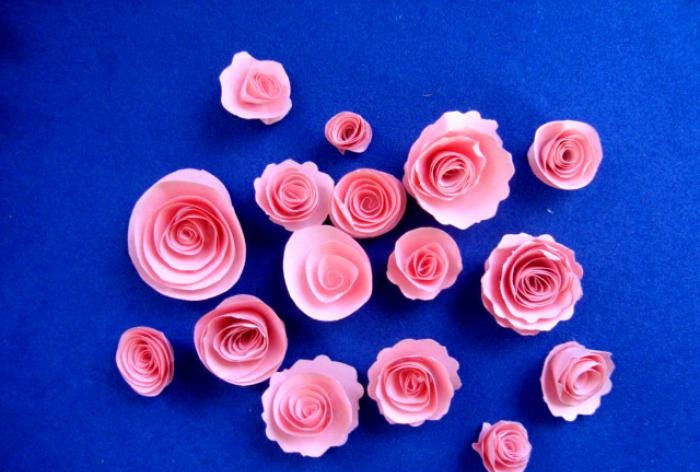
Step 4. Cut out circles of different diameters from a pink sheet. There can be any number of them (the number of circles you make, the number of roses there will be).
![Beautiful and gentle card](https://i.washerhouse.com/images/20/1968-krasivaya-i-nezhnaya-otkrytka.jpg)
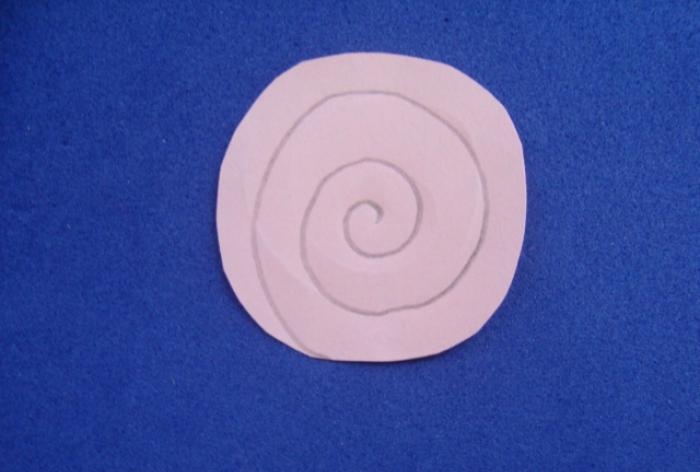
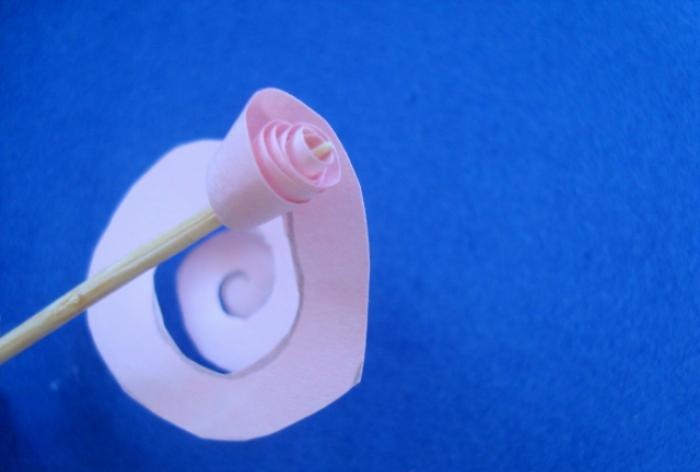
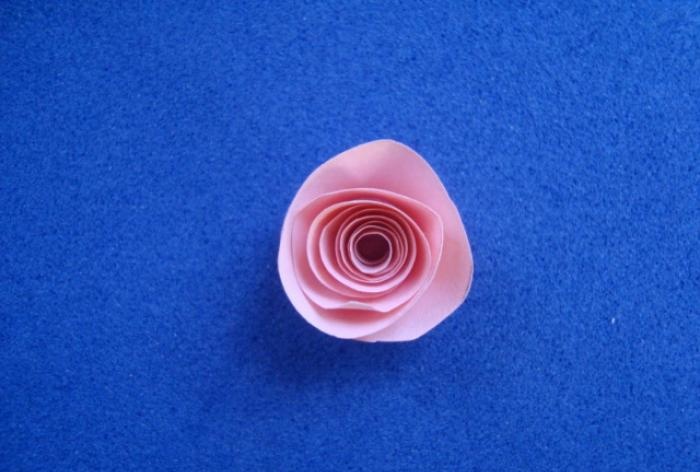
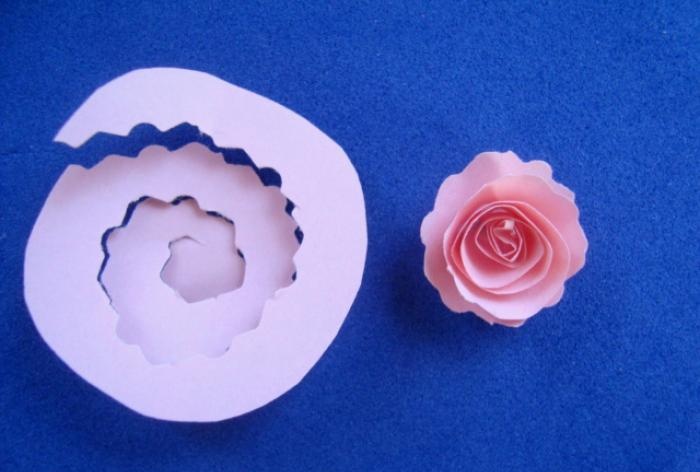
Step 5. Make a rose from the pink circle. We cut the circle in a spiral. Gently roll it into a circle, pressing with your fingers (it’s easier to roll it with a skewer). At the end, apply glue to the last turn. Thus, we make all the roses.
![Beautiful and gentle card](https://i.washerhouse.com/images/20/1969-krasivaya-i-nezhnaya-otkrytka.jpg)
![Beautiful and gentle card](https://i.washerhouse.com/images/20/1970-krasivaya-i-nezhnaya-otkrytka.jpg)
![Beautiful and gentle card](https://i.washerhouse.com/images/20/1971-krasivaya-i-nezhnaya-otkrytka.jpg)
Step 6. You can also cut out several roses using curly scissors.
![Beautiful and gentle card](https://i.washerhouse.com/images/20/1972-krasivaya-i-nezhnaya-otkrytka.jpg)
Step 7. The roses are ready!
![Beautiful and gentle card](https://i.washerhouse.com/images/20/1973-krasivaya-i-nezhnaya-otkrytka.jpg)
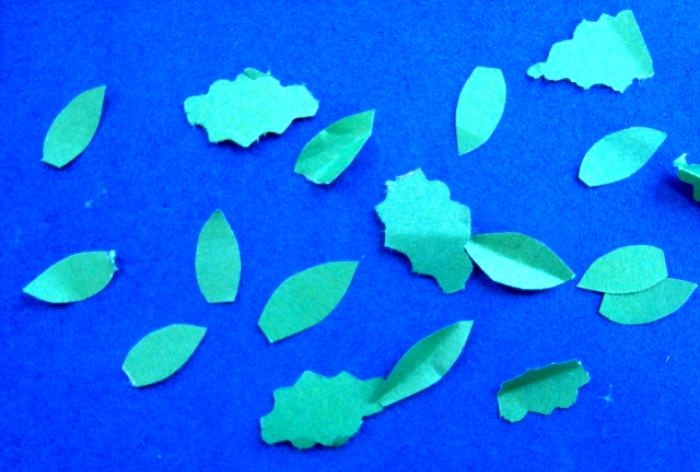
Step 8. Now let's move on to the leaves.We also cut them out using regular and curly scissors.
![Beautiful and gentle card](https://i.washerhouse.com/images/20/1974-krasivaya-i-nezhnaya-otkrytka.jpg)
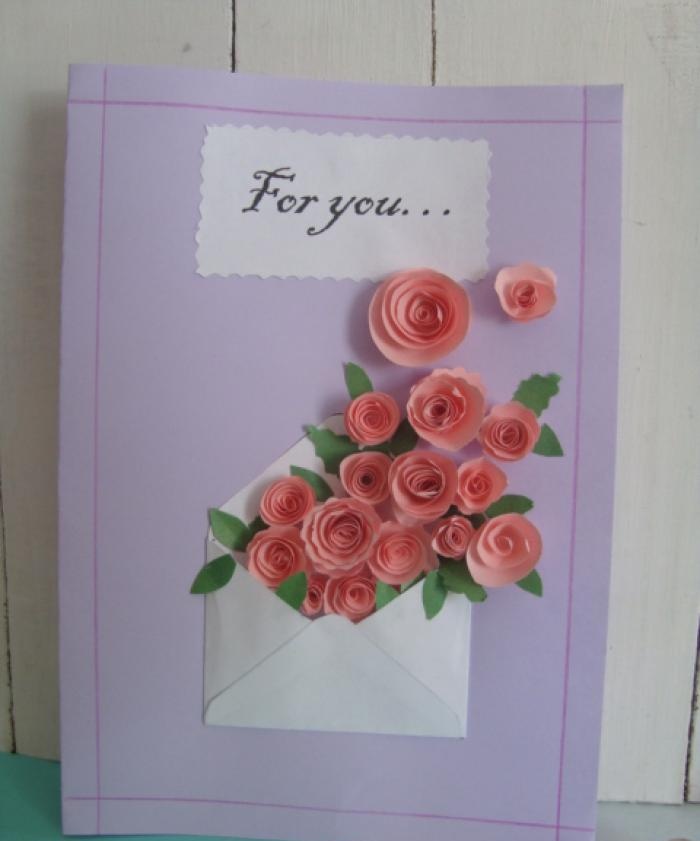
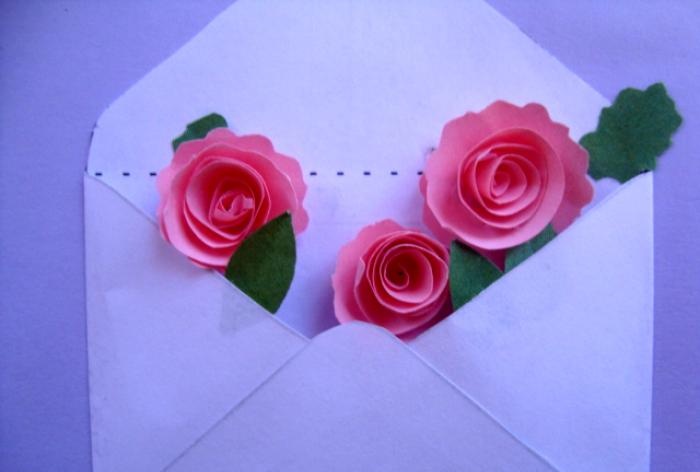
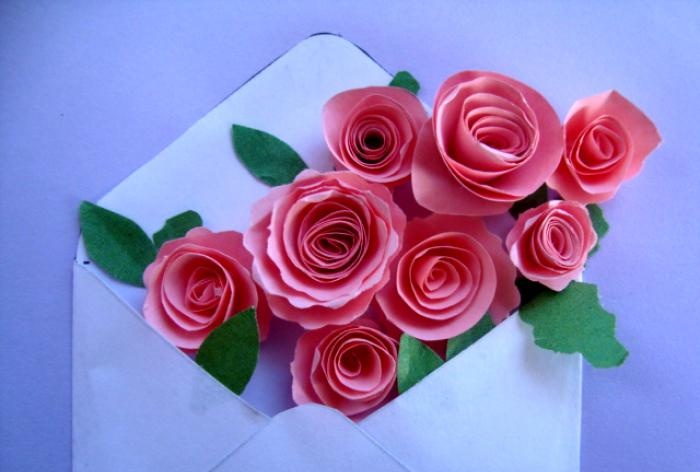
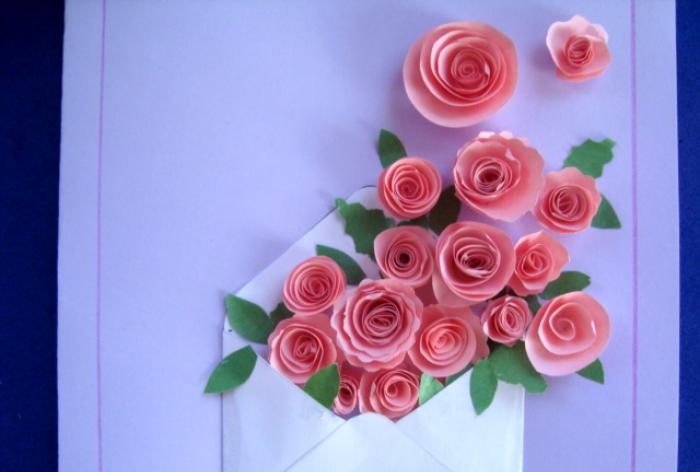
Step 9. We begin to glue the roses, as shown in the photo. At the same time, do not forget about the leaves.
![Beautiful and gentle card](https://i.washerhouse.com/images/20/1975-krasivaya-i-nezhnaya-otkrytka.jpg)
![Beautiful and gentle card](https://i.washerhouse.com/images/20/1976-krasivaya-i-nezhnaya-otkrytka.jpg)
![Beautiful and gentle card](https://i.washerhouse.com/images/20/1977-krasivaya-i-nezhnaya-otkrytka.jpg)
Step 10. Let’s make the inscription “For you” (which is translated from English as “For you”). You can print it on a printer or write it yourself. Cut out with curly scissors.
![Beautiful and gentle card](https://i.washerhouse.com/images/20/1978-krasivaya-i-nezhnaya-otkrytka.jpg)
Step 11. Glue the inscription to the card.
![Beautiful and gentle card](https://i.washerhouse.com/images/20/1979-krasivaya-i-nezhnaya-otkrytka.jpg)
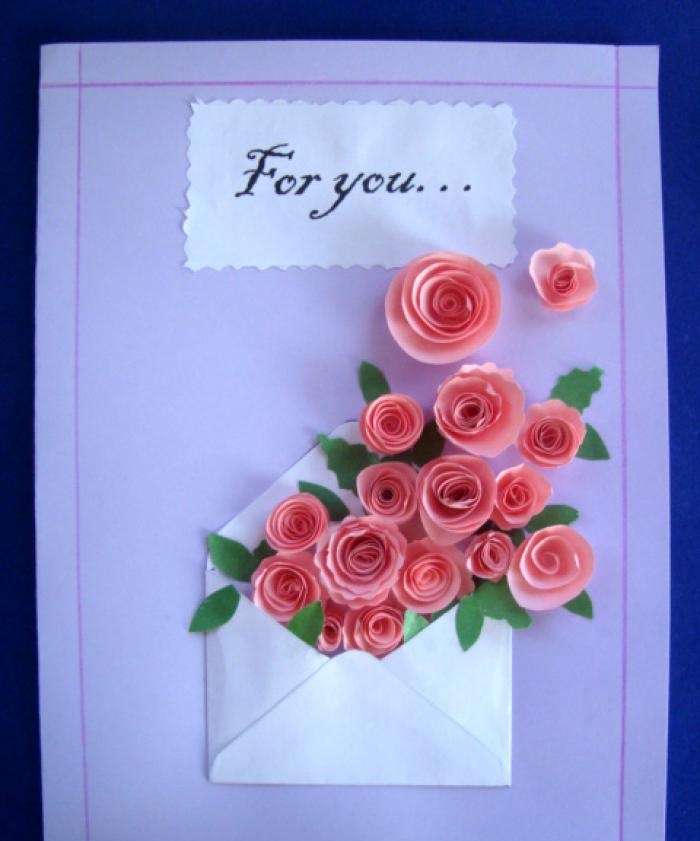
Ready! The card turned out very tender and unusual, everyone will like it.
![Beautiful and gentle card](https://i.washerhouse.com/images/20/1980-krasivaya-i-nezhnaya-otkrytka.jpg)
![Beautiful and gentle card](https://i.washerhouse.com/images/20/1981-krasivaya-i-nezhnaya-otkrytka.jpg)
![Beautiful and gentle card](https://i.washerhouse.com/images/20/1982-krasivaya-i-nezhnaya-otkrytka.jpg)
I wish you creative success!