![Transformable magic wand](https://i.washerhouse.com/images/20/1662-volshebnaya-palochka-transformer.jpg)
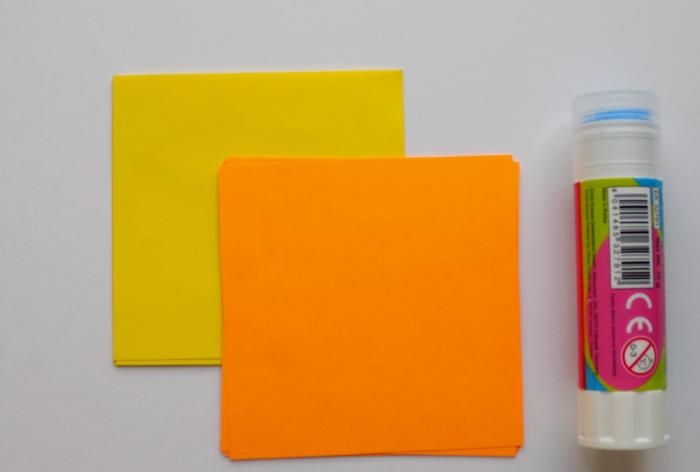
To create it you will need to take:
- an equal number of square sheets of paper of two colors (the length of the stick will depend on their number);
- glue stick.
![Transformable magic wand](https://i.washerhouse.com/images/20/1663-volshebnaya-palochka-transformer.jpg)
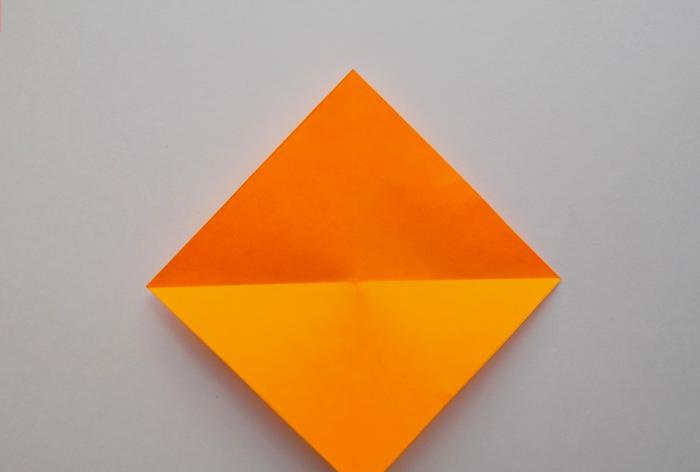
Our stick will consist of separate modules, for the manufacture of each of which you will need 2 sheets of different colors. Let's start putting together the first module. To do this, take an orange square and make a diagonal fold.
![Transformable magic wand](https://i.washerhouse.com/images/20/1664-volshebnaya-palochka-transformer.jpg)
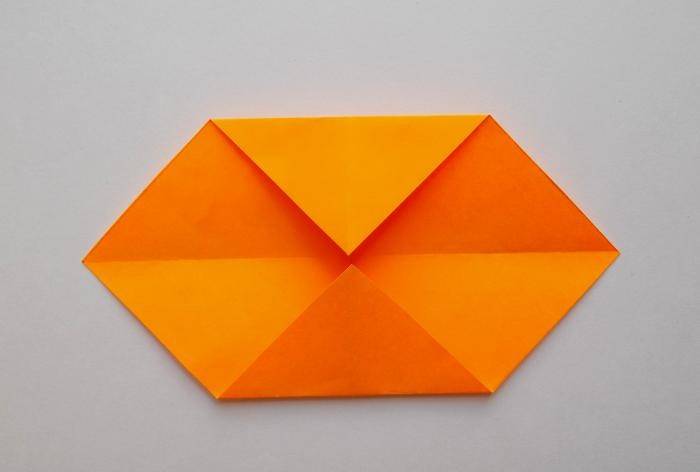
After this, we bend the 2 sides towards the center.
![Transformable magic wand](https://i.washerhouse.com/images/20/1665-volshebnaya-palochka-transformer.jpg)
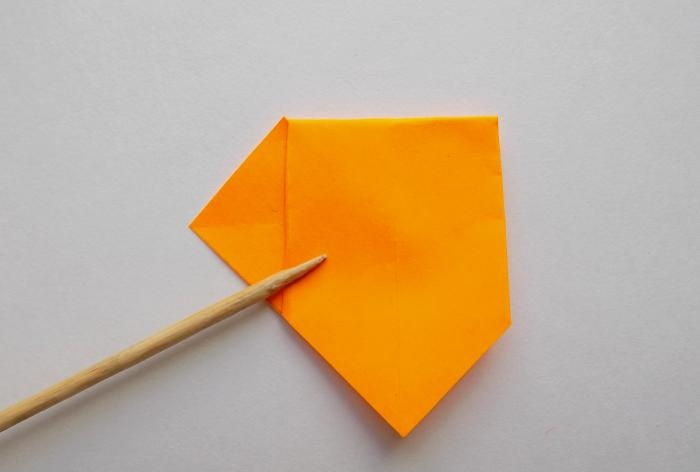
Bend the corners of the resulting triangles in the opposite direction.
![Transformable magic wand](https://i.washerhouse.com/images/20/1666-volshebnaya-palochka-transformer.jpg)
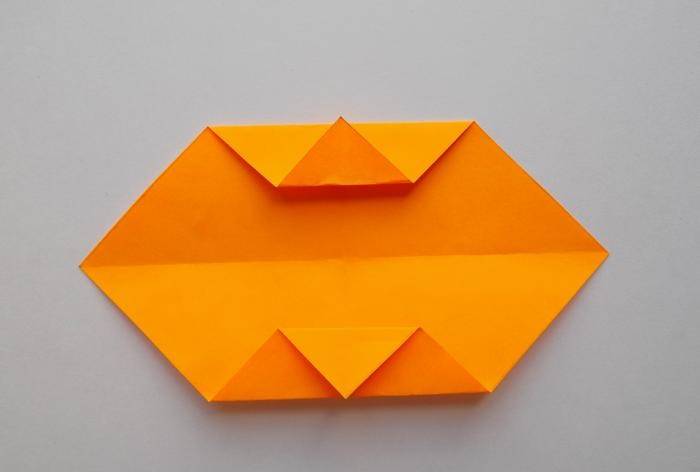
Now we will make folds towards the center line.
![Transformable magic wand](https://i.washerhouse.com/images/20/1667-volshebnaya-palochka-transformer.jpg)
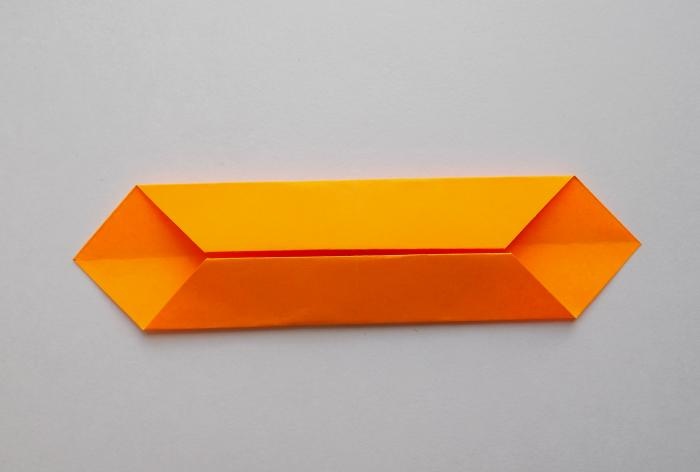
Let's place the workpiece vertically, bend one edge up.
![Transformable magic wand](https://i.washerhouse.com/images/20/1668-volshebnaya-palochka-transformer.jpg)
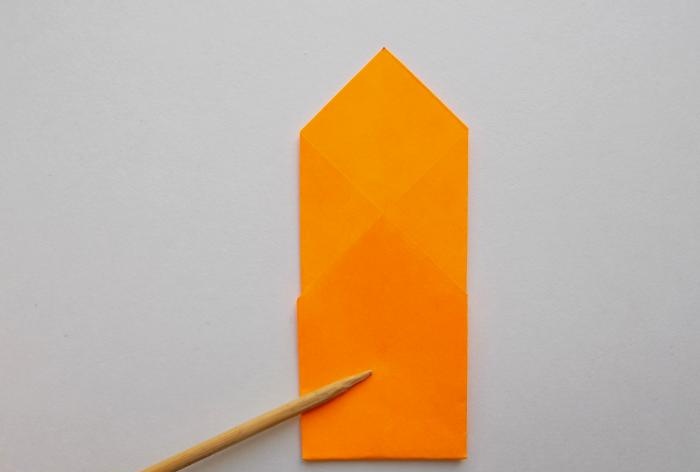
Then we bend the lower part of the blank of the future stick diagonally to the left.
![Transformable magic wand](https://i.washerhouse.com/images/20/1669-volshebnaya-palochka-transformer.jpg)
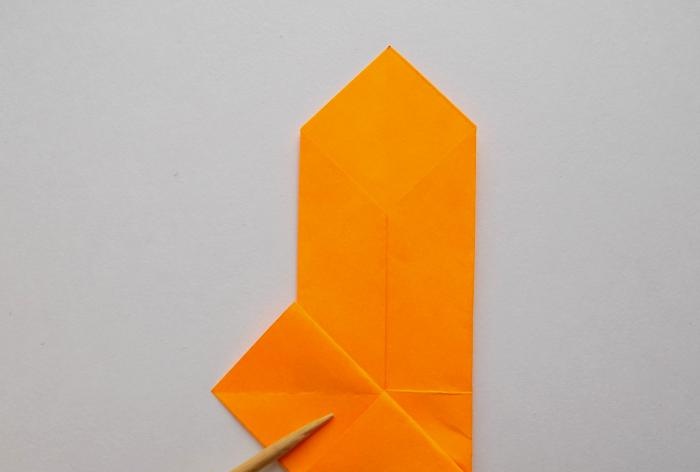
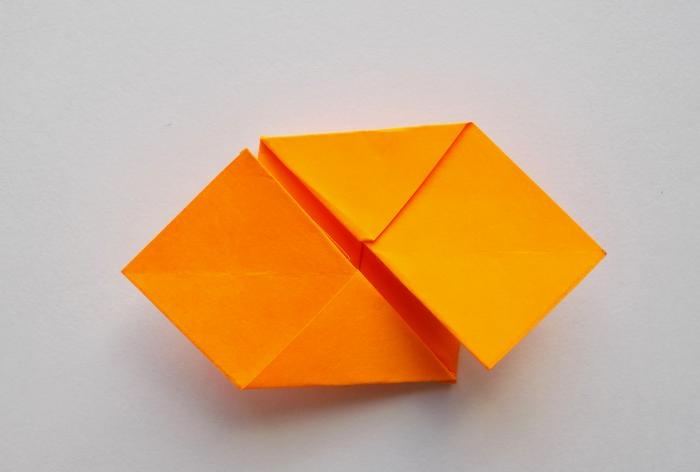
We bend the upper part of the module down.
![Transformable magic wand](https://i.washerhouse.com/images/20/1670-volshebnaya-palochka-transformer.jpg)
Now a diagonal fold needs to be made at the top, bending it to the right side and slightly up.
![Transformable magic wand](https://i.washerhouse.com/images/20/1671-volshebnaya-palochka-transformer.jpg)
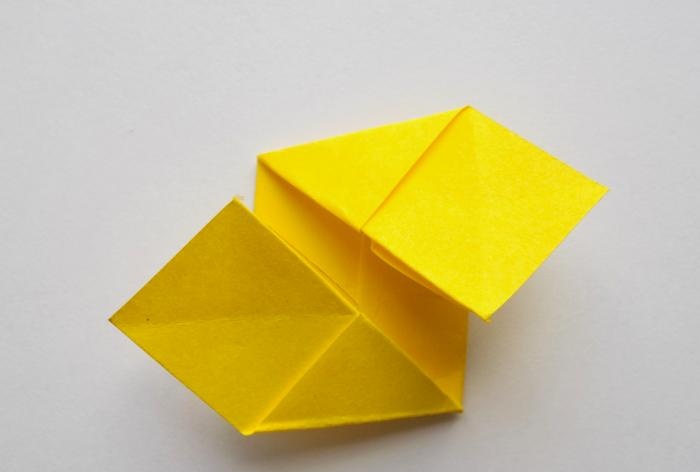
Using the same principle, we make a module from yellow paper.
![Transformable magic wand](https://i.washerhouse.com/images/20/1672-volshebnaya-palochka-transformer.jpg)
Now it's time to connect the two modules into a single whole. To do this, we put the folded yellow element into the orange one.
![Transformable magic wand](https://i.washerhouse.com/images/20/1673-volshebnaya-palochka-transformer.jpg)
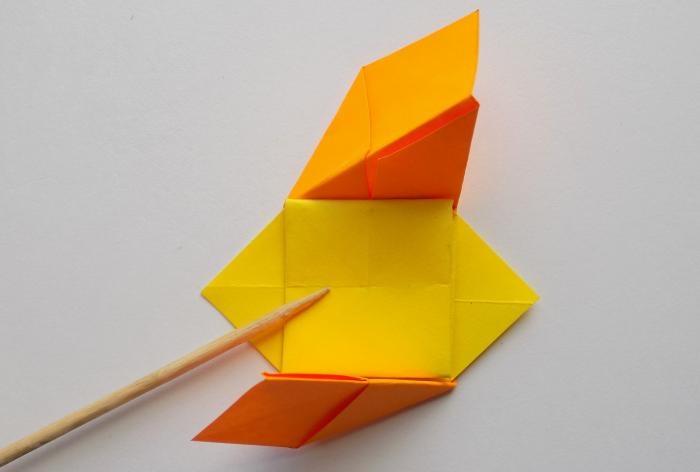
Now the ends of the orange module need to be brought into the yellow one. First we do it from above.
![Transformable magic wand](https://i.washerhouse.com/images/20/1674-volshebnaya-palochka-transformer.jpg)
Then we fill the lower tip of the orange module.
![Transformable magic wand](https://i.washerhouse.com/images/20/1675-volshebnaya-palochka-transformer.jpg)
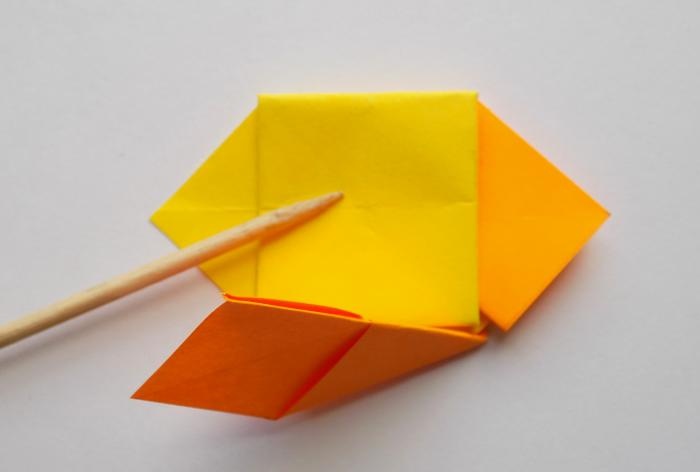
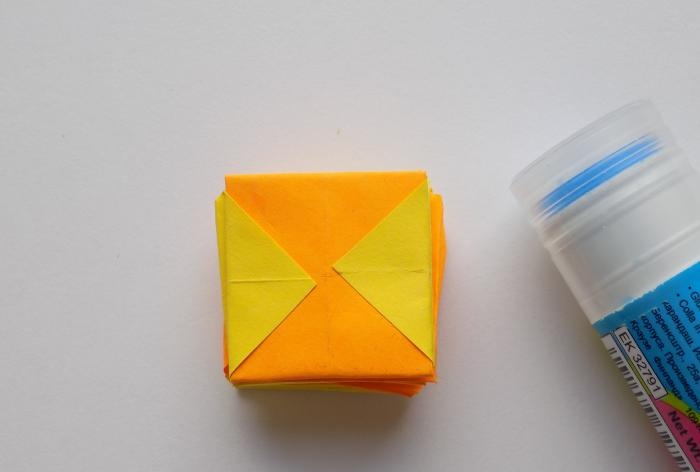
The protruding corners need to be folded up and glued. First we do it on one side.
![Transformable magic wand](https://i.washerhouse.com/images/20/1676-volshebnaya-palochka-transformer.jpg)
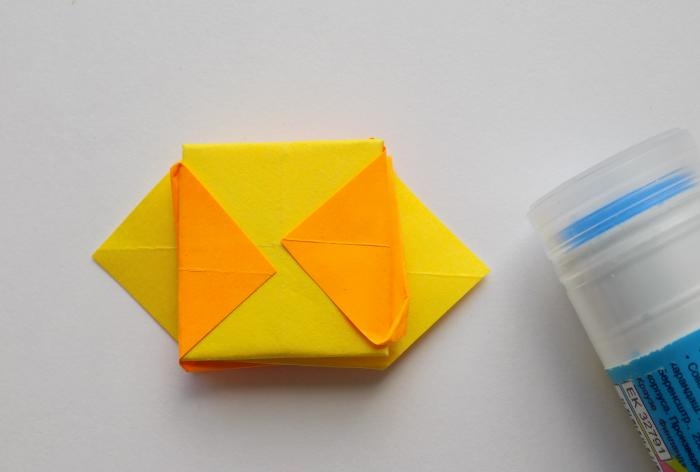
Then we turn it over and repeat the operation.
![Transformable magic wand](https://i.washerhouse.com/images/20/1677-volshebnaya-palochka-transformer.jpg)
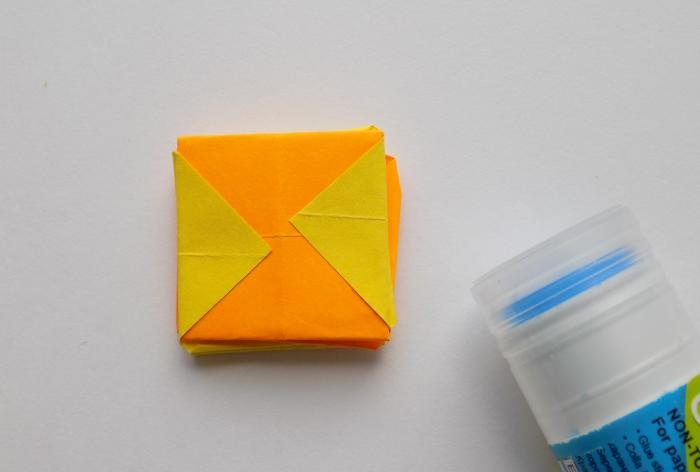
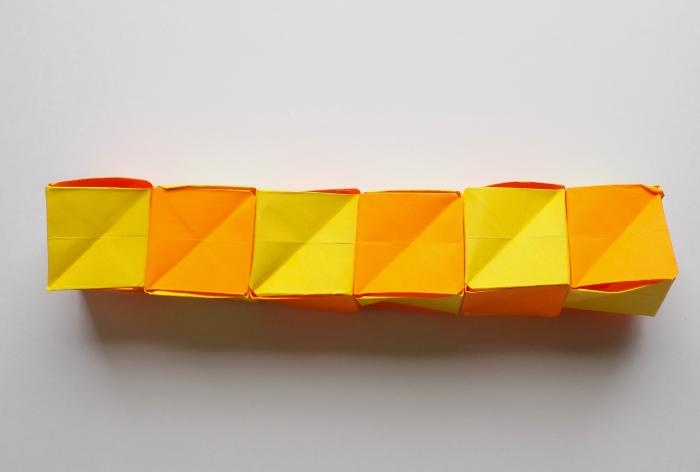
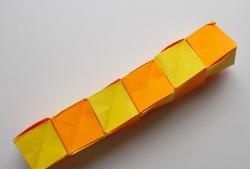
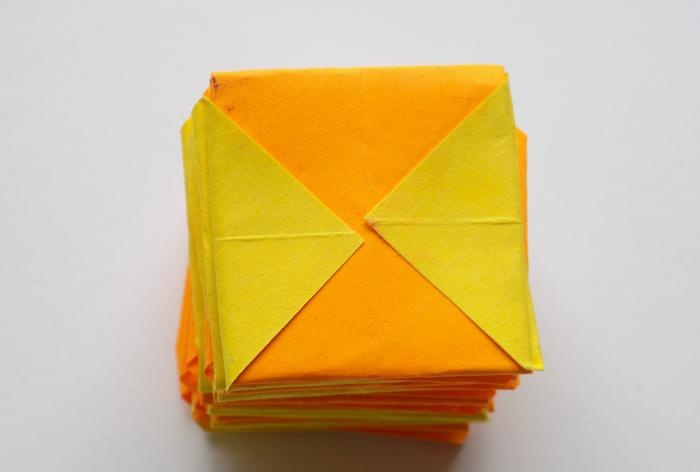
To create a stick, you will need to make several of these elements; the length of the craft will depend on their quantity. We made 6 pieces.
![Transformable magic wand](https://i.washerhouse.com/images/20/1678-volshebnaya-palochka-transformer.jpg)
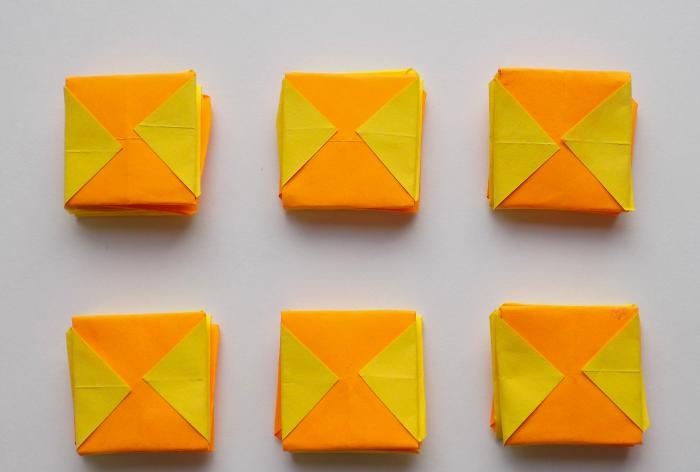
Now all that remains is to connect these elements together. We do this by placing one element on top of another and connecting with glue.
![Transformable magic wand](https://i.washerhouse.com/images/20/1679-volshebnaya-palochka-transformer.jpg)
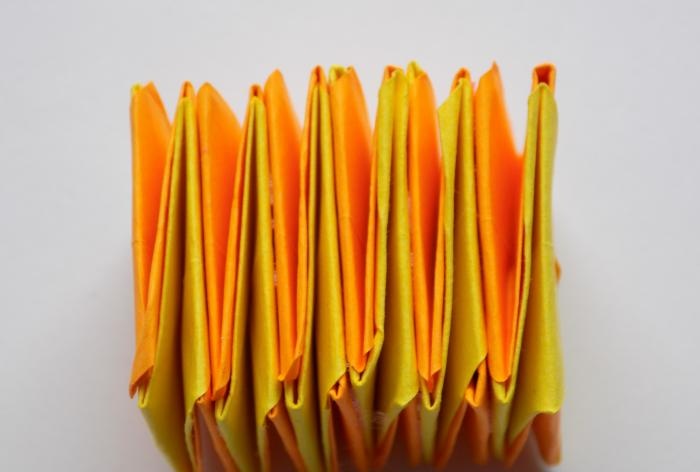
In this way we connect all the elements of our transforming wand.
![Transformable magic wand](https://i.washerhouse.com/images/20/1680-volshebnaya-palochka-transformer.jpg)
This is what our craft looks like from the side.
![Transformable magic wand](https://i.washerhouse.com/images/20/1681-volshebnaya-palochka-transformer.jpg)
To turn it into a long stick, you need to start turning it around its axis. In this case, all elements will begin to straighten out, becoming voluminous.
![Transformable magic wand](https://i.washerhouse.com/images/20/1682-volshebnaya-palochka-transformer.jpg)