![paper dragon](https://i.washerhouse.com/images/17/2067-bumazhnyy-drakon.jpg)
All you need is a square piece of paper of any size and a few free minutes.
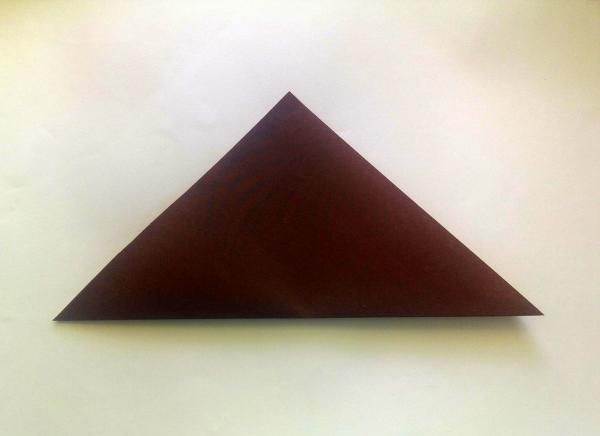
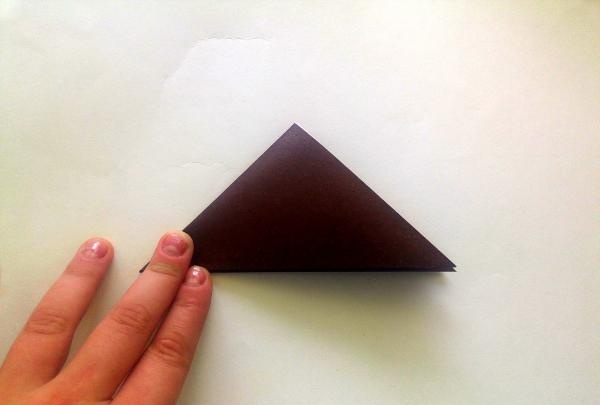
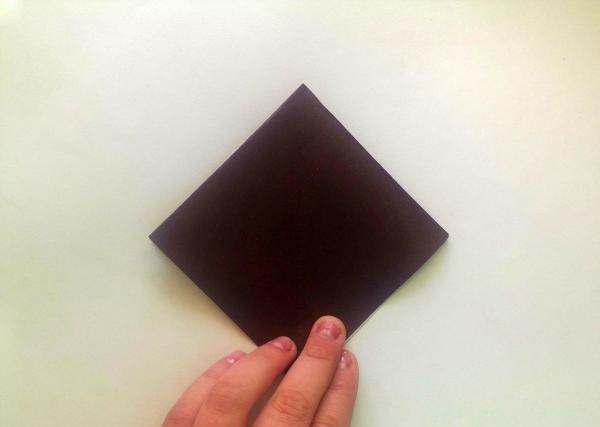
To begin, bend the sheet diagonally.
![paper dragon](https://i.washerhouse.com/images/17/2022-bumazhnyy-drakon.jpg)
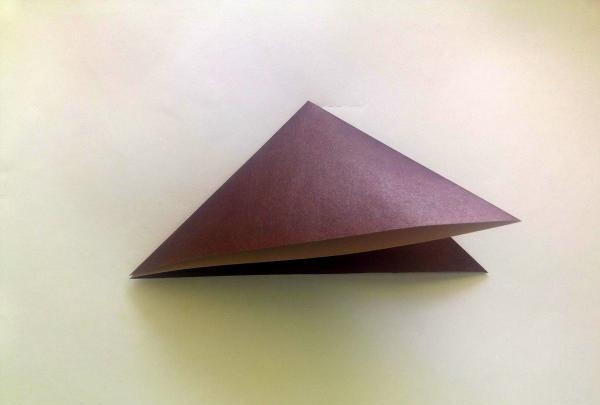
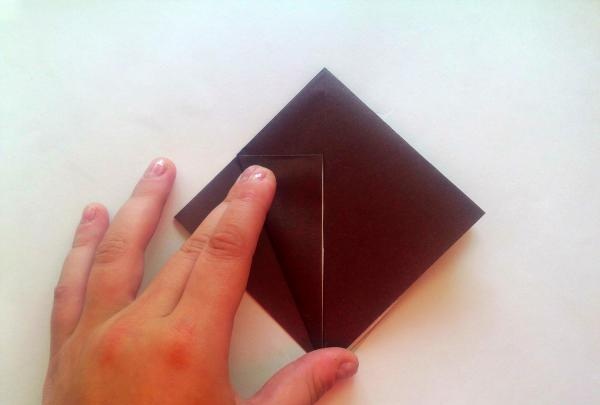
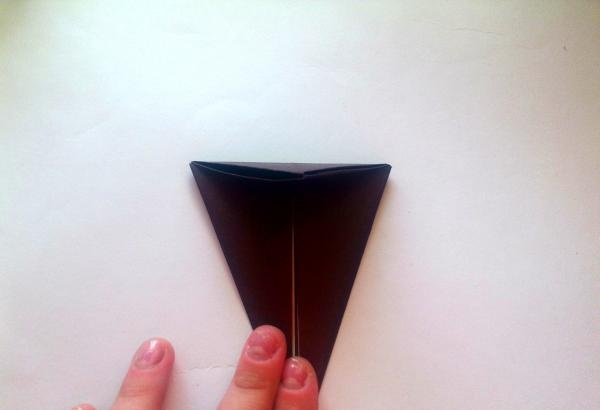
The resulting triangle is also bent in half and in half again.
![paper dragon](https://i.washerhouse.com/images/17/2023-bumazhnyy-drakon.jpg)
![paper dragon](https://i.washerhouse.com/images/17/2024-bumazhnyy-drakon.jpg)
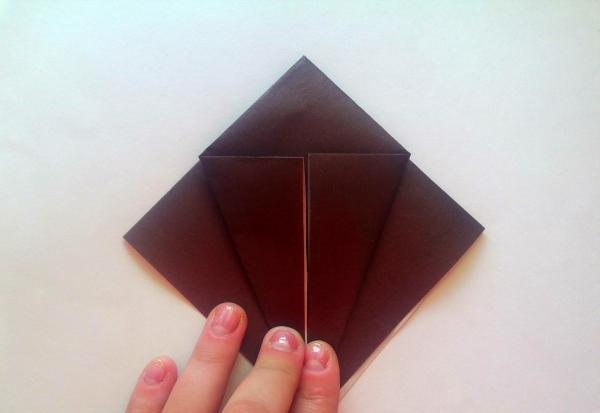
Next, unfold the sheet to its original state and again bend it diagonally.
![paper dragon](https://i.washerhouse.com/images/17/2025-bumazhnyy-drakon.jpg)
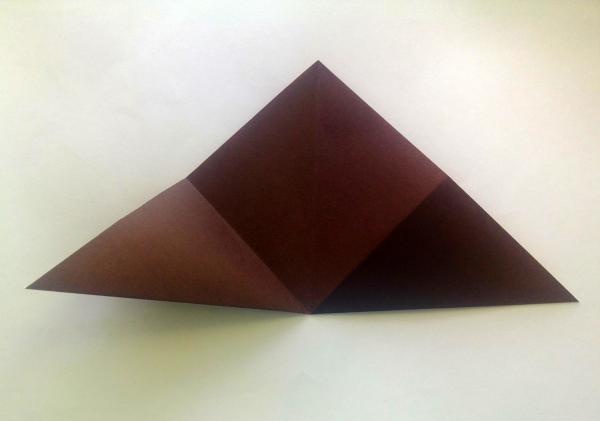
Using the resulting folds, fold the sheet into a double square and place it in the shape of a diamond, with the folds facing up.
![paper dragon](https://i.washerhouse.com/images/17/2026-bumazhnyy-drakon.jpg)
![paper dragon](https://i.washerhouse.com/images/17/2027-bumazhnyy-drakon.jpg)
![paper dragon](https://i.washerhouse.com/images/17/2028-bumazhnyy-drakon.jpg)
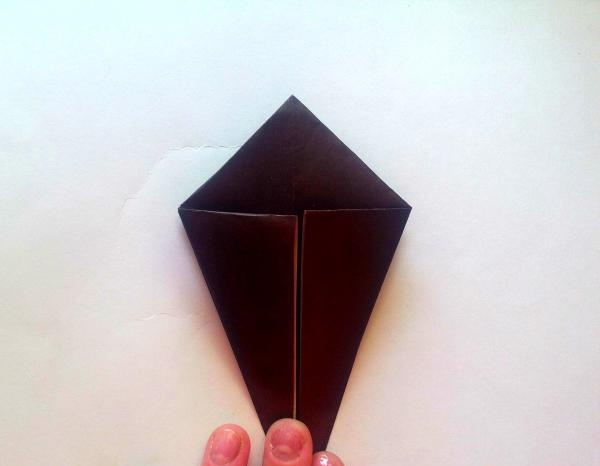
Then fold the corners of the diamond towards the center on both sides.
![paper dragon](https://i.washerhouse.com/images/17/2029-bumazhnyy-drakon.jpg)
![paper dragon](https://i.washerhouse.com/images/17/2030-bumazhnyy-drakon.jpg)
![paper dragon](https://i.washerhouse.com/images/17/2031-bumazhnyy-drakon.jpg)
First bend the remaining top completely, not forgetting to iron it thoroughly, and then, having straightened it, lower the very corner of the upper part to the fold line, again ironing it.
![paper dragon](https://i.washerhouse.com/images/17/2032-bumazhnyy-drakon.jpg)
![paper dragon](https://i.washerhouse.com/images/17/2033-bumazhnyy-drakon.jpg)
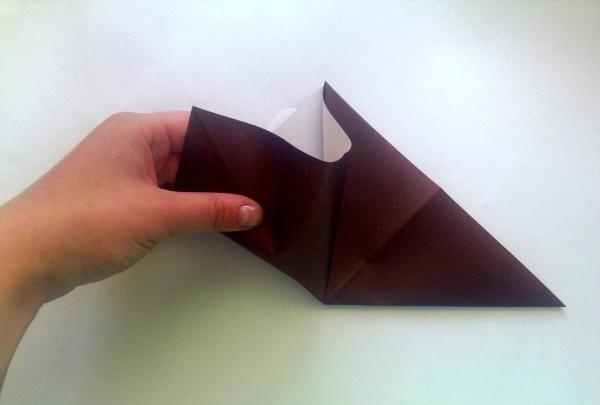
Unfold the sheet completely.
![paper dragon](https://i.washerhouse.com/images/17/2034-bumazhnyy-drakon.jpg)
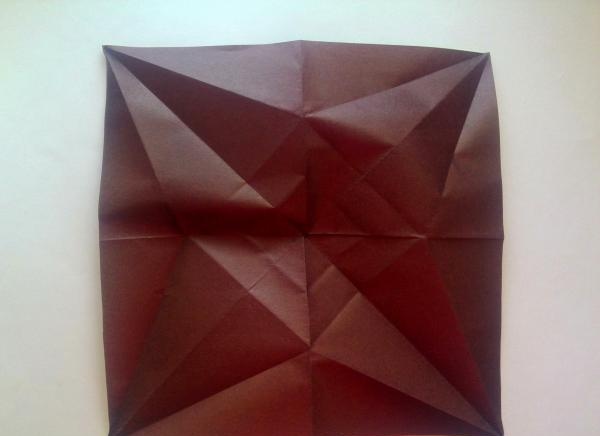
Notice that a small square has appeared in the center of the sheet. We carefully begin to fold the workpiece around this square, and then bend it inward.
![paper dragon](https://i.washerhouse.com/images/17/2035-bumazhnyy-drakon.jpg)
![paper dragon](https://i.washerhouse.com/images/17/2036-bumazhnyy-drakon.jpg)
![paper dragon](https://i.washerhouse.com/images/17/2037-bumazhnyy-drakon.jpg)
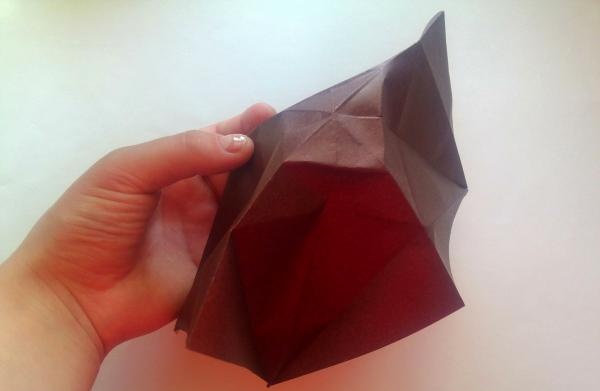
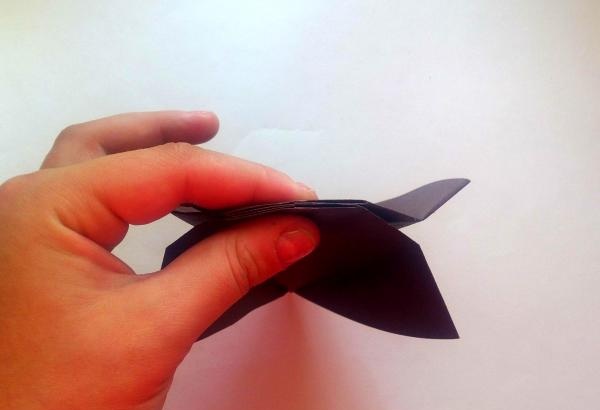
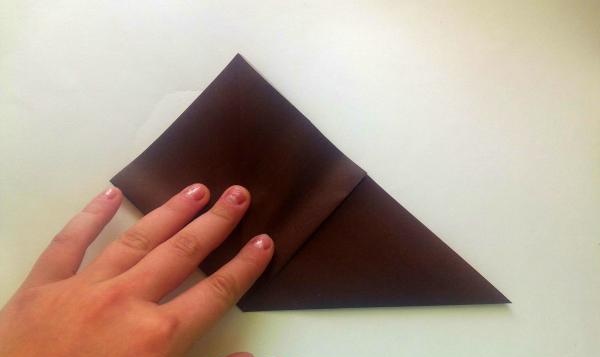
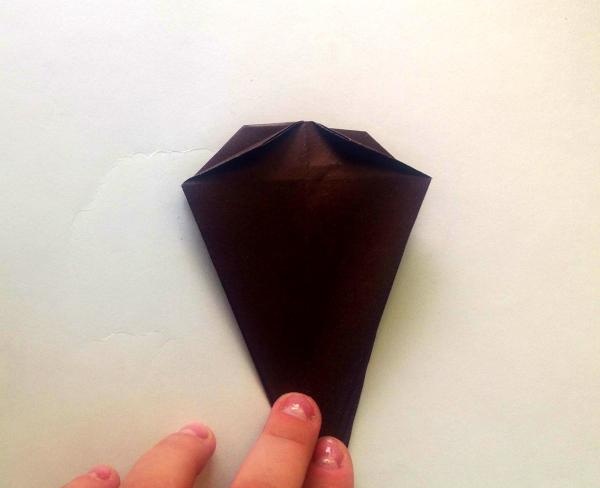
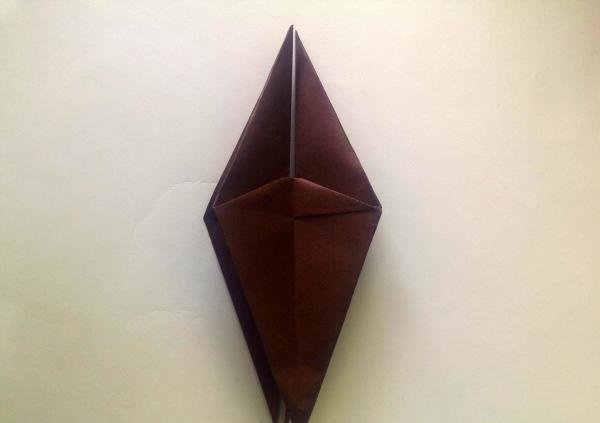
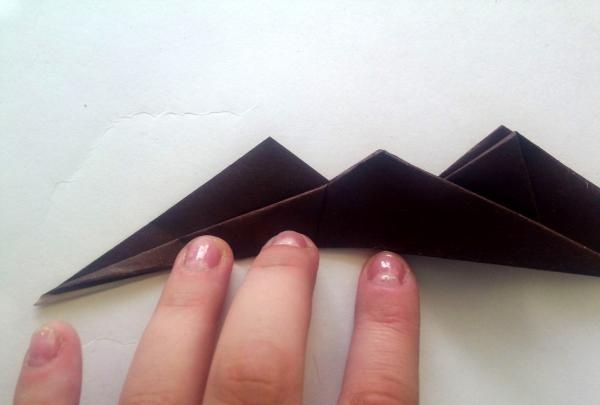
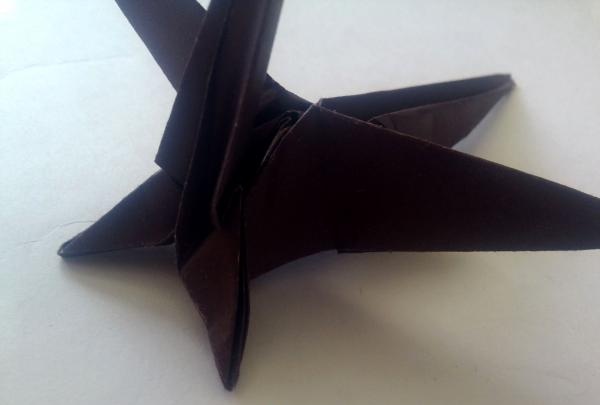
Then bend the protruding triangular parts inward so that you get a figure somewhat similar to a diamond.
![paper dragon](https://i.washerhouse.com/images/17/2038-bumazhnyy-drakon.jpg)
![paper dragon](https://i.washerhouse.com/images/17/2039-bumazhnyy-drakon.jpg)
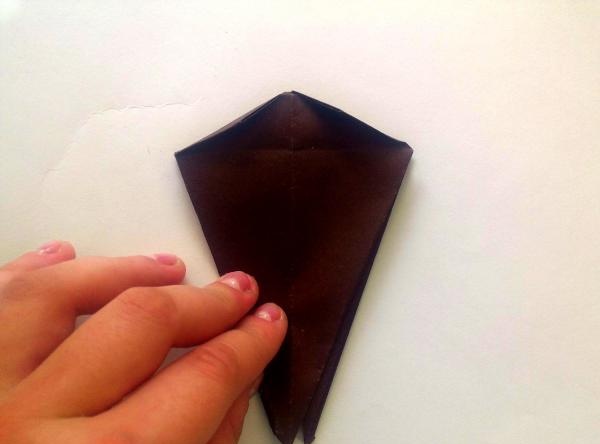
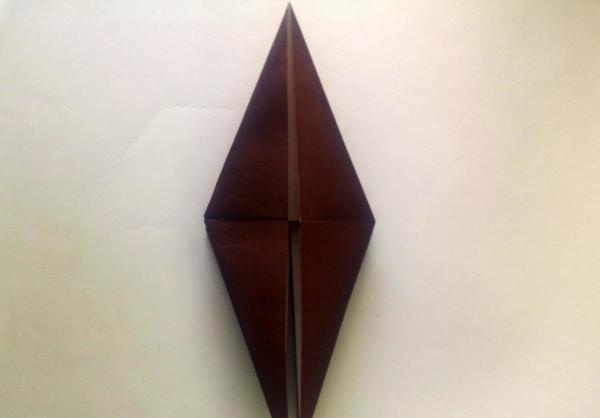
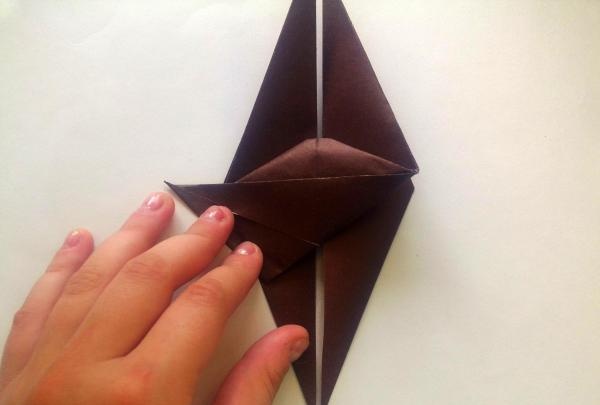
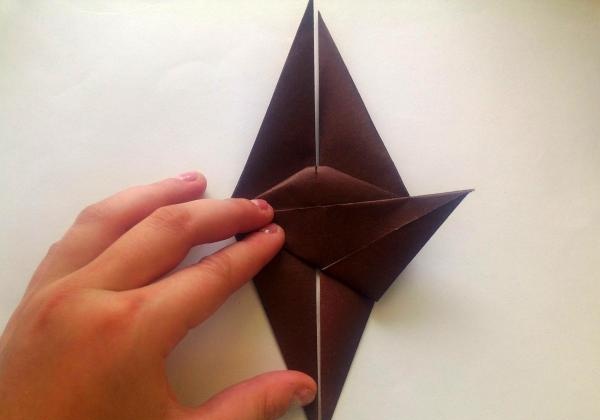
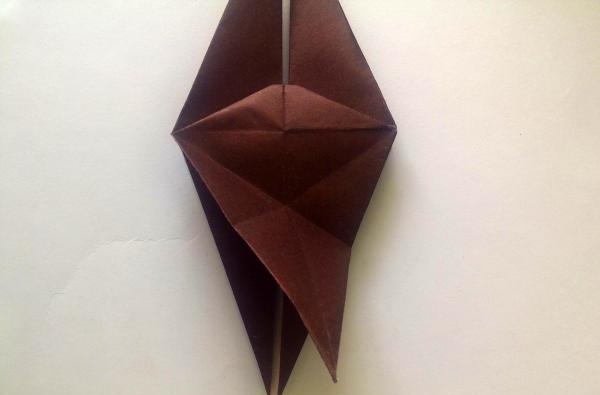
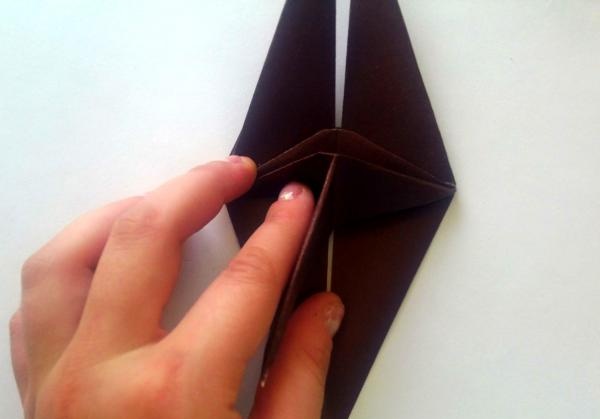
Bend the protruding “ears” of the figure towards the center, and then, following the photo, unfold the parts of the workpiece to a rhombus and fold the entire workpiece in half so that you get two acute-angled triangles separated from each other - the future head and tail, and two wings.
![paper dragon](https://i.washerhouse.com/images/17/2040-bumazhnyy-drakon.jpg)
![paper dragon](https://i.washerhouse.com/images/17/2041-bumazhnyy-drakon.jpg)
![paper dragon](https://i.washerhouse.com/images/17/2042-bumazhnyy-drakon.jpg)
![paper dragon](https://i.washerhouse.com/images/17/2043-bumazhnyy-drakon.jpg)
![paper dragon](https://i.washerhouse.com/images/17/2044-bumazhnyy-drakon.jpg)
![paper dragon](https://i.washerhouse.com/images/17/2045-bumazhnyy-drakon.jpg)
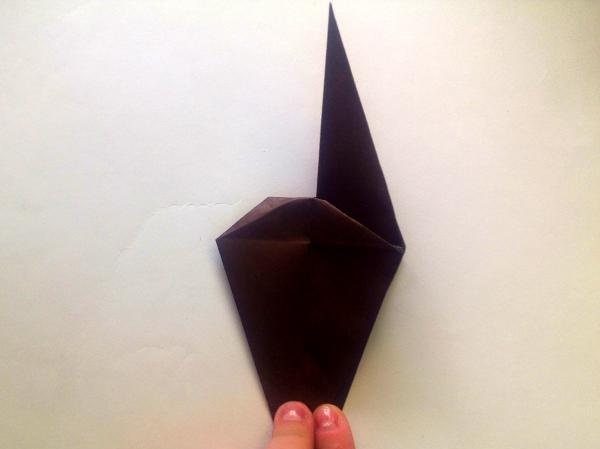
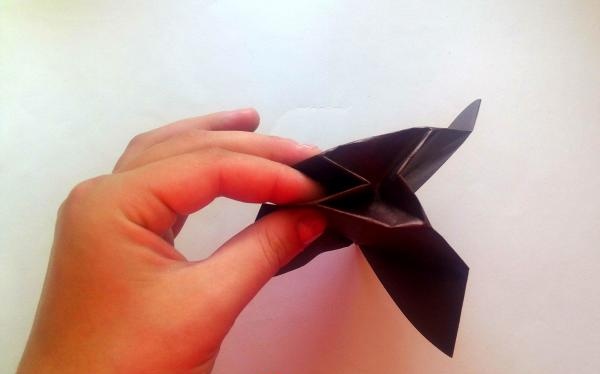
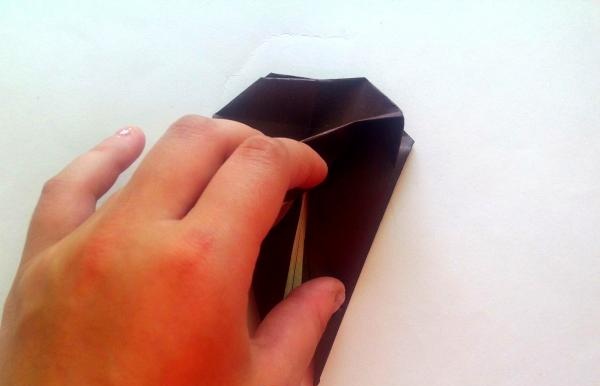
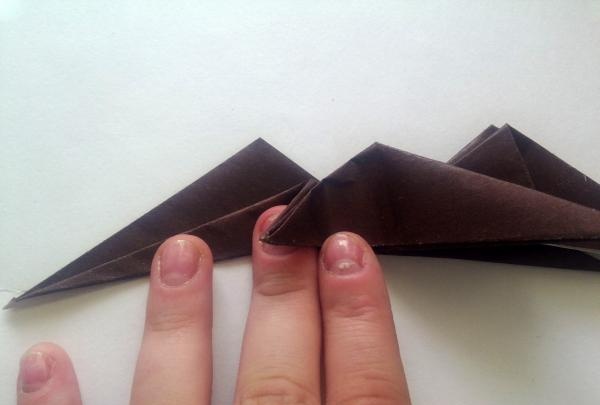
Afterwards we form the blank for the wings. To do this, bend the lower edge of the diamond in different directions, then bend it along the resulting lines.
![paper dragon](https://i.washerhouse.com/images/17/2046-bumazhnyy-drakon.jpg)
![paper dragon](https://i.washerhouse.com/images/17/2047-bumazhnyy-drakon.jpg)
![paper dragon](https://i.washerhouse.com/images/17/2048-bumazhnyy-drakon.jpg)
![paper dragon](https://i.washerhouse.com/images/17/2049-bumazhnyy-drakon.jpg)
![paper dragon](https://i.washerhouse.com/images/17/2050-bumazhnyy-drakon.jpg)
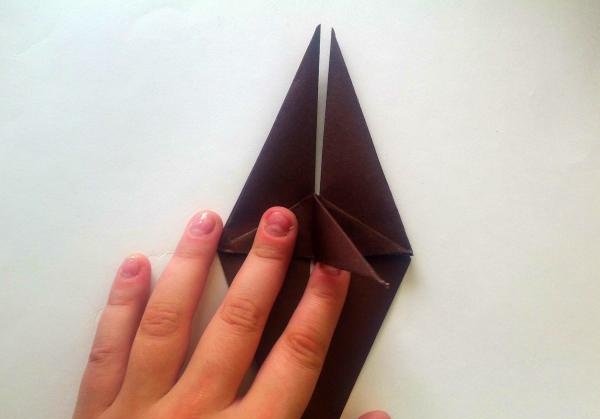
We do the same on the other side.
![paper dragon](https://i.washerhouse.com/images/17/2051-bumazhnyy-drakon.jpg)
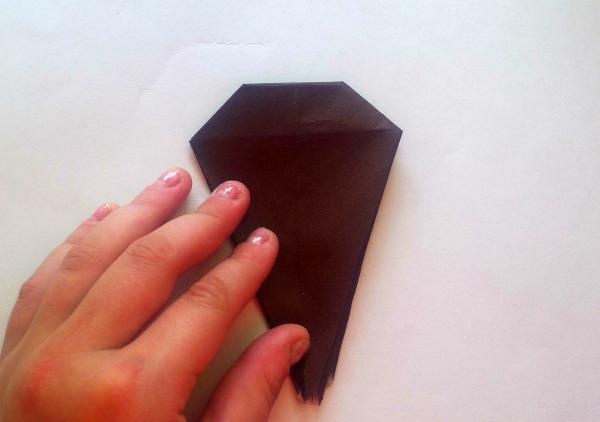
We fold the remaining two points so that they are parallel to the bent wings.
![paper dragon](https://i.washerhouse.com/images/17/2052-bumazhnyy-drakon.jpg)
![paper dragon](https://i.washerhouse.com/images/17/2053-bumazhnyy-drakon.jpg)
![paper dragon](https://i.washerhouse.com/images/17/2054-bumazhnyy-drakon.jpg)
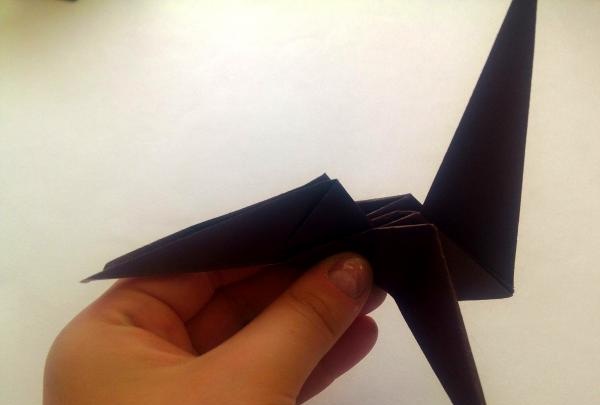
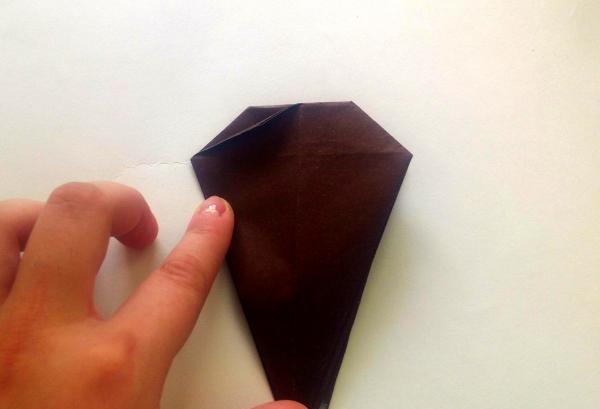
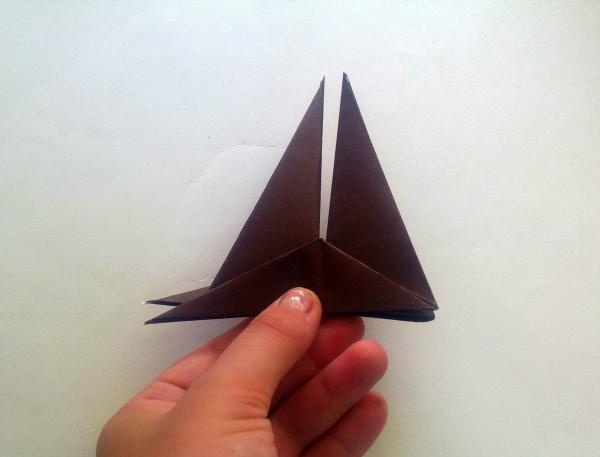
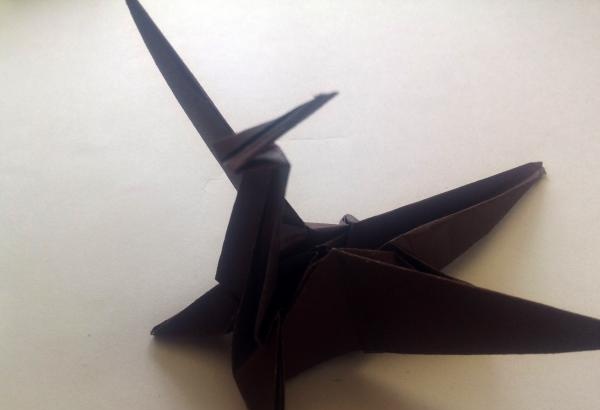
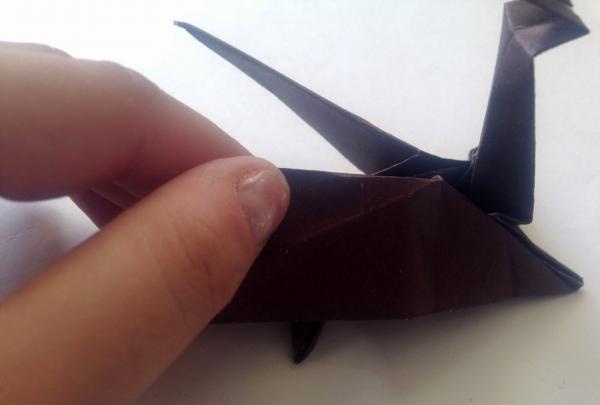
We bend each part of the future head and tail in half, then unfold and fold it as in the photo - these are the paws of our dragon.
![paper dragon](https://i.washerhouse.com/images/17/2055-bumazhnyy-drakon.jpg)
![paper dragon](https://i.washerhouse.com/images/17/2056-bumazhnyy-drakon.jpg)
You can bend them right away.
![paper dragon](https://i.washerhouse.com/images/17/2057-bumazhnyy-drakon.jpg)
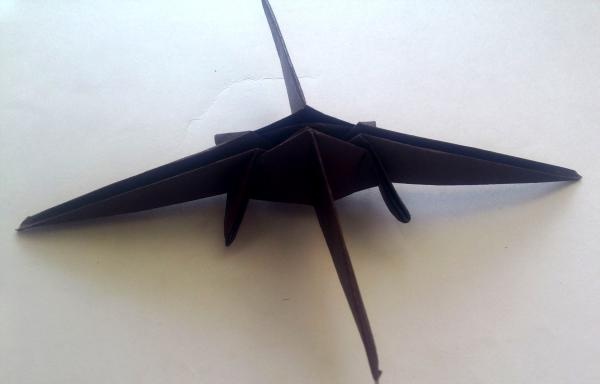
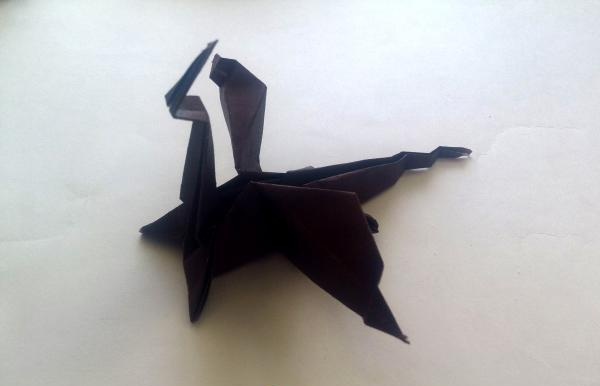
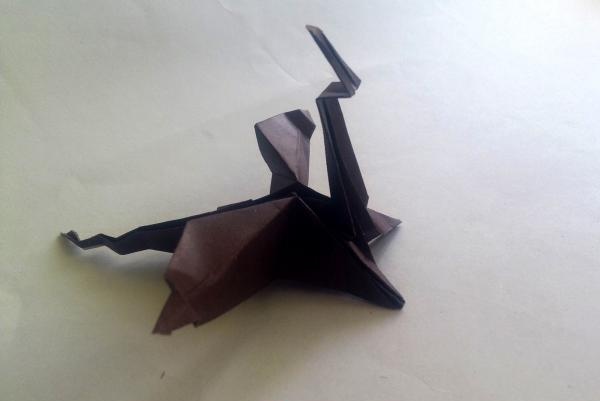
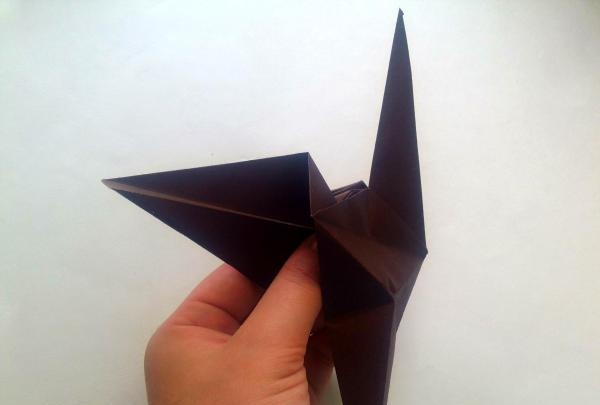
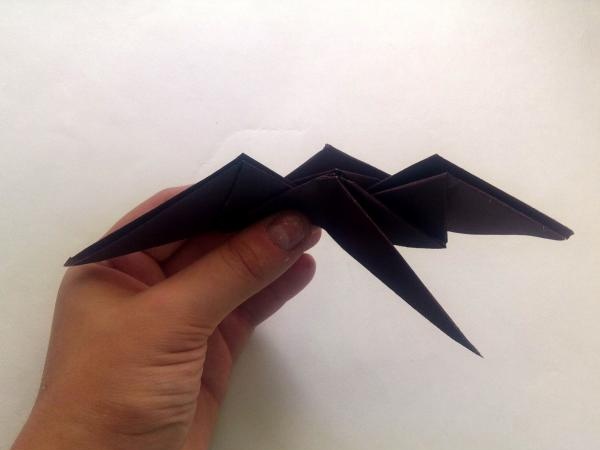
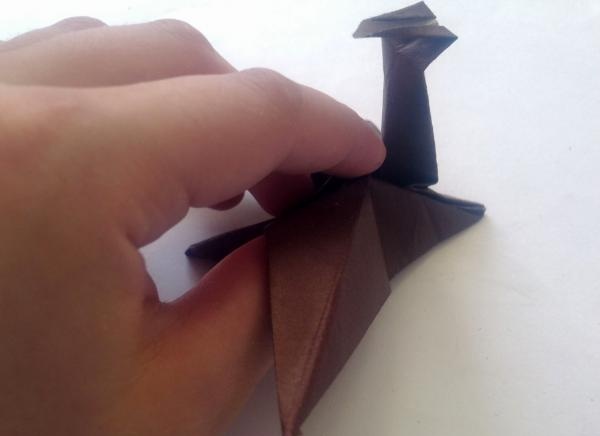
In order not to leave the animal headless, bend one of the head-tails perpendicular to the body and bend it in the opposite direction to the original one, and then form its head with two small bends.
![paper dragon](https://i.washerhouse.com/images/17/2058-bumazhnyy-drakon.jpg)
![paper dragon](https://i.washerhouse.com/images/17/2059-bumazhnyy-drakon.jpg)
In this case, it does not matter at all on which side your dragon’s head will be located and which side its tail will be located.
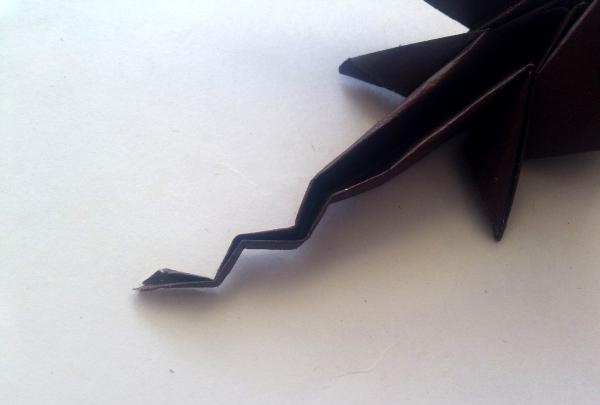
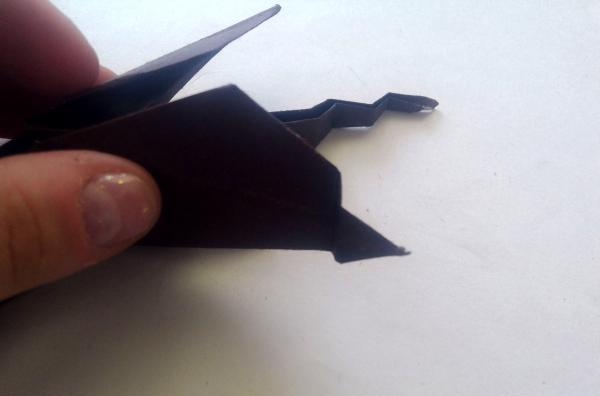
The tail can be absolutely anything: it can be bent in a zigzag, unfolded, twisted, wrinkled - just let your imagination run wild!
![paper dragon](https://i.washerhouse.com/images/17/2060-bumazhnyy-drakon.jpg)
There is only one important part left - the wings. Just unfold them a little, as in the photo, and bend them, ironing the fold.
![paper dragon](https://i.washerhouse.com/images/17/2061-bumazhnyy-drakon.jpg)
![paper dragon](https://i.washerhouse.com/images/17/2062-bumazhnyy-drakon.jpg)
![paper dragon](https://i.washerhouse.com/images/17/2063-bumazhnyy-drakon.jpg)
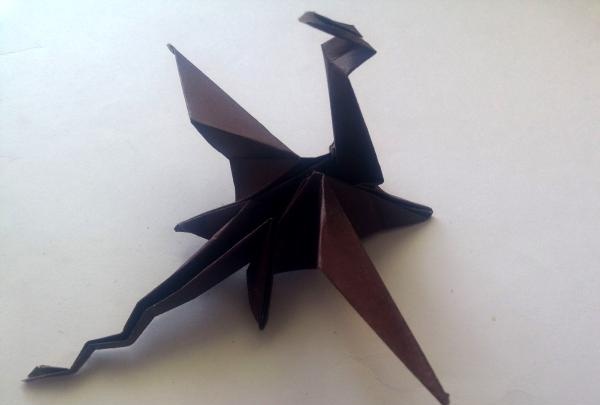
The appearance of the tips of the wings, as well as the tail, does not matter - do as you see fit.
![paper dragon](https://i.washerhouse.com/images/17/2064-bumazhnyy-drakon.jpg)
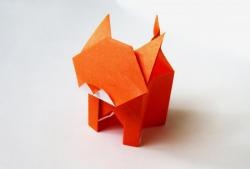
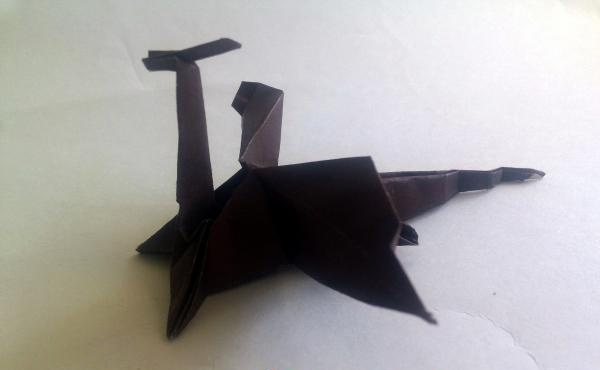
Your very own proud beast is ready!
![paper dragon](https://i.washerhouse.com/images/17/2065-bumazhnyy-drakon.jpg)
![paper dragon](https://i.washerhouse.com/images/17/2066-bumazhnyy-drakon.jpg)
![paper dragon](https://i.washerhouse.com/images/17/2067-bumazhnyy-drakon.jpg)