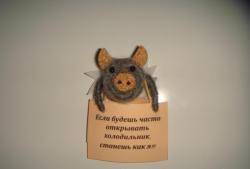
•Salty dough
•Acrylic paints
•2 brushes (thin and medium size)
•Acrylic glossy varnish
•Magnet
•Jar with water
•Baking paper
•Glue moment
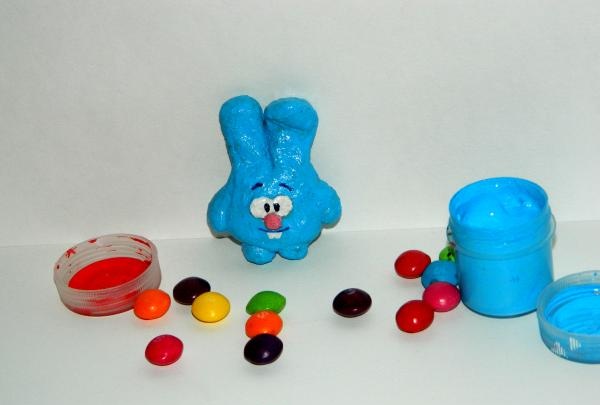
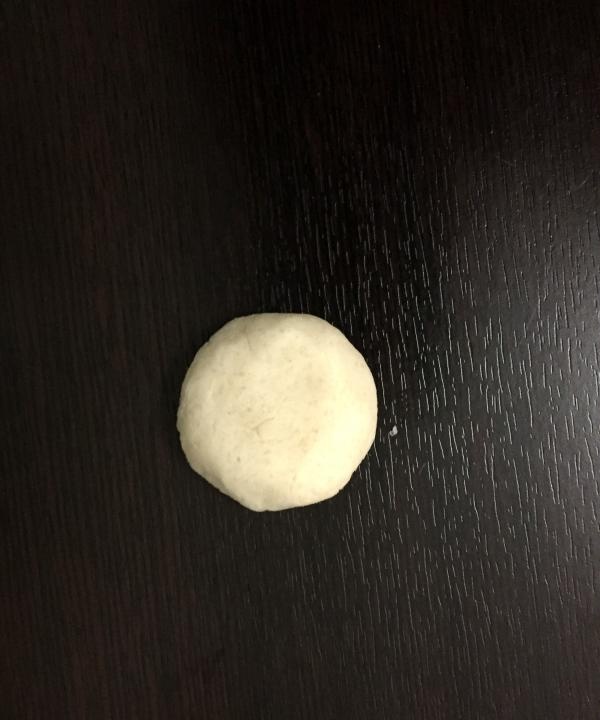
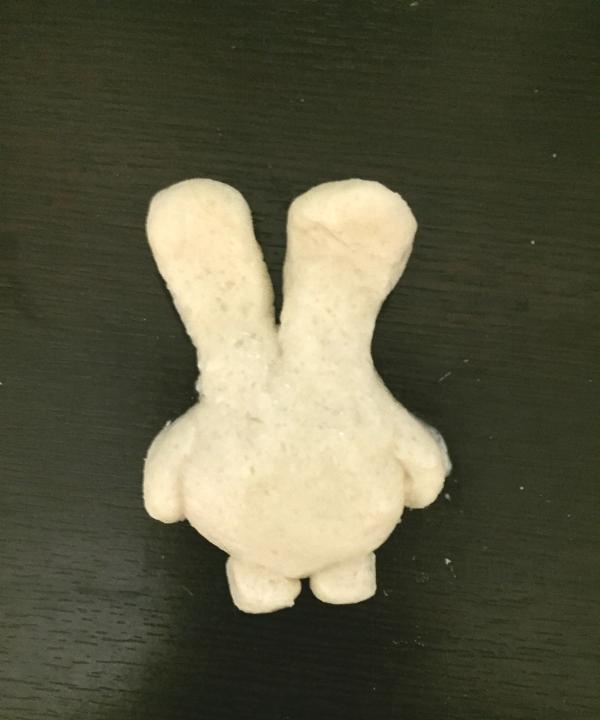
1.Make a circle from the salt dough (it’s best to start right away on baking paper) and flatten it a little.
![Salt dough magnet Smesharik Krosh](https://i.washerhouse.com/images/13/3057-magnit-iz-solenogo-testa-smesharik-krosh.jpg)
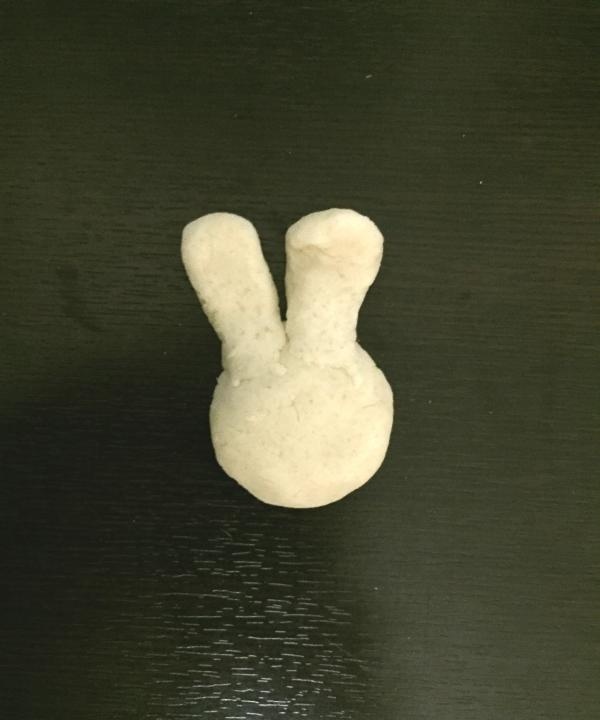
2. Roll two pieces of dough into “sausages” and make ears out of them. We bend one ear slightly. Glue the ears to the body.
![Salt dough magnet Smesharik Krosh](https://i.washerhouse.com/images/13/3058-magnit-iz-solenogo-testa-smesharik-krosh.jpg)
3. Roll out 2 more “sausages”, which should be half the size of the previous ones.
![Salt dough magnet Smesharik Krosh](https://i.washerhouse.com/images/13/3059-magnit-iz-solenogo-testa-smesharik-krosh.jpg)
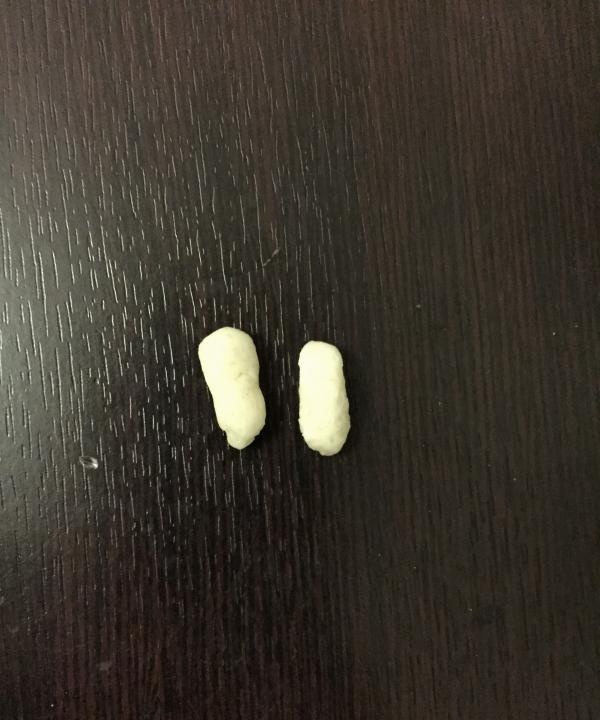
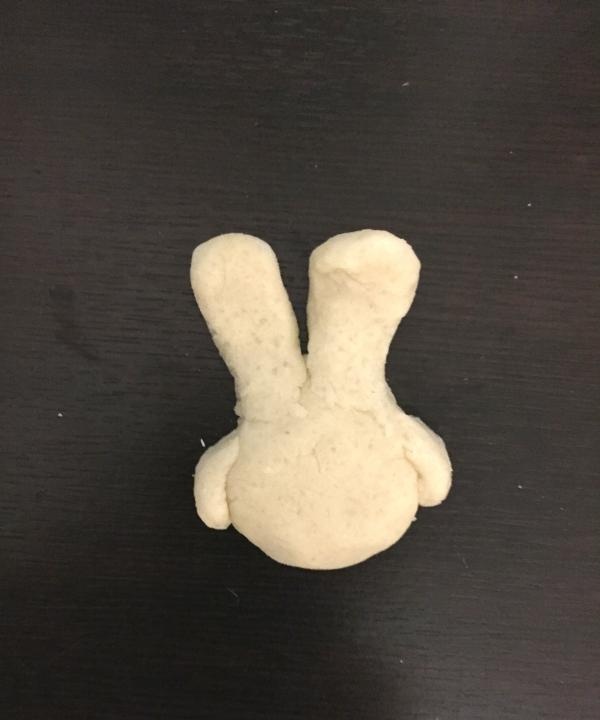
4. We make handles from “sausages” and stick them to the base.
![Salt dough magnet Smesharik Krosh](https://i.washerhouse.com/images/13/3060-magnit-iz-solenogo-testa-smesharik-krosh.jpg)
5. Make two balls from small pieces of dough and slightly flatten them. These will be the legs of the hero from Smeshariki.
![Salt dough magnet Smesharik Krosh](https://i.washerhouse.com/images/13/3061-magnit-iz-solenogo-testa-smesharik-krosh.jpg)
6.Attach the legs to the body.
![Salt dough magnet Smesharik Krosh](https://i.washerhouse.com/images/13/3062-magnit-iz-solenogo-testa-smesharik-krosh.jpg)
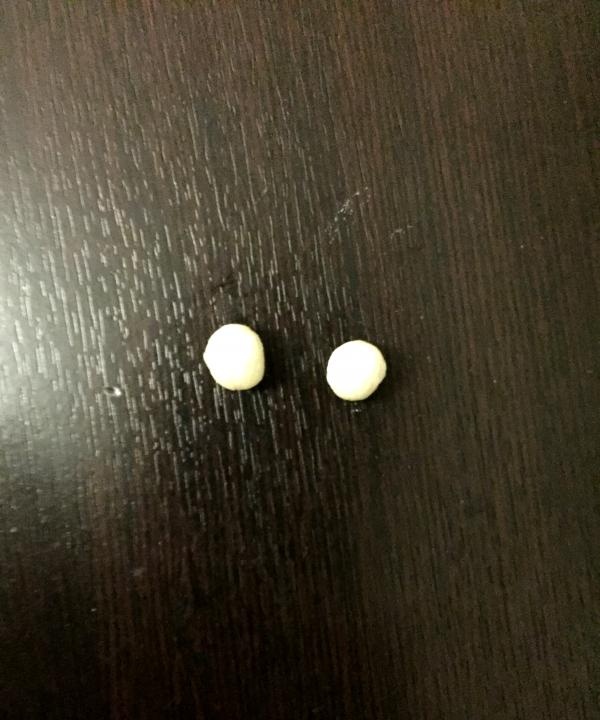
7.Roll out three more balls. From these we make Krosh's eyes and nose.
![Salt dough magnet Smesharik Krosh](https://i.washerhouse.com/images/13/3063-magnit-iz-solenogo-testa-smesharik-krosh.jpg)
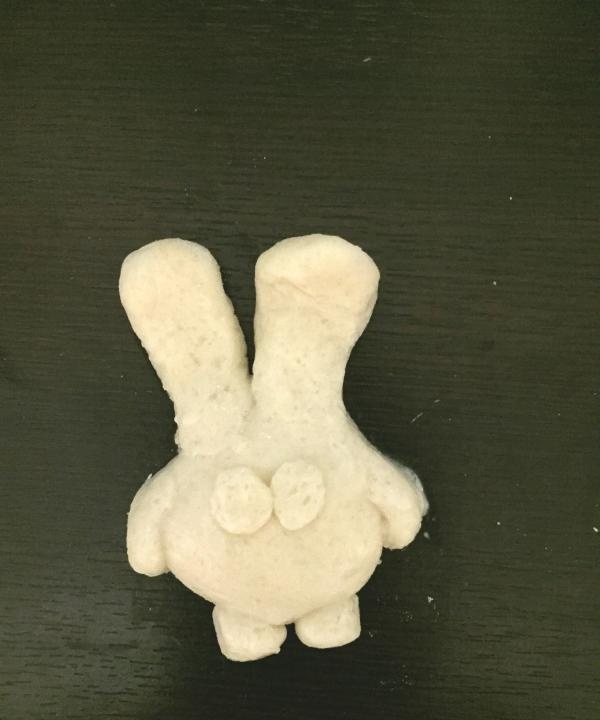
8.Dip the brush into water and smooth out all the joints.
![Salt dough magnet Smesharik Krosh](https://i.washerhouse.com/images/13/3064-magnit-iz-solenogo-testa-smesharik-krosh.jpg)
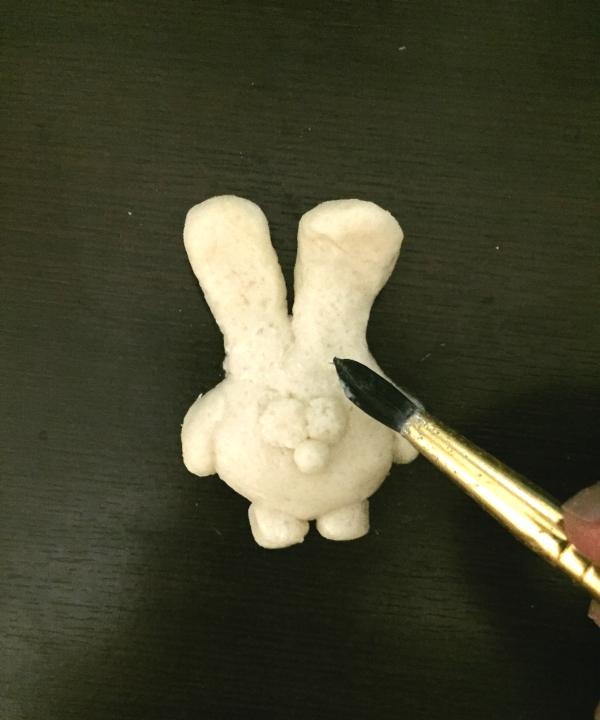
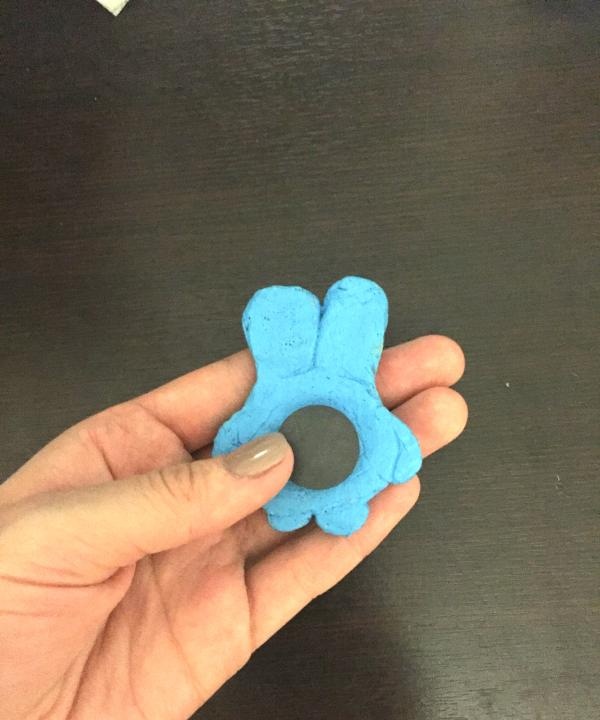
9.After we have molded the base of the magnet, we need to wait for it to dry. To do this, dry the figurine in the oven for three hours (at a temperature of 70-100 degrees).
![Salt dough magnet Smesharik Krosh](https://i.washerhouse.com/images/13/3065-magnit-iz-solenogo-testa-smesharik-krosh.jpg)
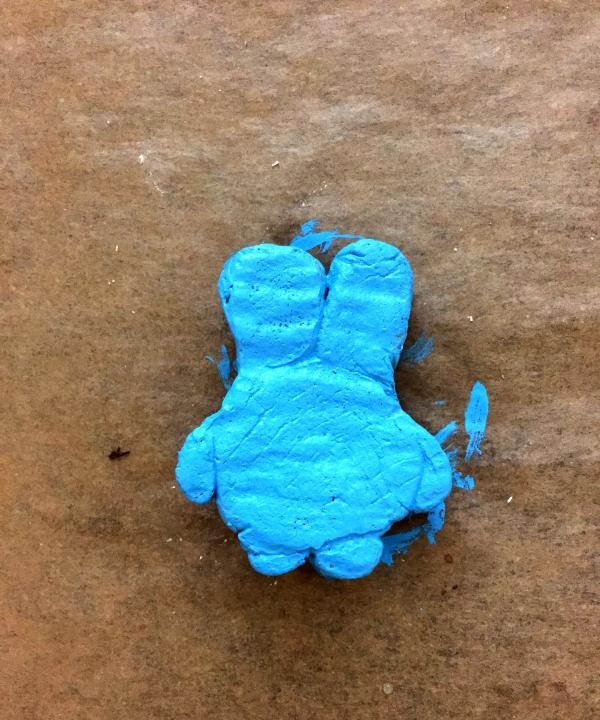
10.When the figure is dry, you need to paint it with acrylic paints. First, paint the flat side on which the magnet itself will be attached. Next, paint the front side with blue acrylic paint.
![Salt dough magnet Smesharik Krosh](https://i.washerhouse.com/images/13/3066-magnit-iz-solenogo-testa-smesharik-krosh.jpg)
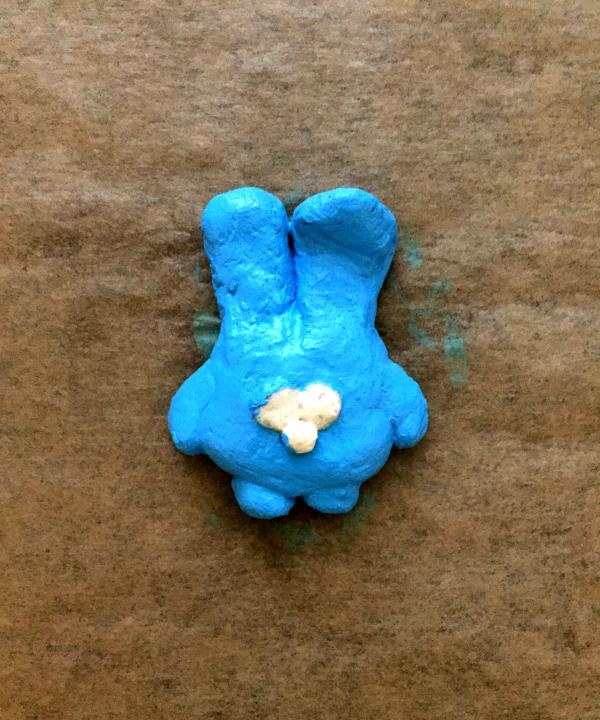
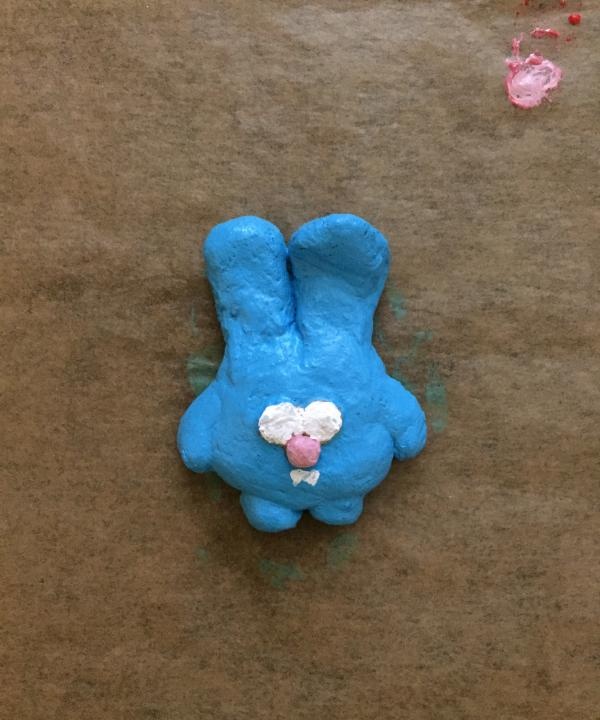
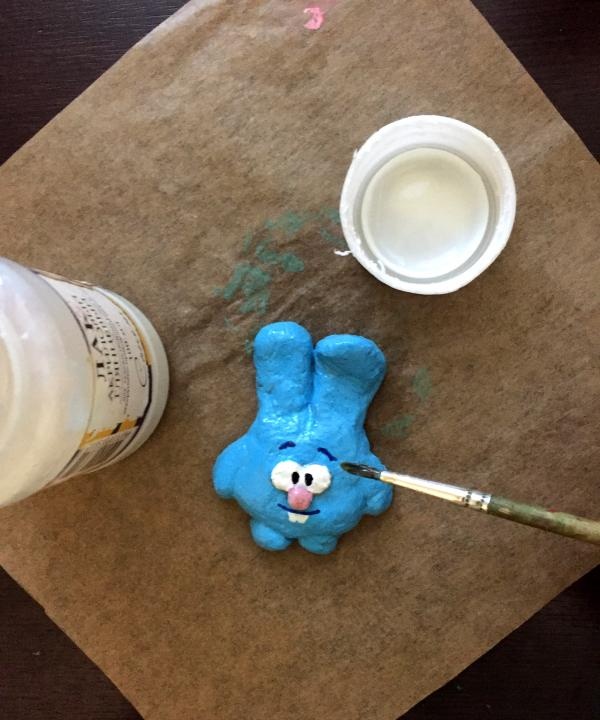
11.We paint the eyes with white acrylic, and the nose with pink.
![Salt dough magnet Smesharik Krosh](https://i.washerhouse.com/images/13/3067-magnit-iz-solenogo-testa-smesharik-krosh.jpg)
12.Draw the teeth with white paint. You must use a thin brush. Use blue paint to draw the eyebrows and line of the mouth. Using black paint we finish the eyes of Smesharik.
![Salt dough magnet Smesharik Krosh](https://i.washerhouse.com/images/13/3068-magnit-iz-solenogo-testa-smesharik-krosh.jpg)
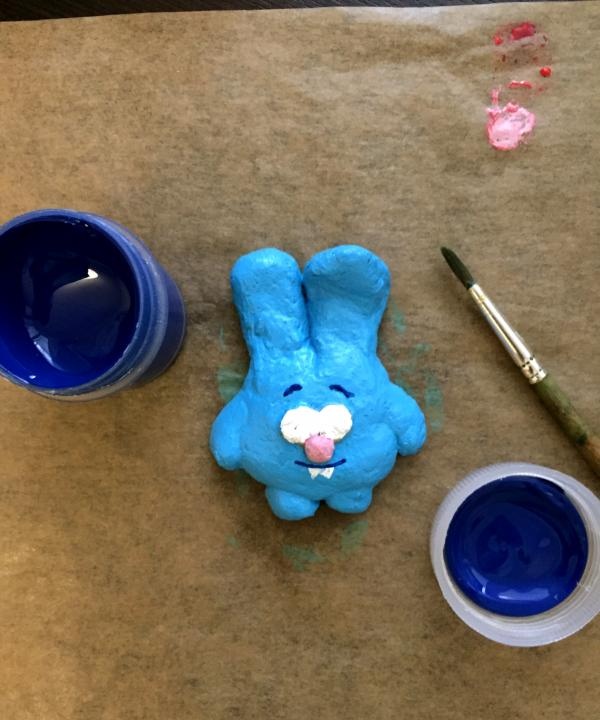
13. Acrylic paint dries quickly, so after half an hour you can glue the magnet with adhesive.
![Salt dough magnet Smesharik Krosh](https://i.washerhouse.com/images/13/3069-magnit-iz-solenogo-testa-smesharik-krosh.jpg)
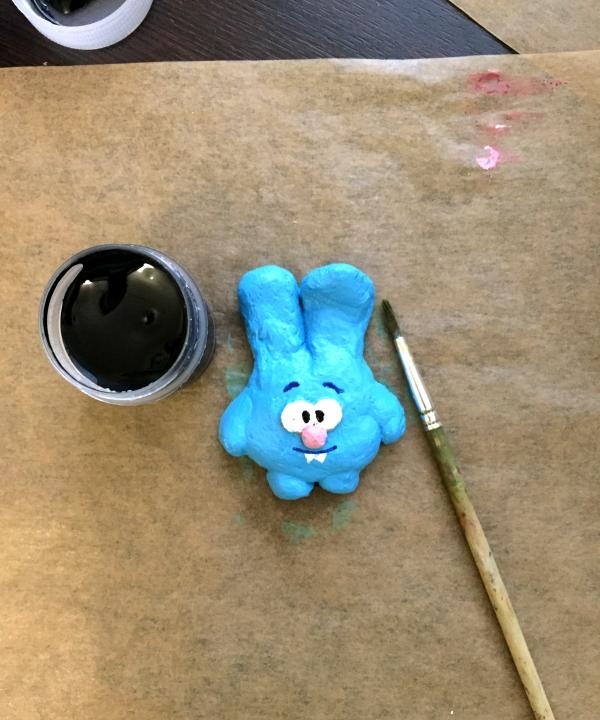
14.And finally, we cover the figure with acrylic varnish, which dries for about 30 minutes.
![Salt dough magnet Smesharik Krosh](https://i.washerhouse.com/images/13/3070-magnit-iz-solenogo-testa-smesharik-krosh.jpg)
![Salt dough magnet Smesharik Krosh](https://i.washerhouse.com/images/13/3071-magnit-iz-solenogo-testa-smesharik-krosh.jpg)
Both adults and children can make a salt dough magnet. Using this principle, you can create other heroes of “Smeshariki” and collect a whole collection of magnets!
![Salt dough magnet Smesharik Krosh](https://i.washerhouse.com/images/13/3072-magnit-iz-solenogo-testa-smesharik-krosh.jpg)