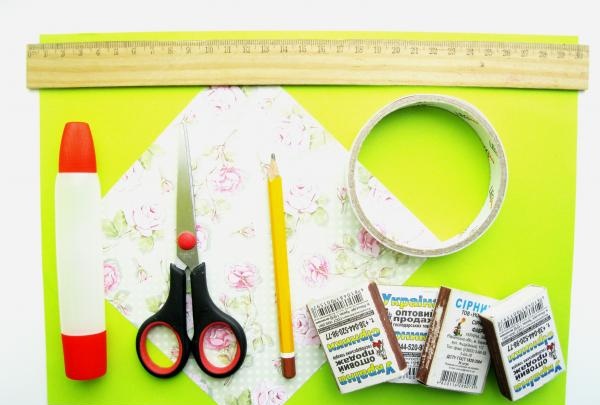
Necessary materials:
- green decorative paper;
- green double-sided paper;
- four matchboxes;
- Double-sided tape;
- office glue;
- ruler;
- scissors;
- a simple pencil.
![Matchbox chair](https://i.washerhouse.com/images/12/2633-kreslo-iz-spichechnyh-korobkov.jpg)
Stages of making a chair:
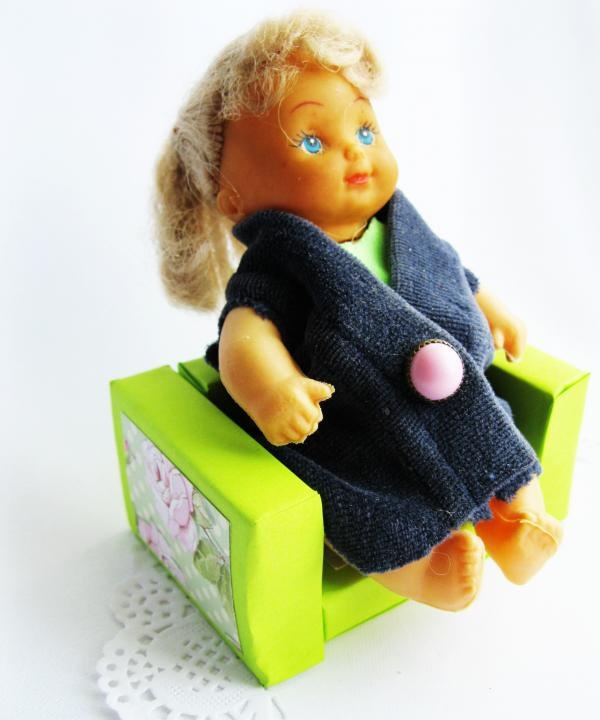
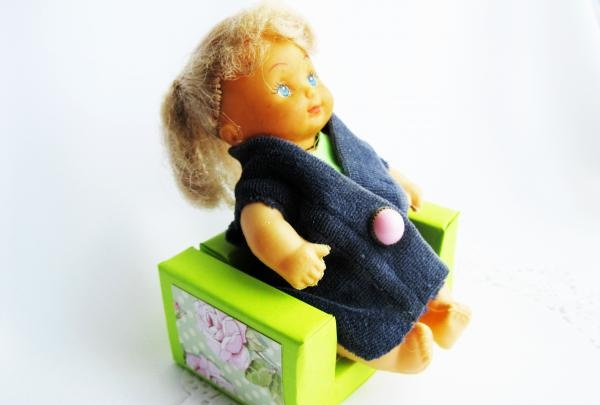
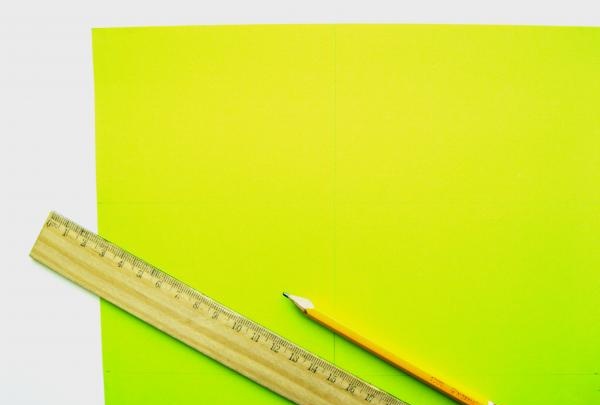
1. Our matchbox chair will be green in color. When making it, we cannot do without green double-sided paper. Draw 4 rectangles with dimensions 11 x 8 cm on it with a simple pencil.
![Matchbox chair](https://i.washerhouse.com/images/12/2634-kreslo-iz-spichechnyh-korobkov.jpg)
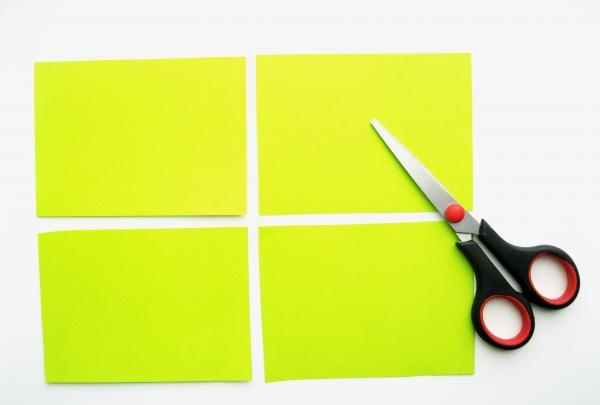
2. Cut out the rectangles with scissors.
![Matchbox chair](https://i.washerhouse.com/images/12/2635-kreslo-iz-spichechnyh-korobkov.jpg)
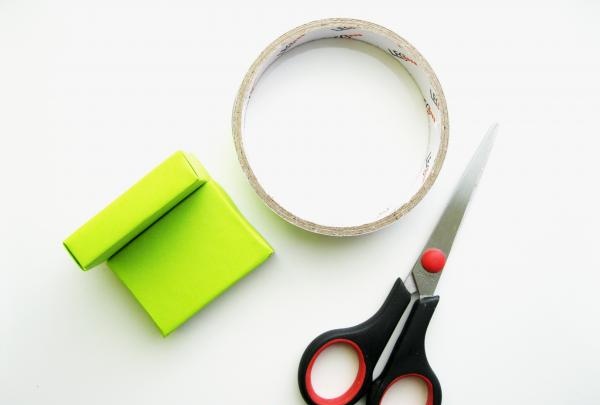
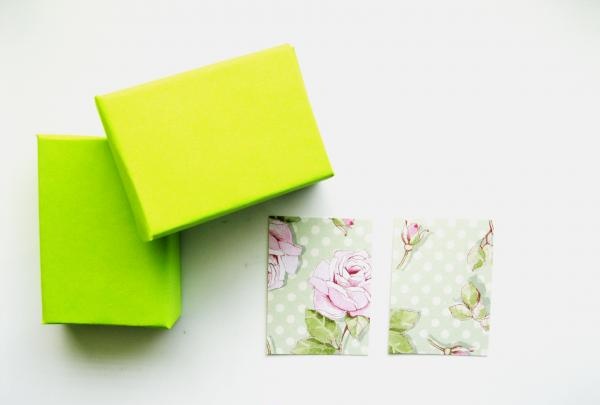
3. Carefully cover each matchbox with green paper.
![Matchbox chair](https://i.washerhouse.com/images/12/2636-kreslo-iz-spichechnyh-korobkov.jpg)
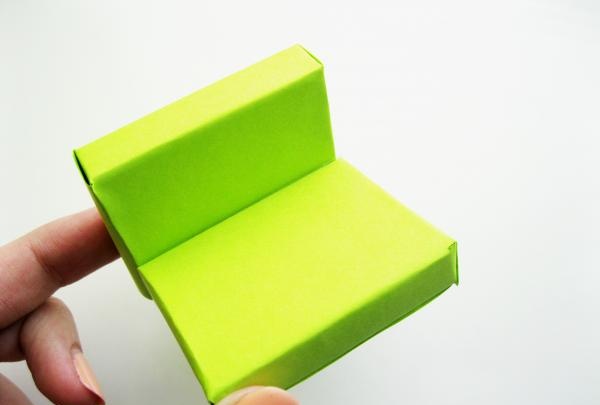
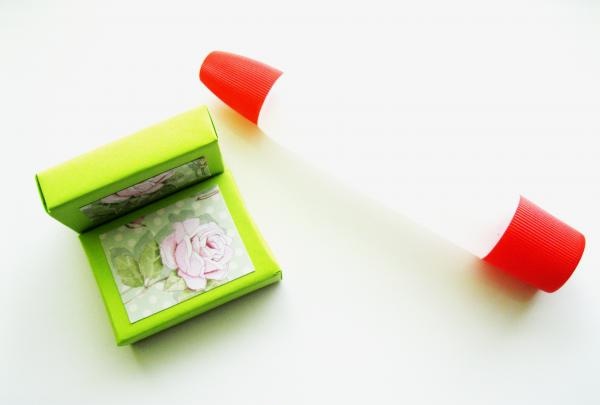
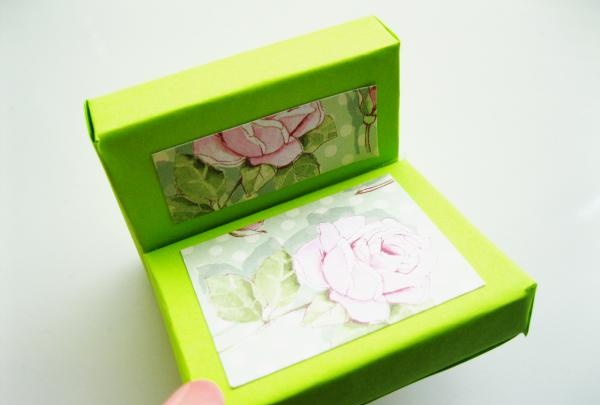
4. Take two matchboxes. We will place one horizontally, the other vertically.
![Matchbox chair](https://i.washerhouse.com/images/12/2637-kreslo-iz-spichechnyh-korobkov.jpg)
5. Glue at the point of contact with glue or double-sided tape.
![Matchbox chair](https://i.washerhouse.com/images/12/2638-kreslo-iz-spichechnyh-korobkov.jpg)
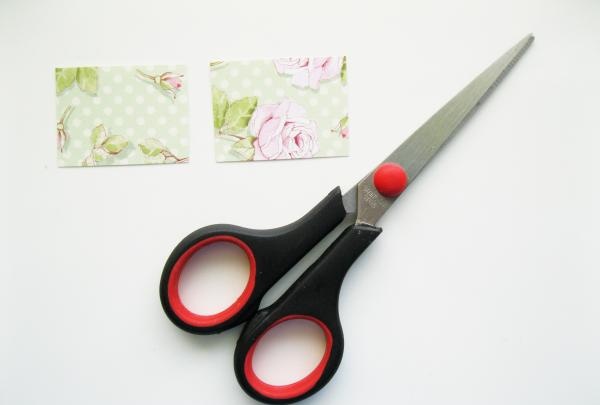
6. Decorate the seat with decorative paper. We take it and cut out two segments that will be slightly smaller than the matchboxes.
![Matchbox chair](https://i.washerhouse.com/images/12/2639-kreslo-iz-spichechnyh-korobkov.jpg)
![Matchbox chair](https://i.washerhouse.com/images/12/2640-kreslo-iz-spichechnyh-korobkov.jpg)
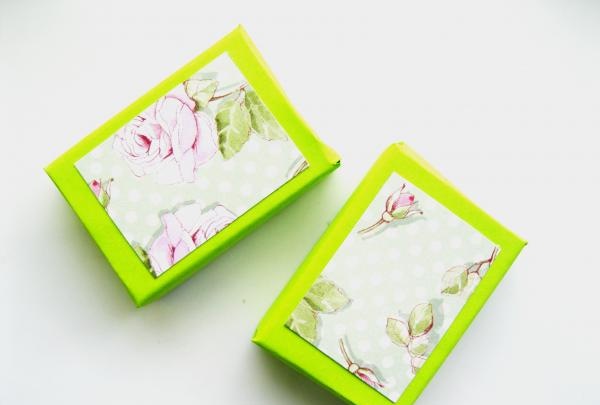
7. Glue it to the required places.
![Matchbox chair](https://i.washerhouse.com/images/12/2641-kreslo-iz-spichechnyh-korobkov.jpg)
![Matchbox chair](https://i.washerhouse.com/images/12/2642-kreslo-iz-spichechnyh-korobkov.jpg)
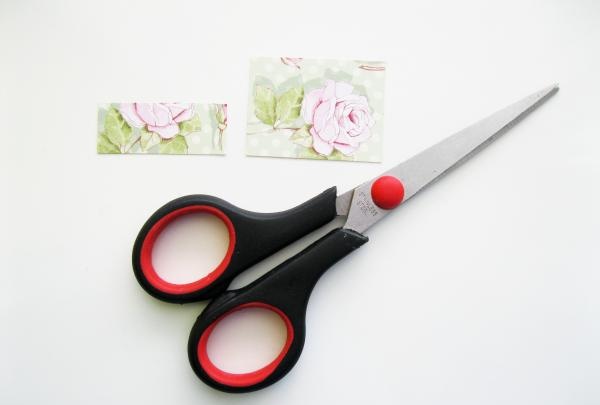
8. Now let’s decorate the other two matchboxes with this paper. To do this, cut out two rectangles 4 x 3 cm.
![Matchbox chair](https://i.washerhouse.com/images/12/2643-kreslo-iz-spichechnyh-korobkov.jpg)
![Matchbox chair](https://i.washerhouse.com/images/12/2644-kreslo-iz-spichechnyh-korobkov.jpg)
![Matchbox chair](https://i.washerhouse.com/images/12/2645-kreslo-iz-spichechnyh-korobkov.jpg)
9. Glue it onto the matchboxes in the middle.
![Matchbox chair](https://i.washerhouse.com/images/12/2646-kreslo-iz-spichechnyh-korobkov.jpg)
![Matchbox chair](https://i.washerhouse.com/images/12/2647-kreslo-iz-spichechnyh-korobkov.jpg)
![Matchbox chair](https://i.washerhouse.com/images/12/2648-kreslo-iz-spichechnyh-korobkov.jpg)
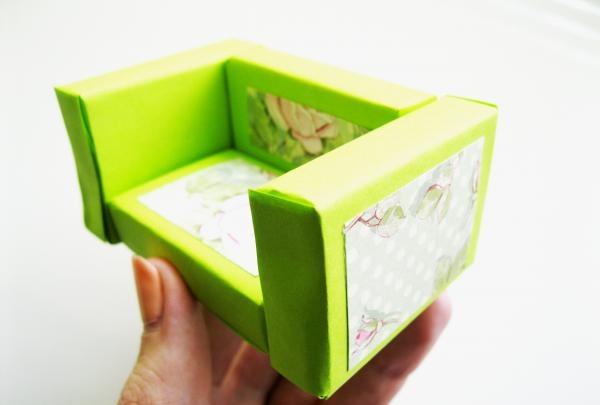
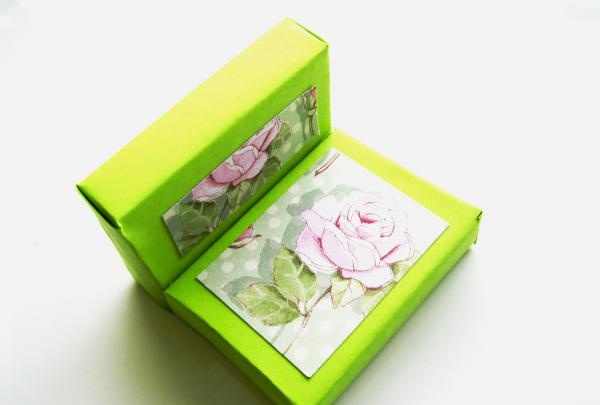
10. Place the matchboxes vertically and glue them to the other two.
![Matchbox chair](https://i.washerhouse.com/images/12/2649-kreslo-iz-spichechnyh-korobkov.jpg)
![Matchbox chair](https://i.washerhouse.com/images/12/2650-kreslo-iz-spichechnyh-korobkov.jpg)
![Matchbox chair](https://i.washerhouse.com/images/12/2651-kreslo-iz-spichechnyh-korobkov.jpg)
![Matchbox chair](https://i.washerhouse.com/images/12/2652-kreslo-iz-spichechnyh-korobkov.jpg)
![Matchbox chair](https://i.washerhouse.com/images/12/2653-kreslo-iz-spichechnyh-korobkov.jpg)
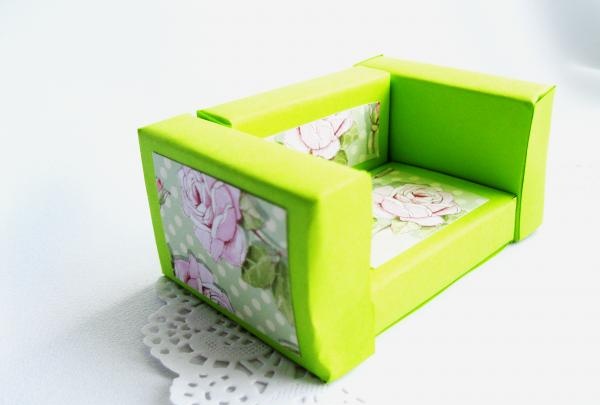
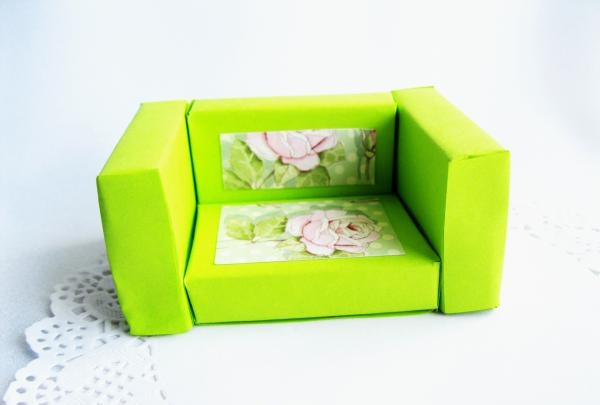
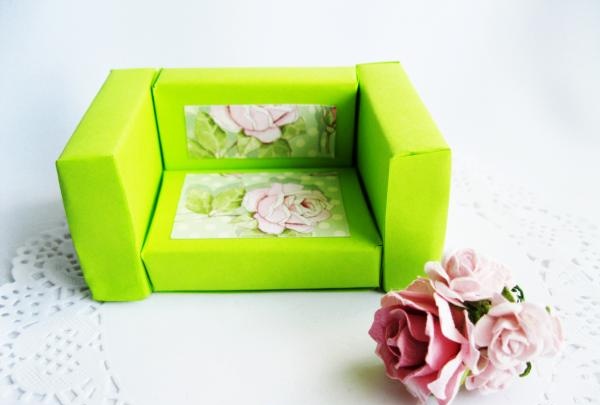
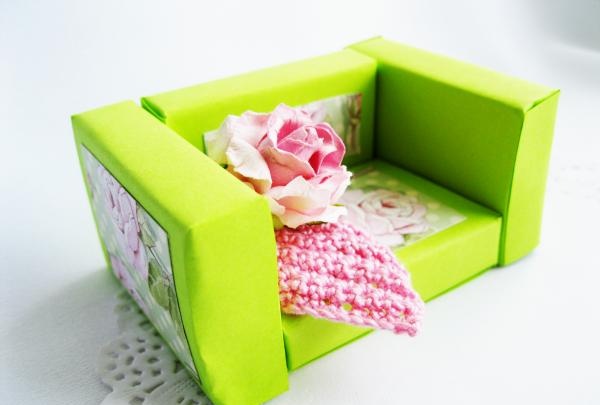
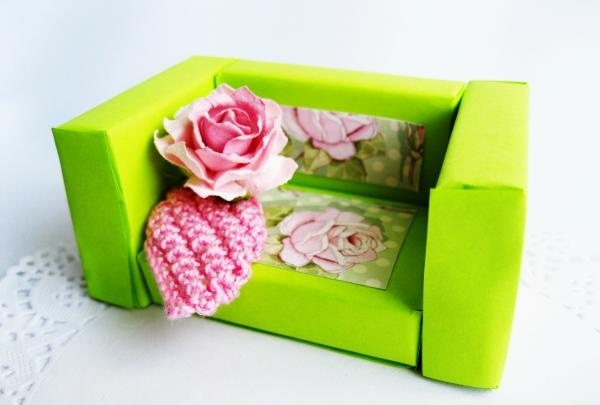
As a result, we got a beautiful green chair for dolls. It’s great if your child makes a couple more chairs and a table in the same style. In this case, all of the daughter’s favorite dolls can sit and gather together at one table.
![Matchbox chair](https://i.washerhouse.com/images/12/2654-kreslo-iz-spichechnyh-korobkov.jpg)
![Matchbox chair](https://i.washerhouse.com/images/12/2655-kreslo-iz-spichechnyh-korobkov.jpg)
![Matchbox chair](https://i.washerhouse.com/images/12/2656-kreslo-iz-spichechnyh-korobkov.jpg)