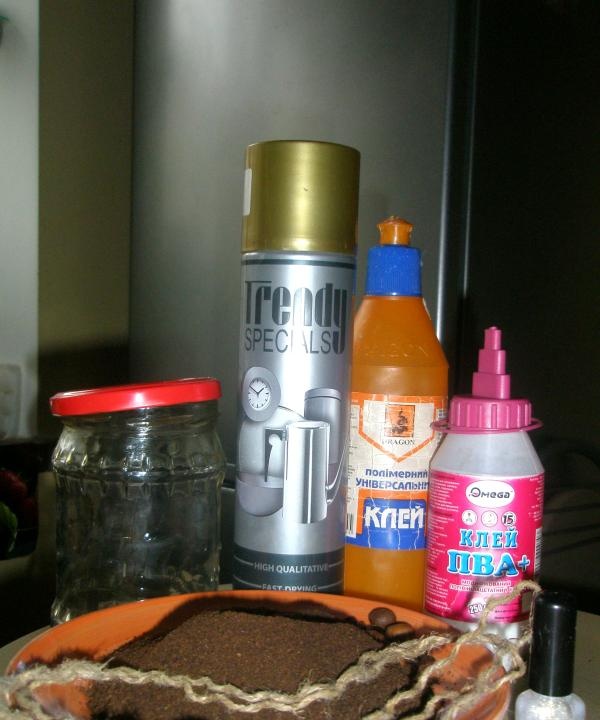
So, we will need:
1. Glass jar with a capacity of 0.5 or 1 liter.
2. Golden spray paint.
3. Polymer glue.
4. Ground coffee.
5. Coffee beans.
6. Jute or linen twine.
7. Pearlescent or golden nail polish.
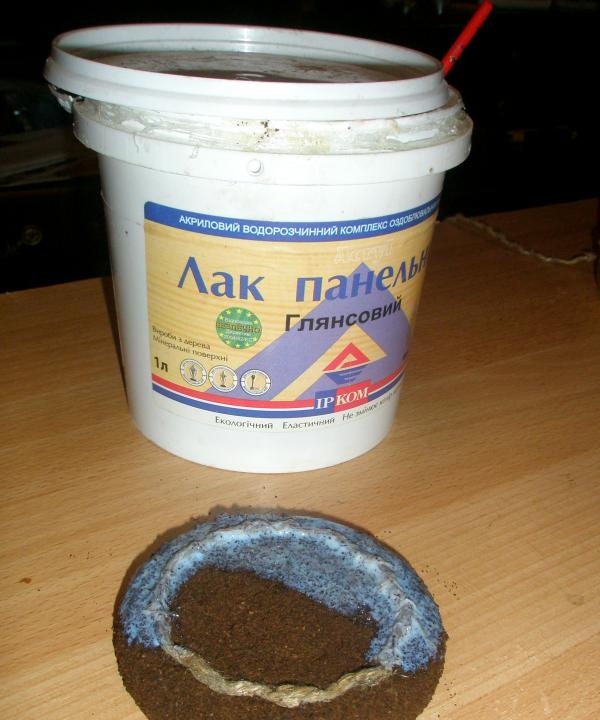
8. Acrylic panel varnish.
9. PVA glue.
10. Brush.
11. Scissors.
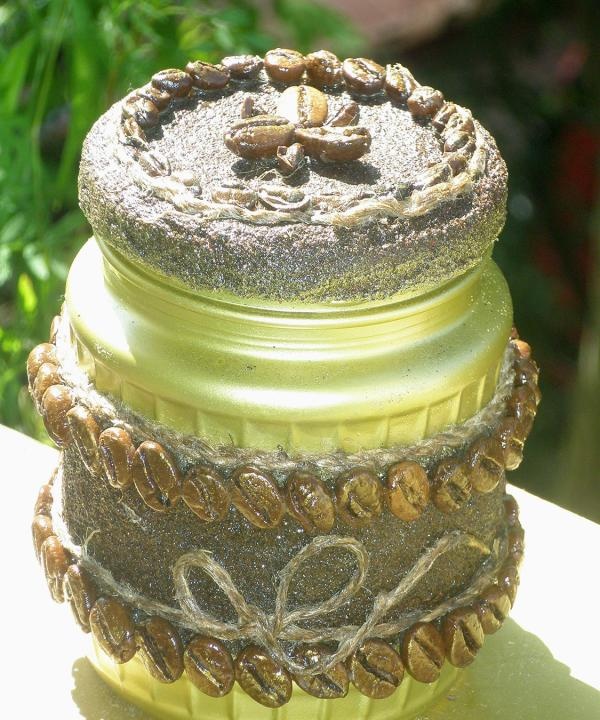
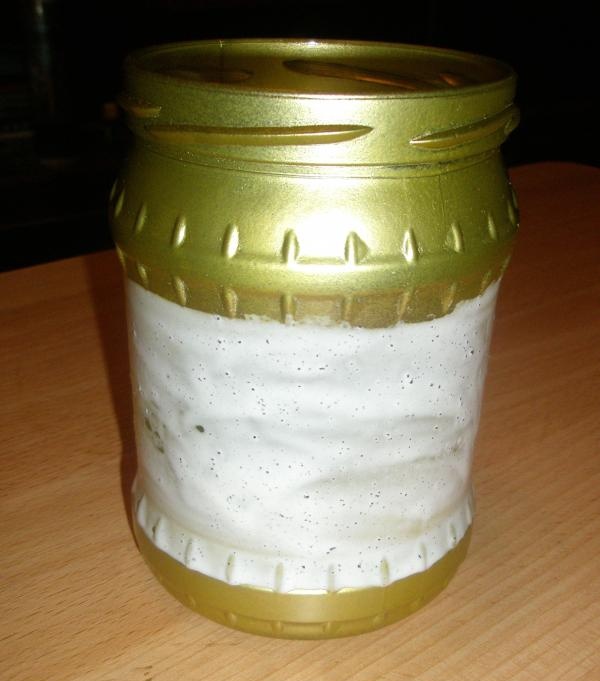
Wash the jar thoroughly and degrease it with alcohol or another product so that the paint lays evenly and adheres well. Then shake the paint can and spray it on the outside of the jar, top and bottom, excluding the middle. While the paint dries, let's work on the lid. It must be covered with a thick layer of PVA glue and dipped in ground coffee.
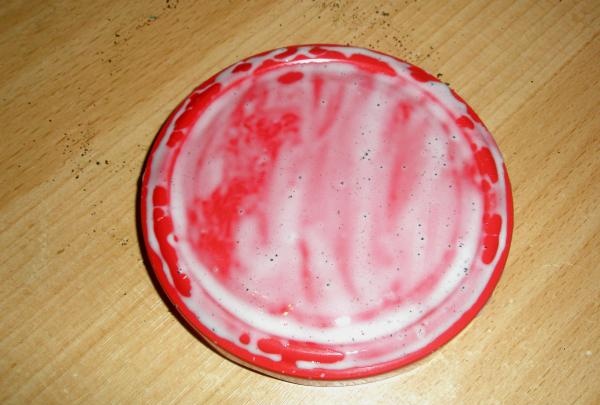
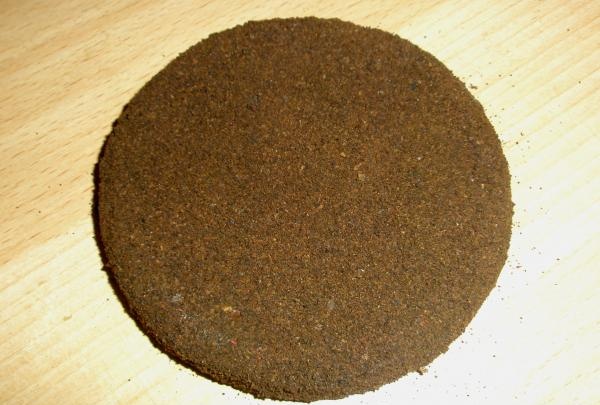
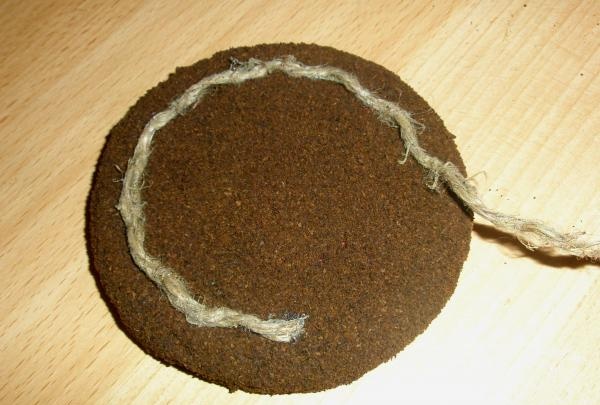
In order to save money, you can use the grounds from drunk coffee, which must first be dried.Covering the surface with ground coffee should be repeated until a uniform layer is achieved, through which the paint of the lid will not break through. Then we take the twine and glue it around the circumference of the lid.
When the paint on the can has dried, you need to cover the middle part with glue and roll it over the spilled coffee.
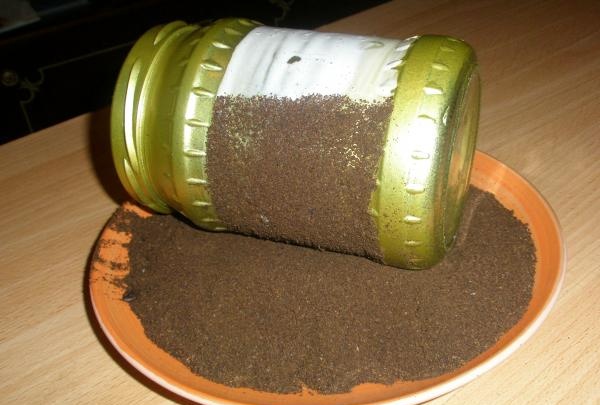
The coating of the coffee can should also be repeated several times to obtain an even surface.

Then we tie the jar from the bottom and top with twine, while decorating the “tails”.
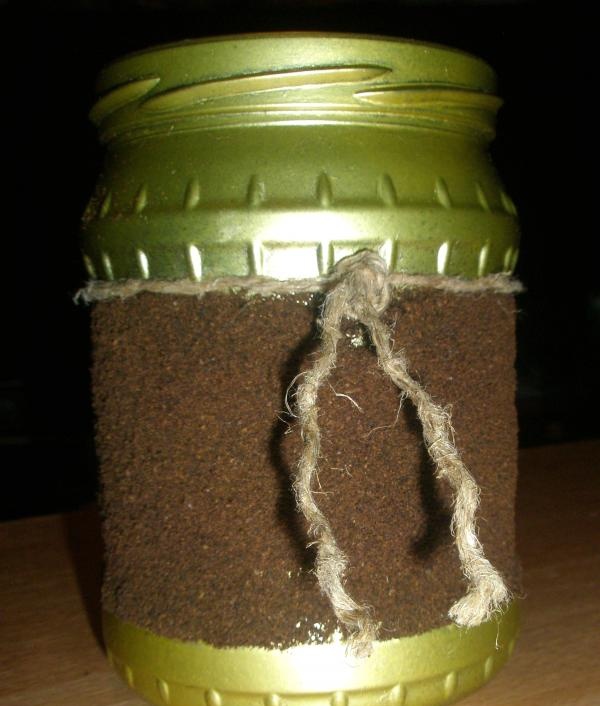
Glue coffee beans to the ends of the rope.
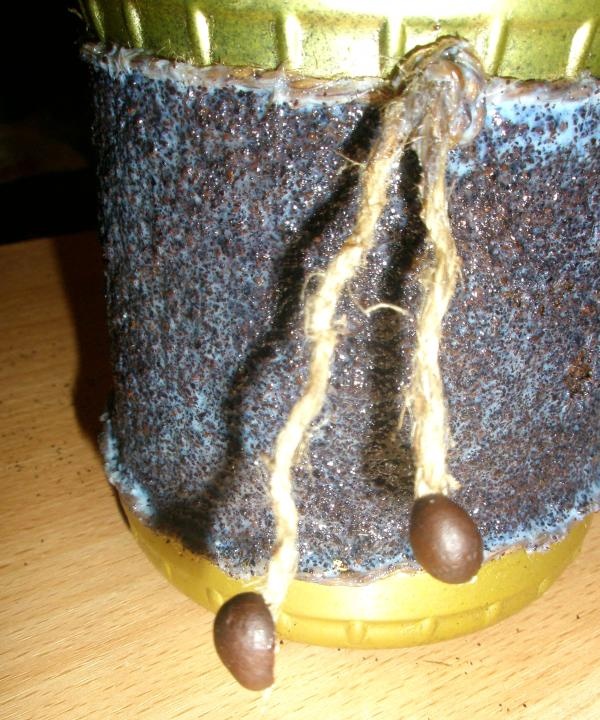
Now we cover the surface of the jar and the lid on which the coffee was applied with a layer of acrylic varnish.

After a few hours, the varnish will dry and you can proceed to the next stage - decorating with grains. In order for the grains to stick evenly, they must be calibrated before gluing. Lightly coat selected coffee beans with pearlescent or golden varnish. We place the grains in the center of the flower-shaped lid and around the circumference of the twine, and glue them with polymer glue.

As a result, you should get a lid like this.
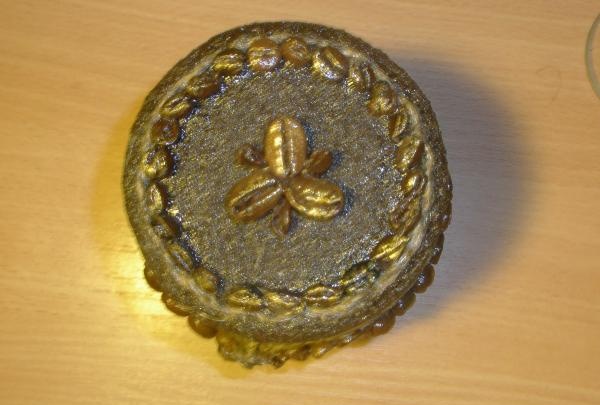
Glue the coffee beans to the jar just below the level of the twine.
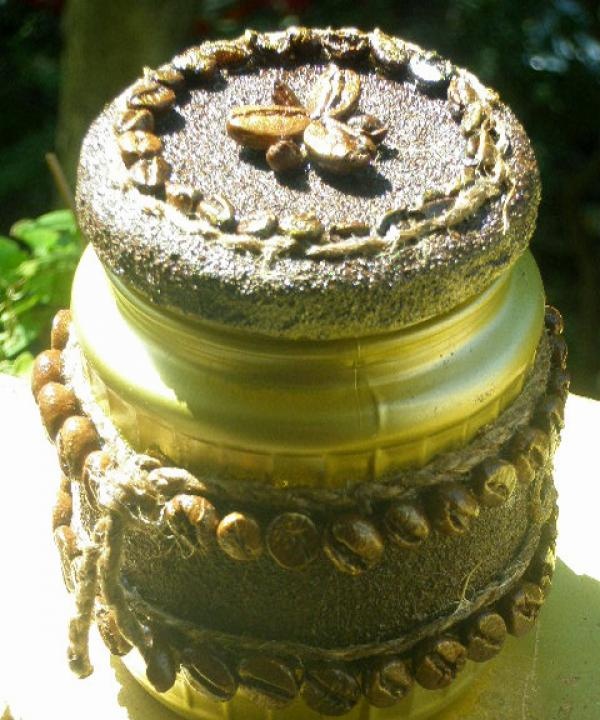
After the glue has dried, after about an hour, the grains must be covered with a layer of acrylic varnish so that the composition fills all the gaps. Then the grains will stick well and will not come off. That's it, the coffee jar is ready.