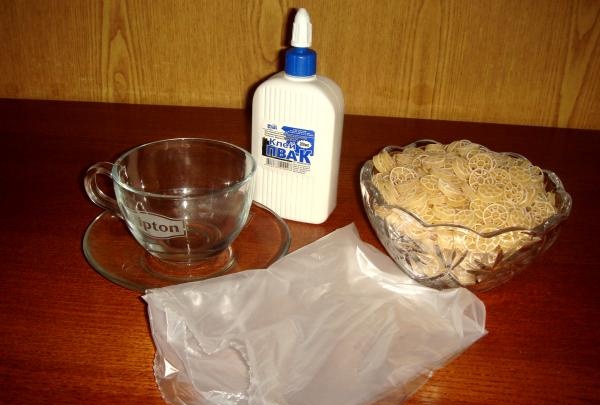
For work, prepare:
- wheel-shaped pasta 250 grams;
- a tube of PVA glue;
- cup and saucer;
- plastic bags.
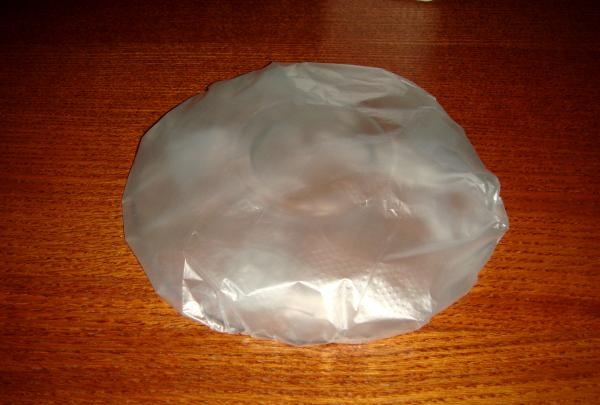
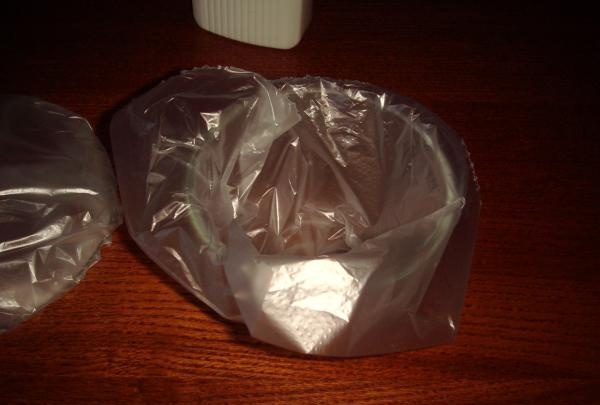
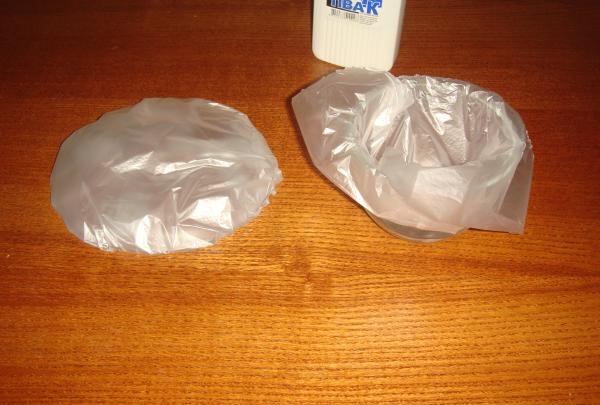
First you need to wrap the saucer and cup in a plastic bag. To do this, it is better to turn the saucer upside down and cover it with polyethylene on top. And in the cup, it is important to place the package in the middle.
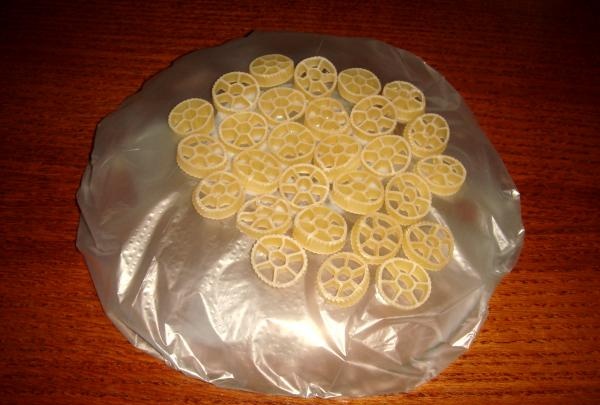
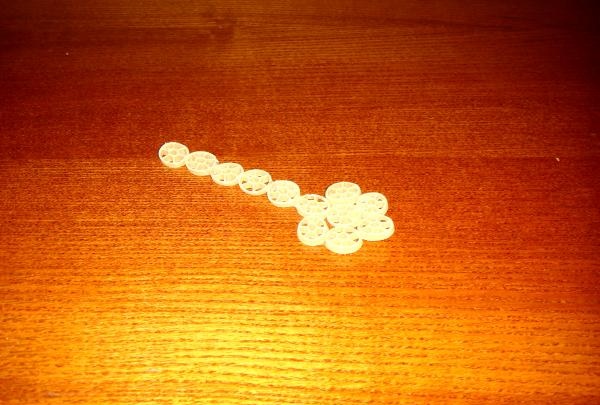
Now take a saucer and apply a little glue to the very bottom. Start gluing the “wheels”.Place one in the very center, then place 5 pasta around it. For the next row you will need 12 pieces.

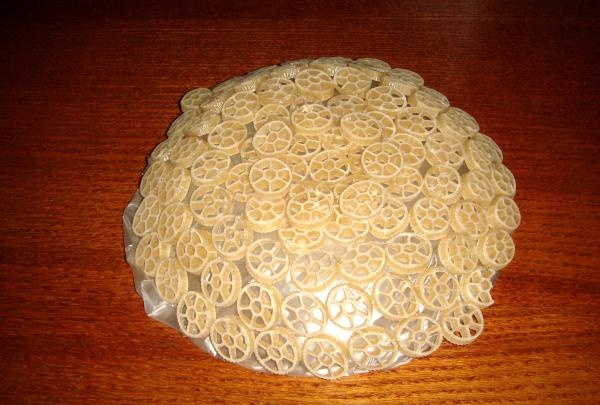
Continue gluing the pasta, gradually working your way down to the edges of the saucer. It is important to apply glue not only to the polyethylene, but also to the joint between the pasta.
As soon as the entire surface of the saucer is filled, apply another drop of glue on top (namely at the joints). Plus glue 7 of them on the second row from the center so that the pasta saucer is on a low stand.
Place the workpiece near the battery so that the glue dries faster. It's better to leave it overnight.
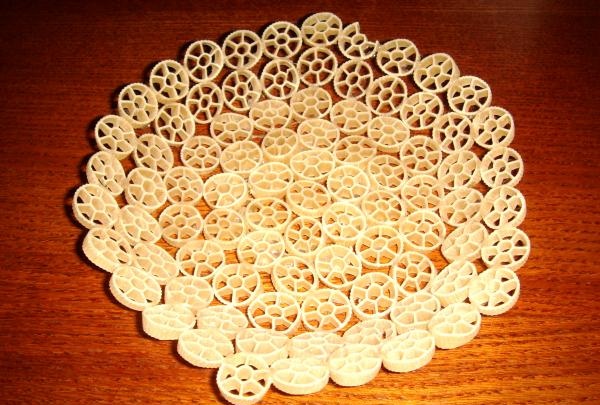
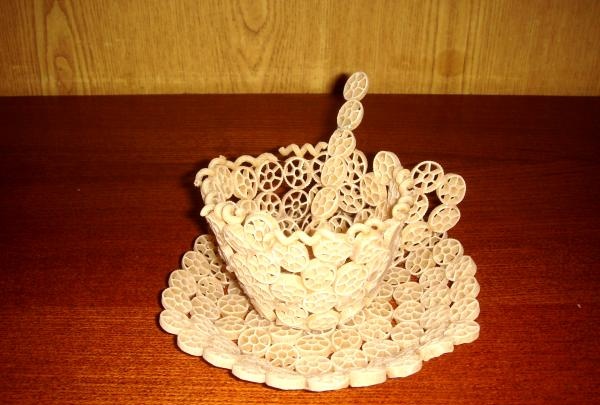
When everything is dry and sticks tightly, you need to carefully remove the pasta saucer from the polyethylene. It turns out to be such beauty.
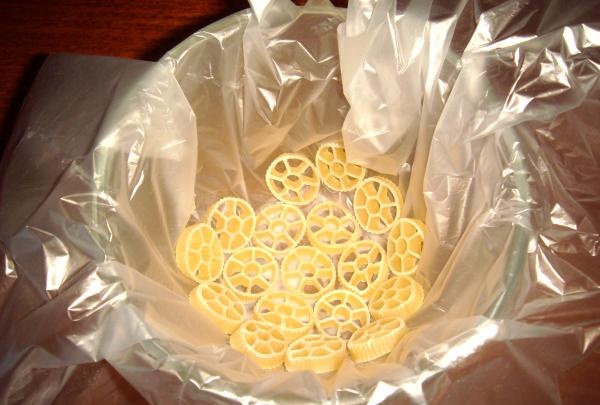
Fill the cup with pasta from the middle. In the same way, you need to put one in the center, then 5 pieces on the second circle, then 12 on the next turn.
Once you fill the entire surface of the cup, do not forget to coat all the joints of the pasta with glue on top. To create edges, you can glue spirals around the entire perimeter.
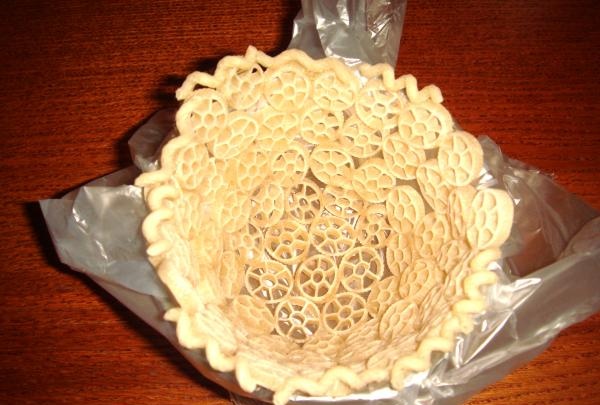
Place the workpiece overnight near the battery. When the glue is completely dry, remove the pasta from the plastic. This is how the cup turns out.
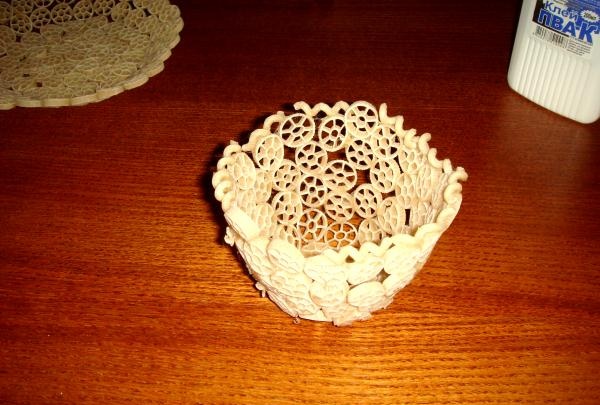
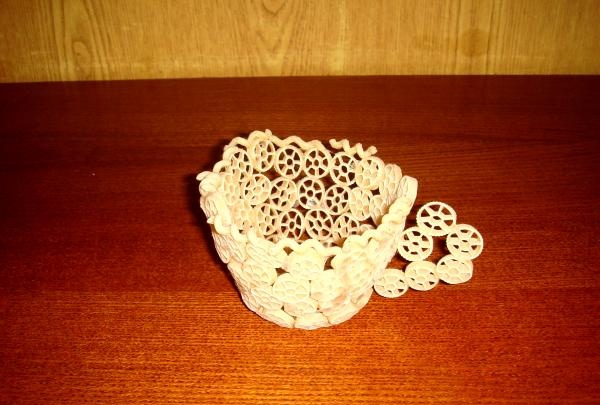
All that remains is to make a handle from 6 rings glued together at one edge, and glue it to the side of the container. The cup is also ready.
You only need to glue the spoon together. Fold 7 rings into a small circle, and 5 pasta will be needed to form a handle. Place everything on a plastic bag and wait until the glue dries. The spoon is ready.
Assemble the tea set. This craft will be a great decoration for your kitchen or dining room.
If you have a lot of free shelves in your kitchen, then you can make three or even six of these crafts, plus a kettle.If you want to add color to your work, then buy paint in a can (gold or silver) and paint the service.