Here are a few ideas to consider.
Idea No. 1.
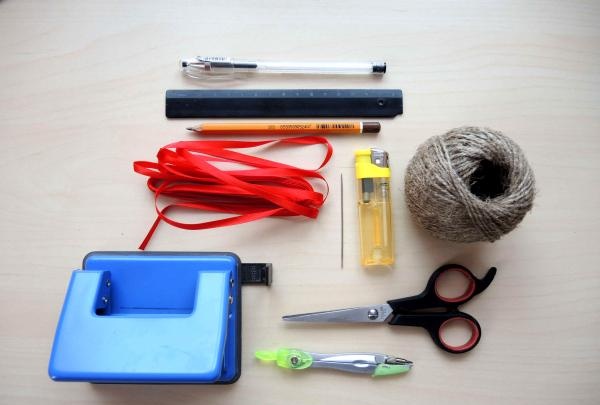
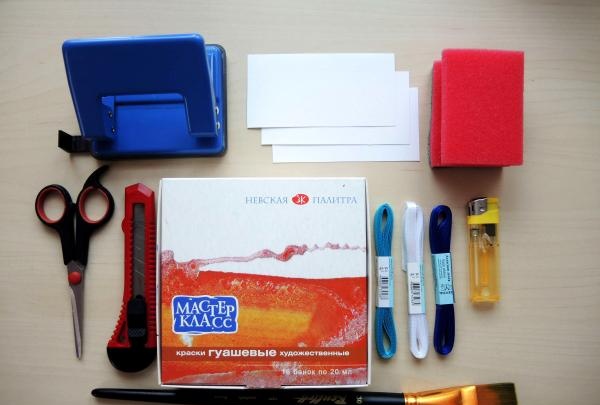
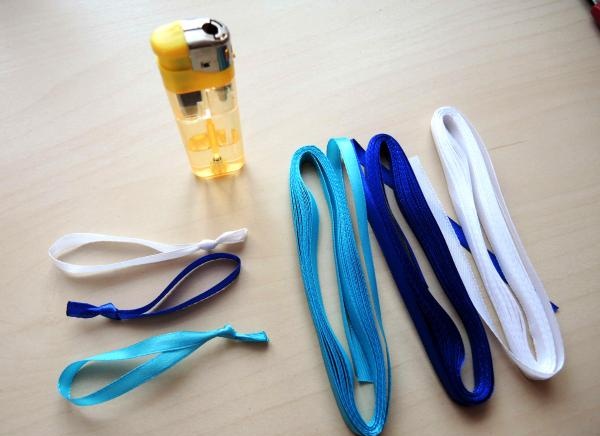
To make tags you will need:
Watch the video
White cardboard or thick paper.
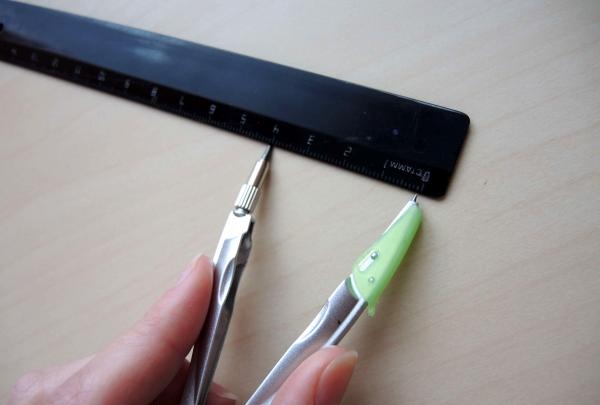
- - Compass.
- - Pencil.
- - Hole puncher.
- - Black gel pen (fine marker).
- - Thick sewing needle.
- - Linen twine.
- - Lighter.
- - Red satin ribbon.
- - Paints.
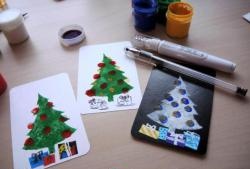
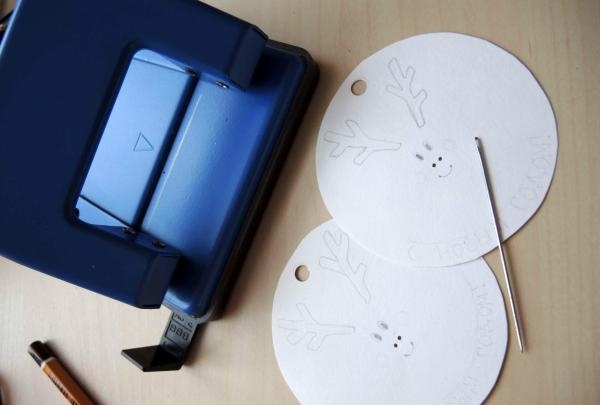
First of all, let's prepare templates.
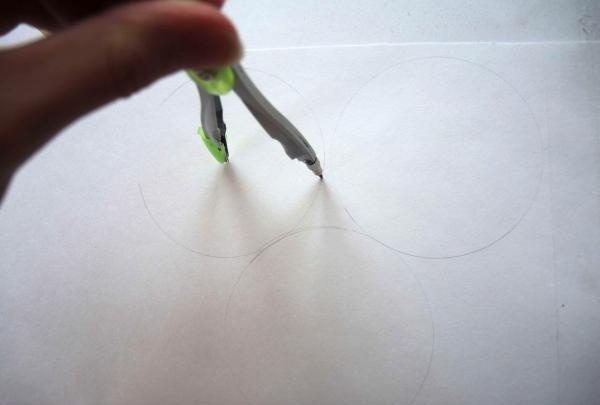
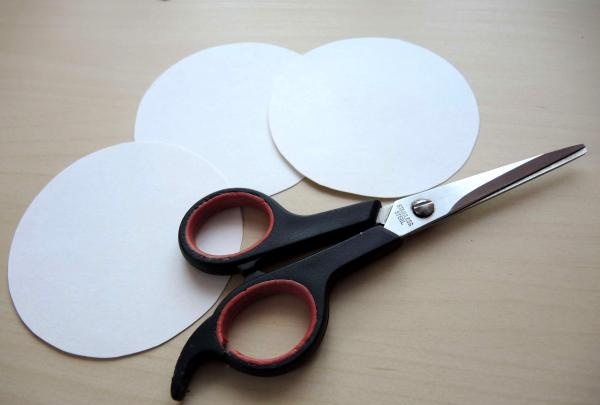
We measure 3-4 cm with a compass and draw the required number of circles, then cut them out.
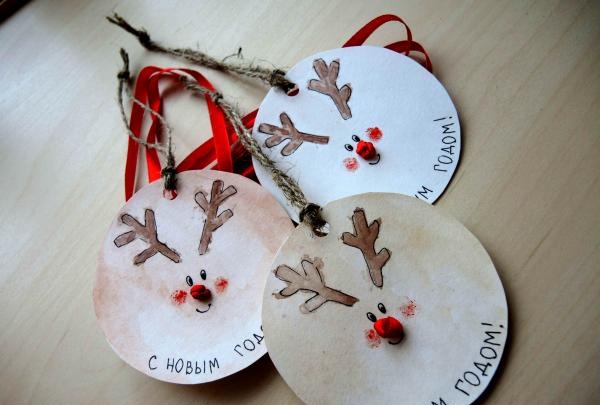
Next we’ll draw the deer’s faces. For now, instead of the nose, let's put two dots.
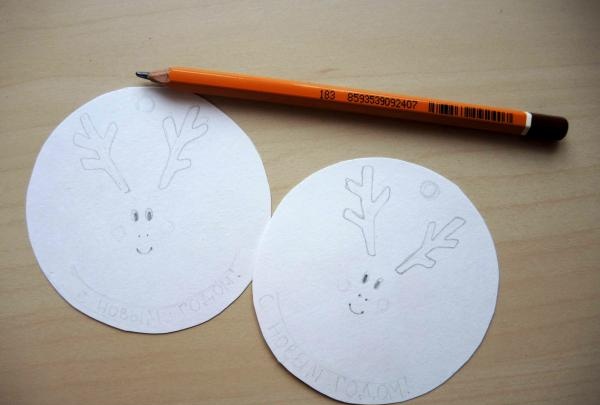
Using a hole punch we make a hole for the lace, and with a thick needle we pierce two holes where the nose is. Right now the deer's nose looks like a pig's nose, but we'll fix that soon.
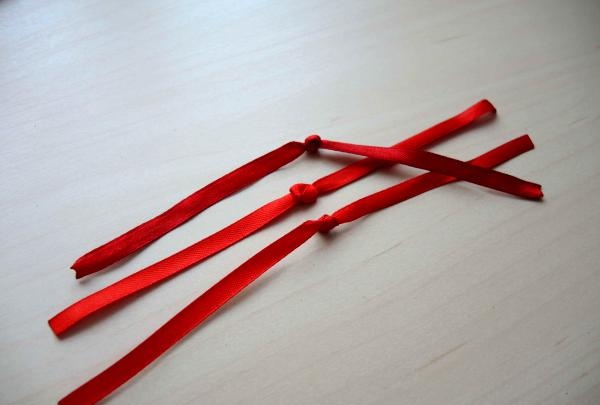
Let's cut the ribbon into pieces approximately 20-25 cm long and tie a regular knot twice, but just don't tighten it too much, as the knots will look much larger - and that's exactly what we need.We burn the ends so that the ribbon does not unravel.
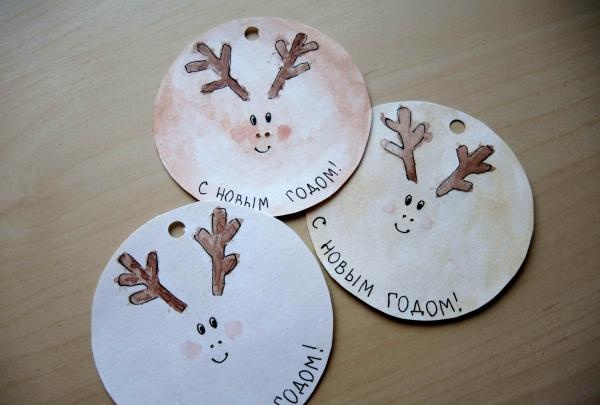
Let's get back to the tags. We paint over the circles and draw horns. Using a gel pen, we trace the pencil lines and write a congratulation (or the name of the person to whom the gift will be intended).
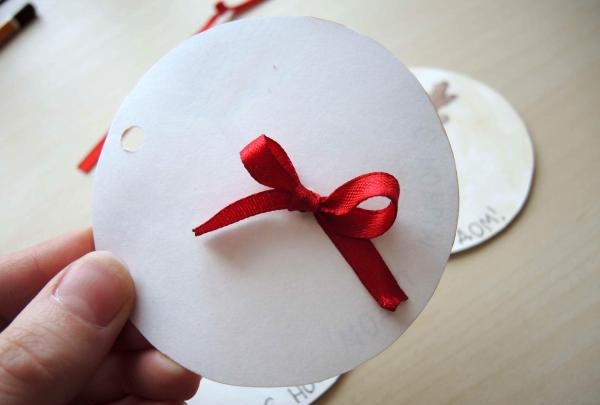
Now we turn the snout into the nose of a deer. We pass the ribbon through the holes pierced with a needle and tie a bow on the back side.

Thread the twine, draw some blush with your finger and paint, and you're done!
Idea No. 2.
You will need:
- - Cardboard blanks (rectangles 12x6 cm)
- - Gouache
- - Wide brush
- - Satin ribbons
- - Sponge
- - Stationery knife
- - Hole puncher.
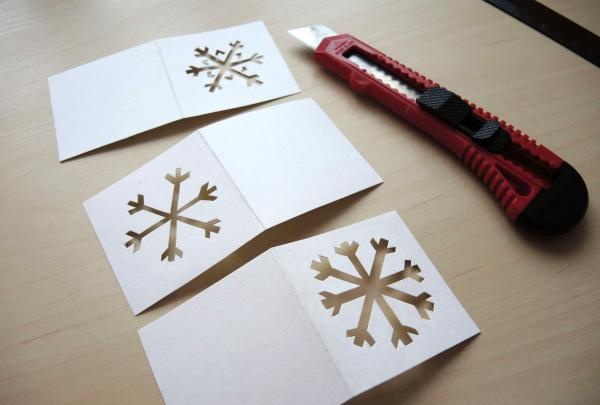
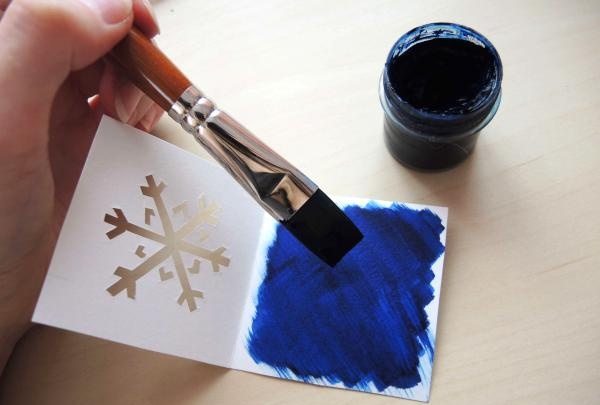
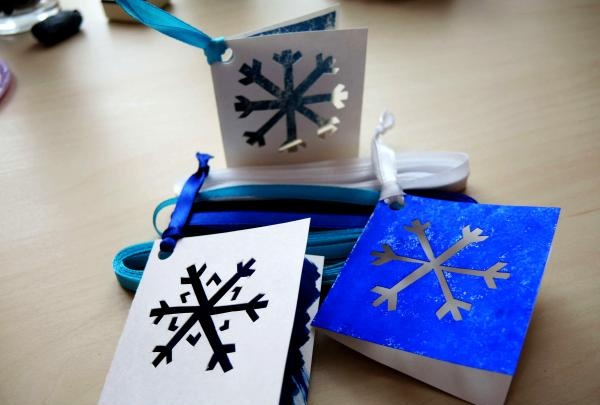
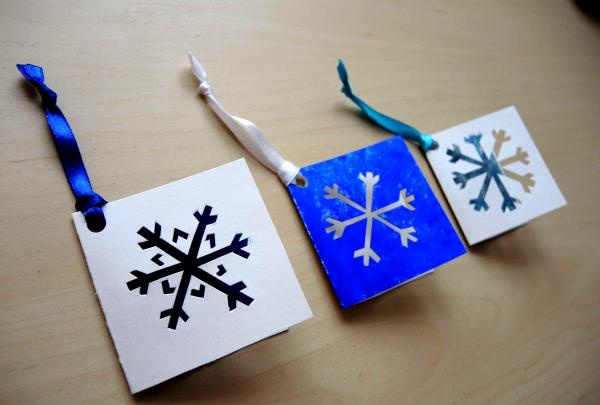
We fold the cardboard rectangles in half and on the front side of each we draw the silhouette of a snowflake by hand or by first printing the template on a printer.
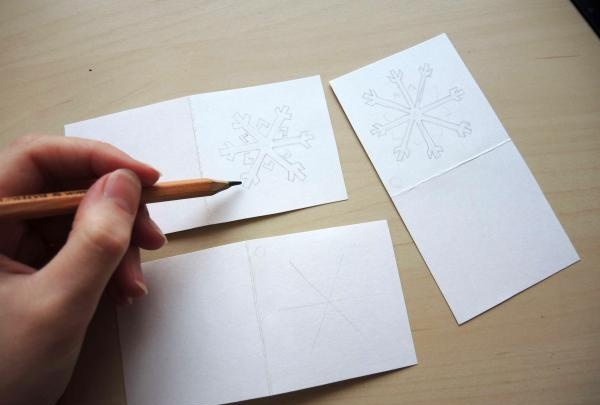
Using a stationery knife we cut out the silhouettes.
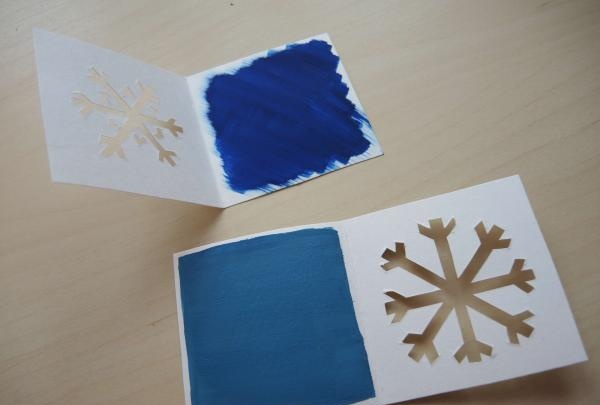
Inside one of the mini-cards, use a wide brush to paint the background with paint that contrasts with the white paper.
Let's take another color and do the same with the next card.
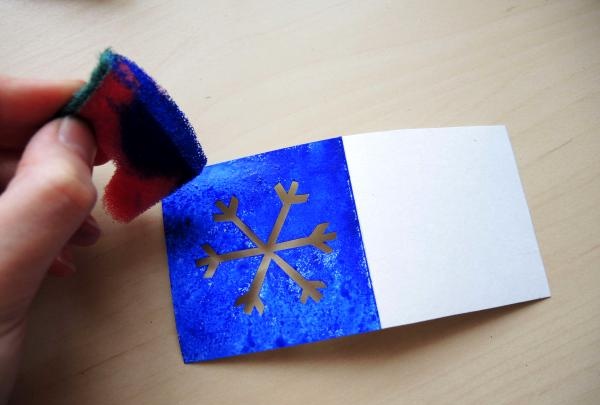
Let's design another one a little differently. Cut a small piece from the sponge. Dip it in paint and fill the front side of the card with color.
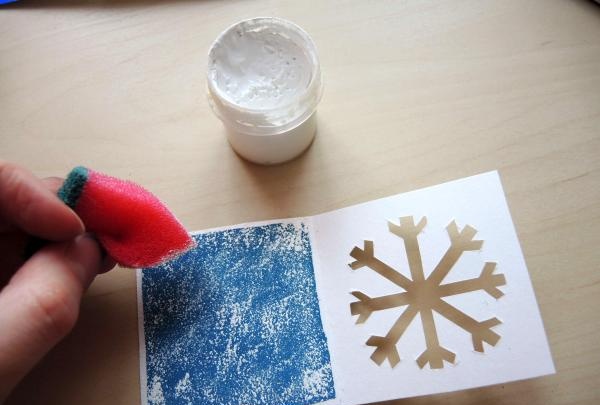
When one of the first two cards is dry, use a sponge to apply another layer of white paint.
Let's cut the ribbons, singe the ends and tie knots.
We thread the ribbons through the holes and the postcard tags are ready!
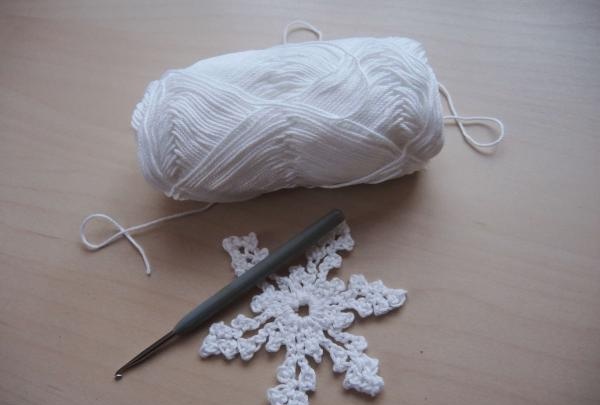
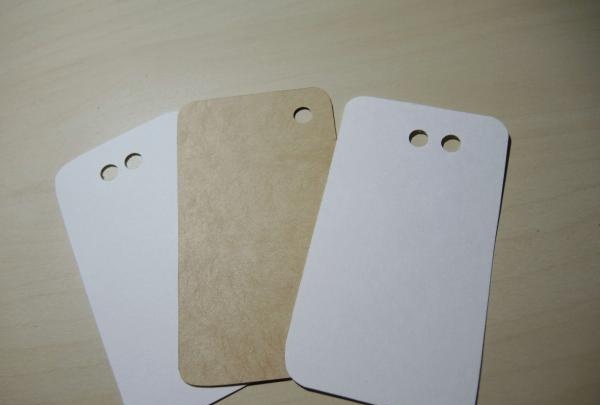
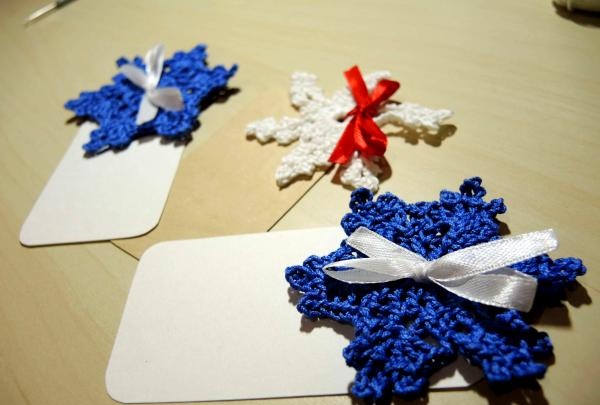
Idea No. 3.
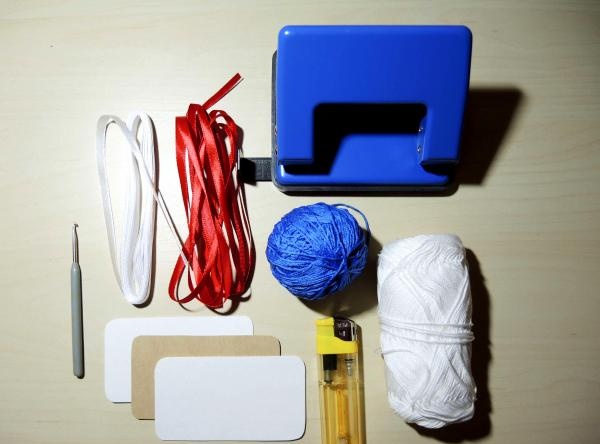
To make these labels you will need:
- - Threads of two (or more) colors
- - Hook No. 2
- - Rectangular blanks made of white and colored cardboard (approximately 9x5 cm)
- - Ribbons
- - Hole puncher.
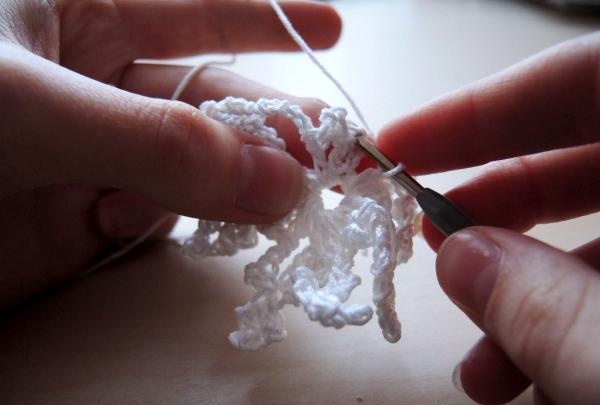
First of all, let's knit the snowflakes. If you are an experienced knitter, you will successfully find many wonderful knitting patterns, and if you are new to this area, then what follows is an analysis of the proposed pattern.It is very simple, but the product knitted using it is nevertheless very attractive.
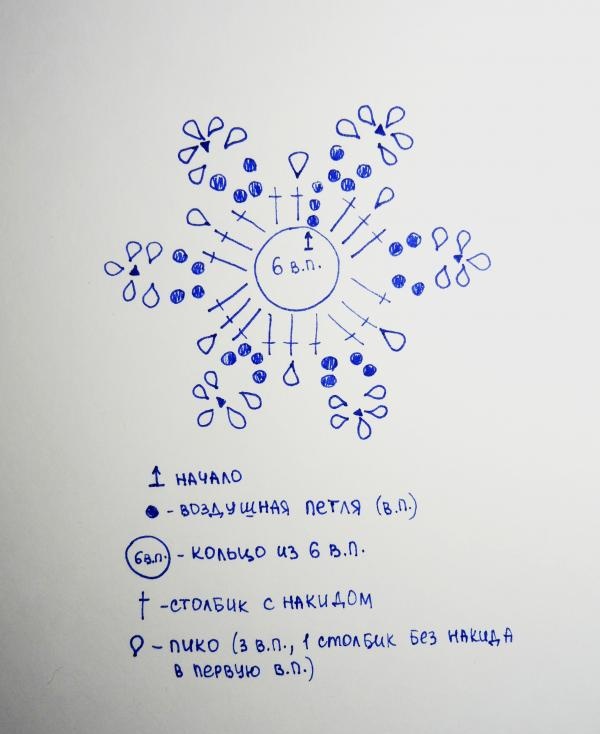
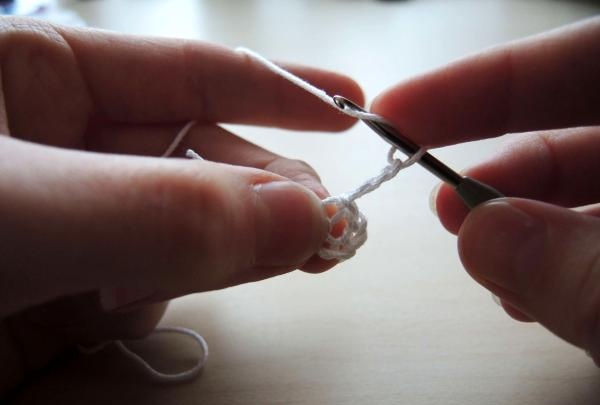
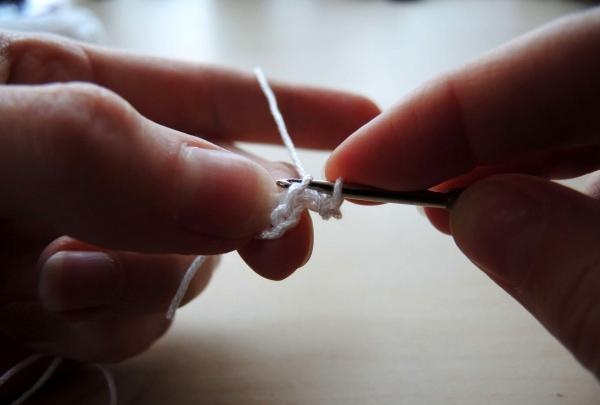
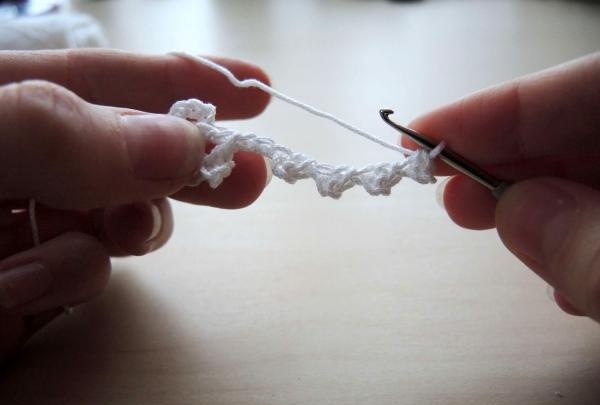
First of all, we cast on a chain of six air loops.
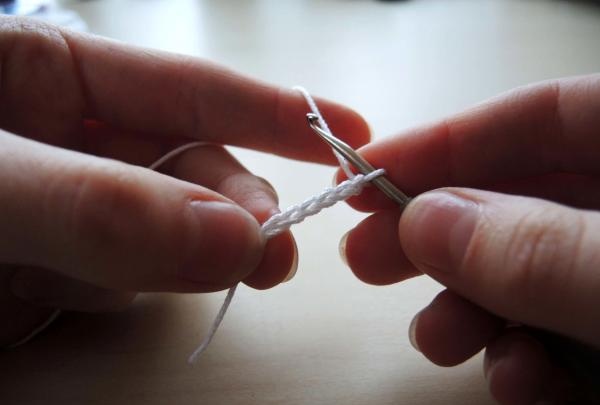
We close it into a ring with a connecting post. To do this, insert the hook into the first loop of the chain and hook the working thread and simply pull it through the two loops that are on the hook.
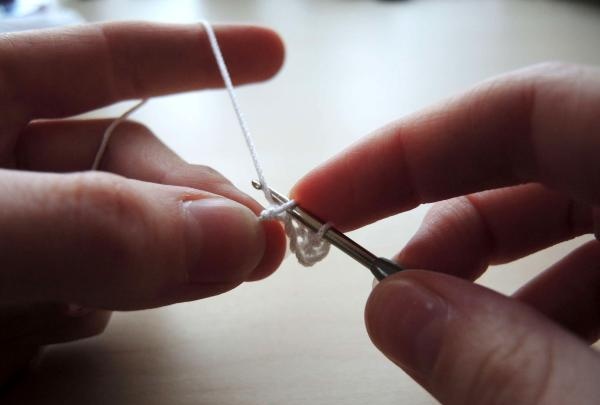
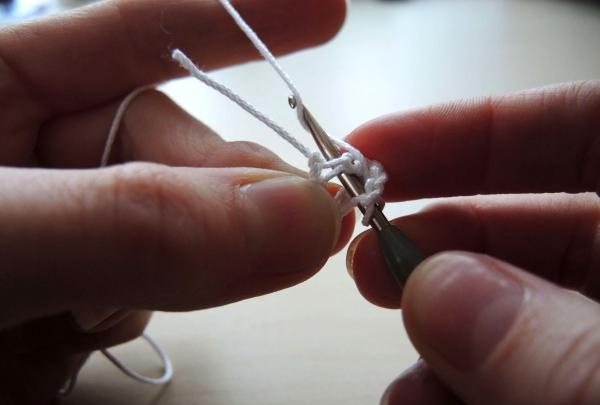
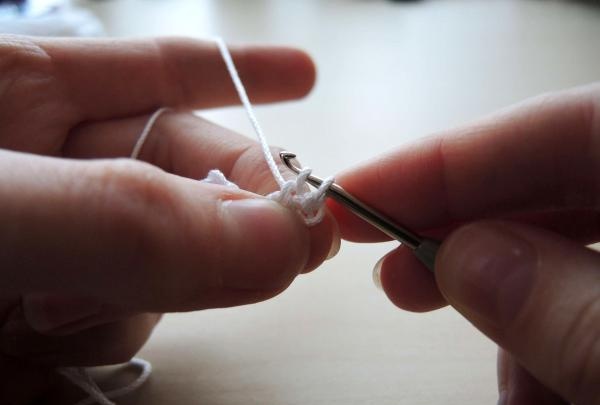
Next, we cast on three air lifting loops - they are replaced with one double crochet, allowing you to start a new row of knitting.
Now double crochet: insert the hook into the ring, throw a thread over it and pull it out, now three loops have formed on the hook.
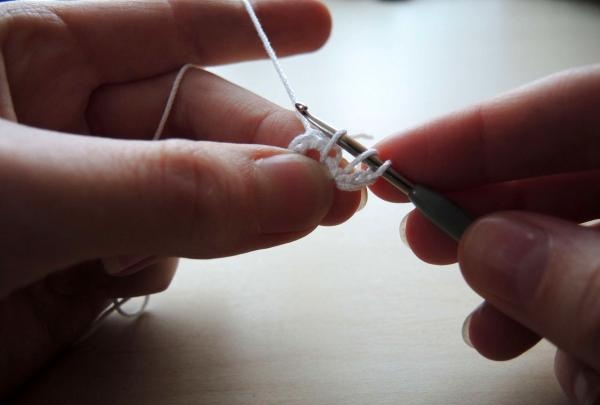
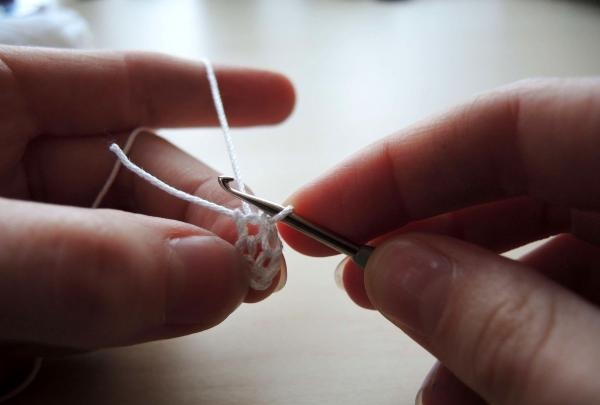
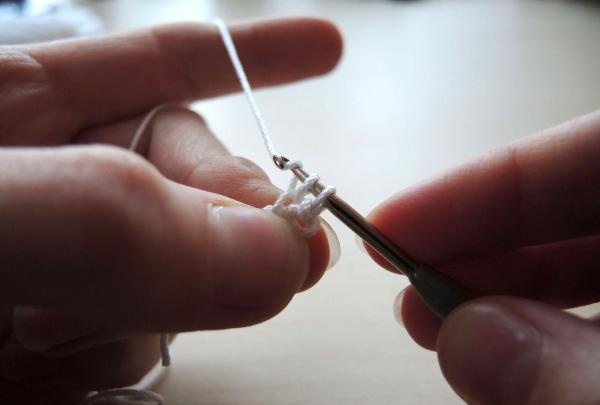
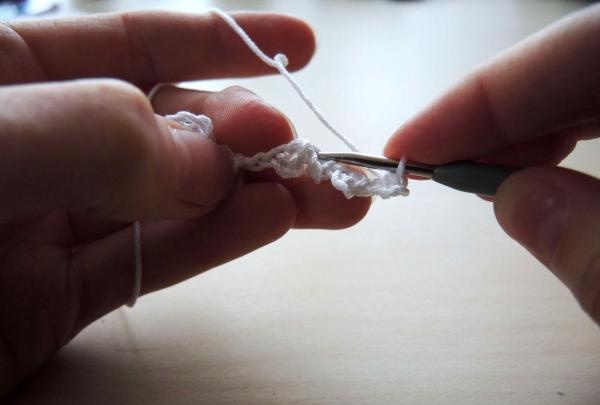
Next, we hook the working thread and pull it through the two closest loops, now there are two loops left on the hook, we hook the thread again and knit two loops into one.
We collect two air loops.

Next according to the scheme is picot. We collect three more air loops and thread the hook into the third loop from the end, grab the working thread and pull it out. There are now two loops on the hook, throw on the thread and knit them together.
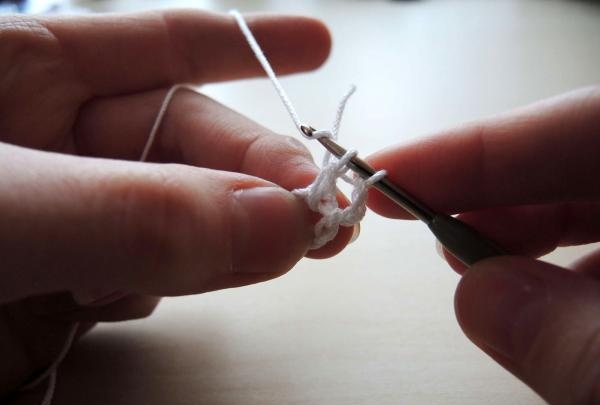
Next - double crochet again.
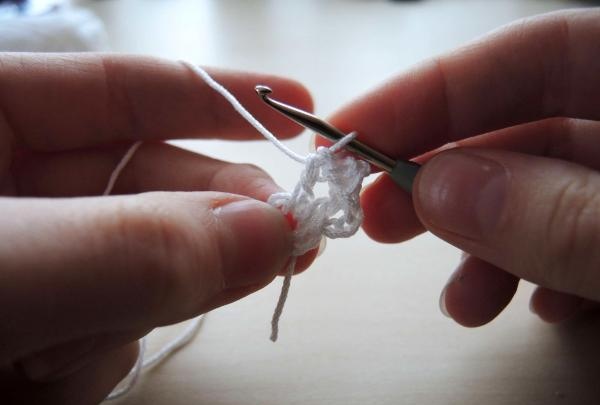
Two air loops and four picots.
When the fourth picot is knitted, insert the hook into the base of the third picot from the hook and simply pull the working thread through the loops that are on the hook - this is the connecting post.
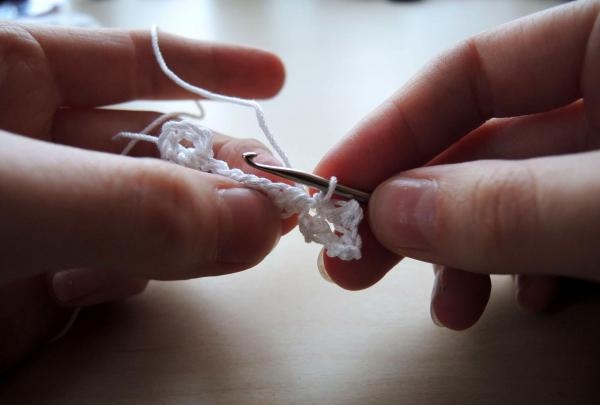
Then again two chain stitches and a double crochet into the ring.
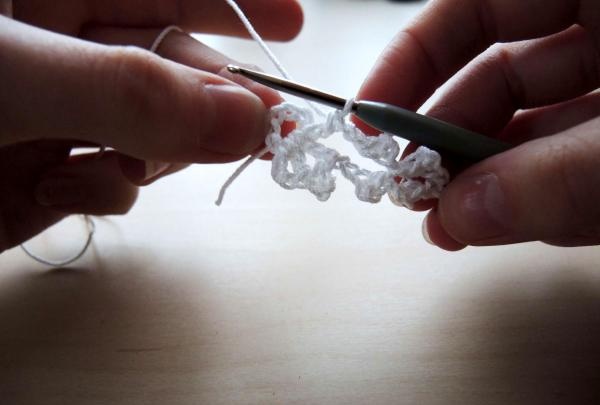
Then simply repeat the steps described above five more times. Once you've crocheted all six "petals" of the snowflake, simply insert your hook into the top of the very first double crochet you crocheted and crochet a connecting stitch.
The finished snowflake needs to be ironed.
The snowflakes in the photo, knitted with blue threads, are made using the same knitting techniques as described above, but according to a different pattern.If you wish, you can independently master new schemes.
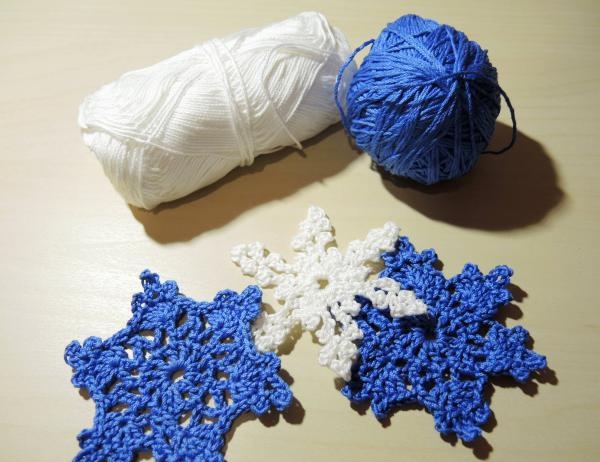
We make holes in the cardboard blanks with a hole punch.
And we tie the snowflakes with ribbons.
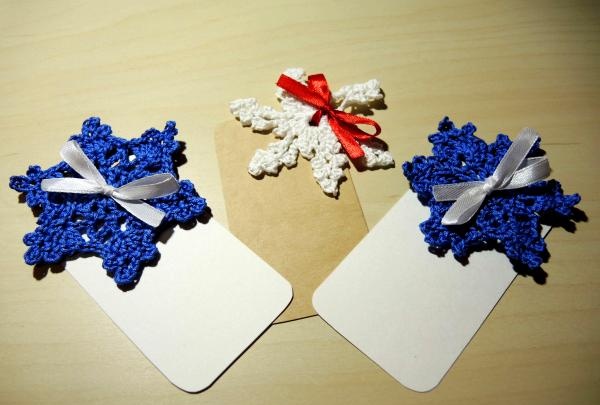
All that remains is to write your wishes.
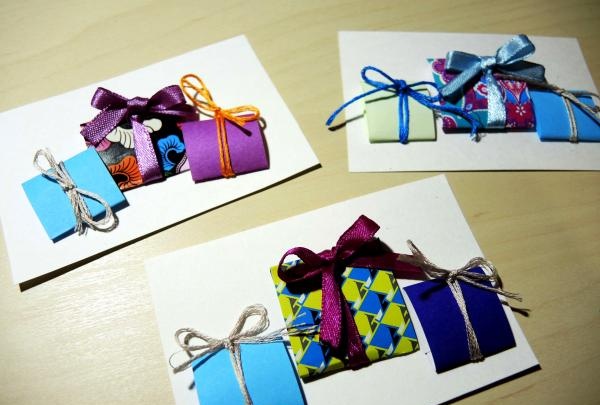
Idea No. 4 - a great opportunity to put the accumulated leftover colored paper to good use. In addition to the remaining paper, we will also need ribbons and threads, and, of course, cardboard blanks.
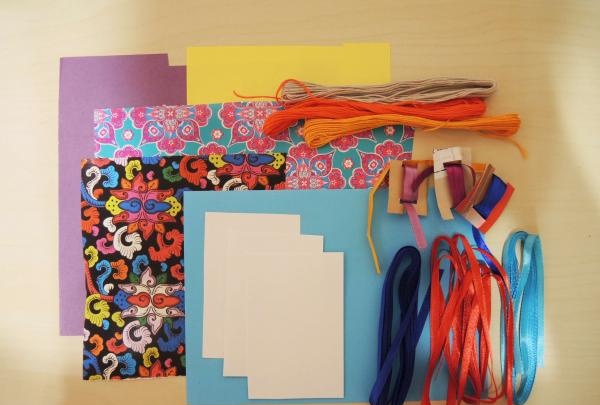
For each label we make our own set: a rectangle of patterned paper, two smaller rectangles of plain paper, two pieces of thread and a ribbon.

We fold each rectangle the same way as in the photo, without ironing the fold - let the box seem voluminous and tie a ribbon.

We tie smaller rectangles with thread. Glue the miniature gifts to the blank and the job is done!
Thank you for your attention! I wish you success!