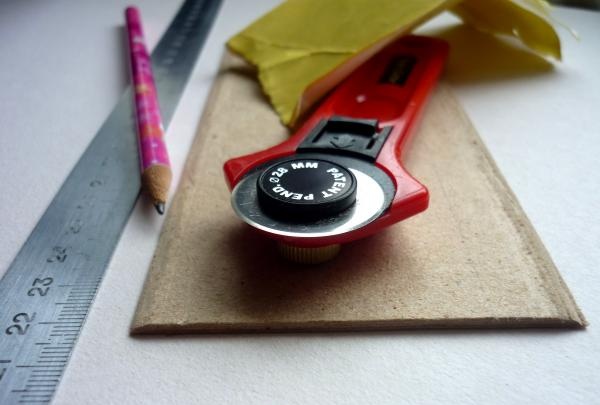
To make an eyeglass case we will need:
• binding cardboard (thickness 2 mm);
• Whatman paper;
• cotton;
• 2 types of glue: PVA and “Moment” (Crystal or Universal);
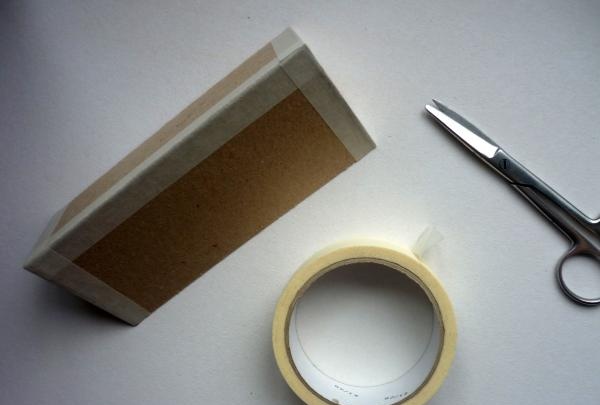
• masking tape;
• magnet for bags;
• pencil, stack, ruler, stationery or circular knife, glue brush, thread, needle, scissors.
First, let's cut out the necessary parts of the case from cardboard with a stationery knife.
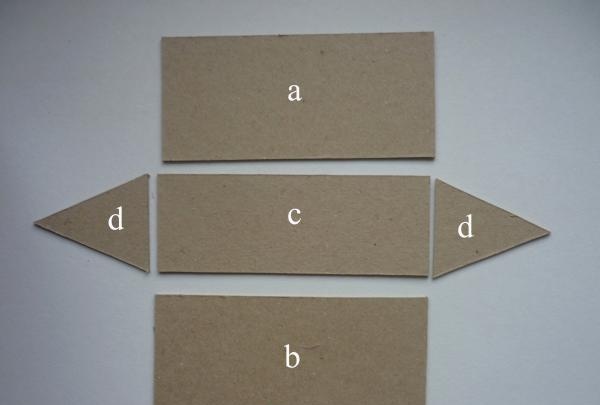
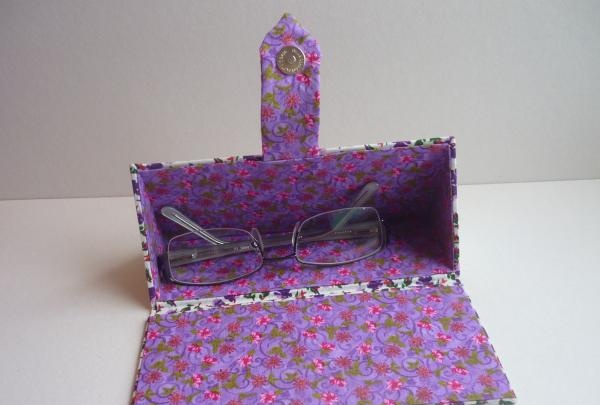
Here is a simple diagram of what the case will look like. Below are the parameters of each side. Also, the diagram shows a sketch of a lock for the case, which will be discussed later.
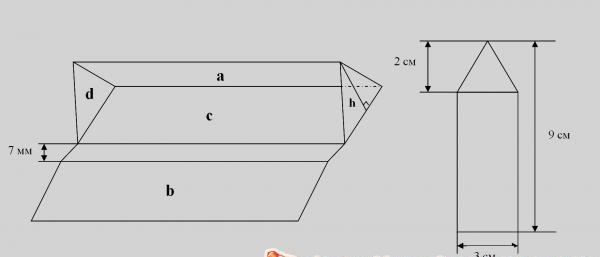
Parameters of the sides of the glasses case:
a = 16.6 x 7.6 cm
b = 17 x 8 cm
c = 16.6 x 6 cm
d = 6 (at base) x 7.8 x 7.8 cm
h = 7.5 cm
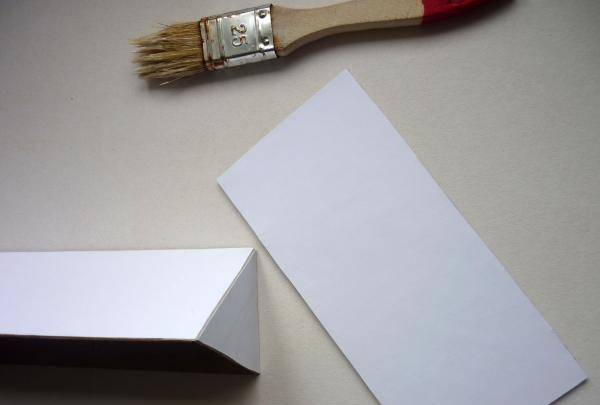
Now let’s cut out two copies from whatman paper for each side according to its size. For external sides a and c, the length of the cut piece must be increased by 4 mm.
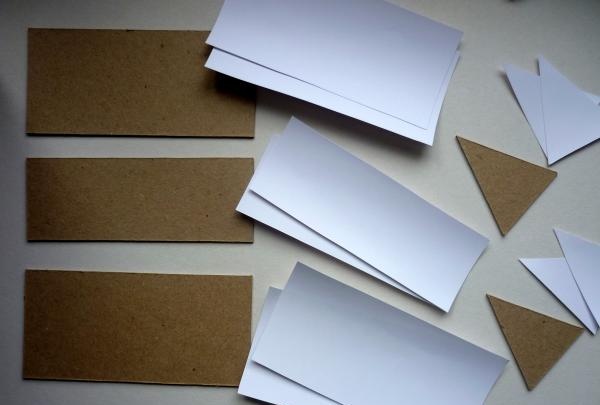
Make the edges of side a beveled using a circular knife or a stationery knife so that the corners of the sides do not interfere with each other.
Glue the sides (triangles) to the base, adjusting with a ruler with an acute angle so that they are perpendicular to the base.
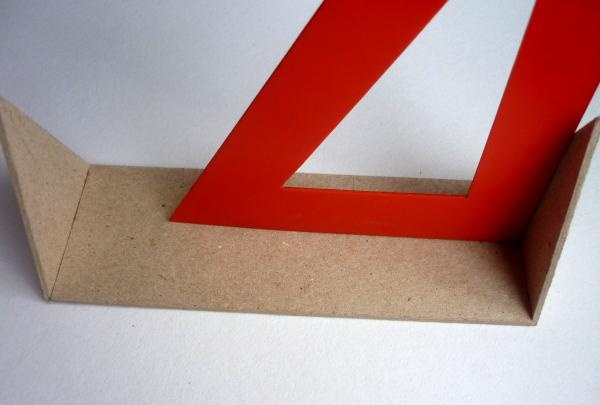
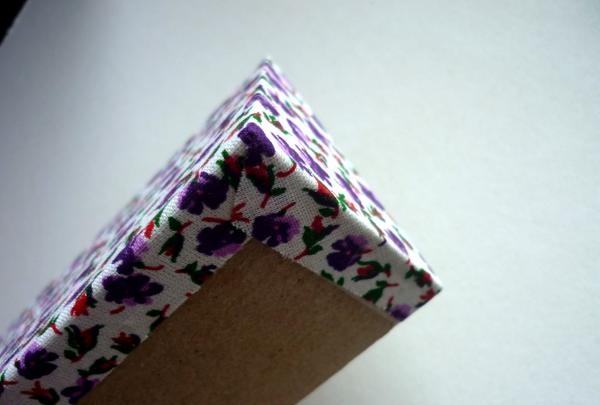
We glue the three edges of side a with glue and fix it well between the sides. At the same time, the beveled side faces inward.
We should get such a beautiful angle on both sides of the structure.
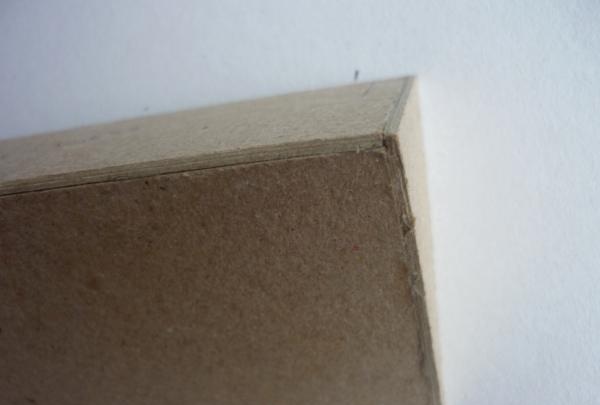
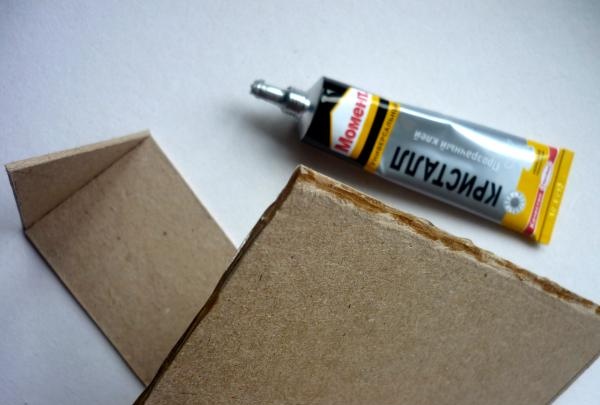
We use masking tape to glue all the internal and external corners of our workpiece.
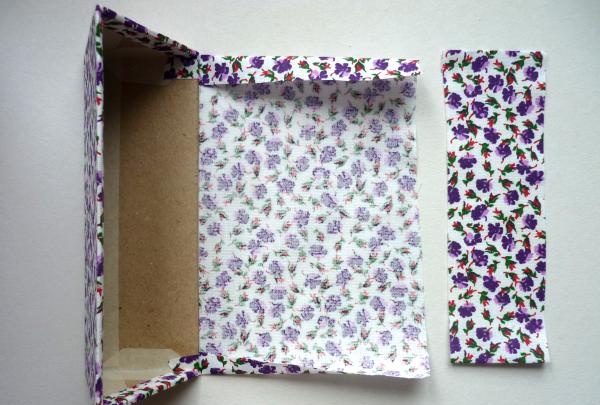
Glue cut out pieces of whatman paper onto sides a and both sides d on the outside. Glue also on b - the glued side will be on the outside.
We cut out the fabric with allowances in such a way as to completely glue sides a and both sides d.
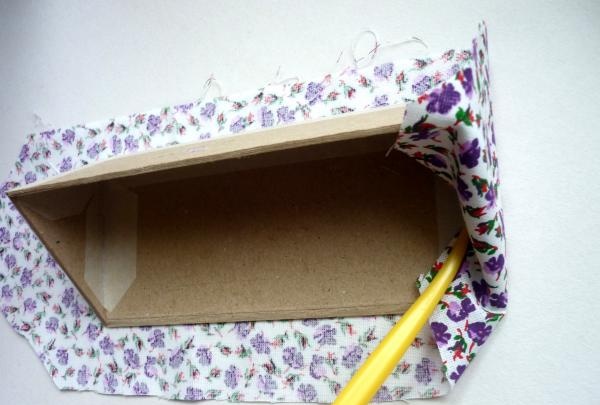
Glue the fabric onto a very thin layer of glue, leveling the surface with a stack. Carefully trim the unnecessary fabric around the edges and seal the corners.
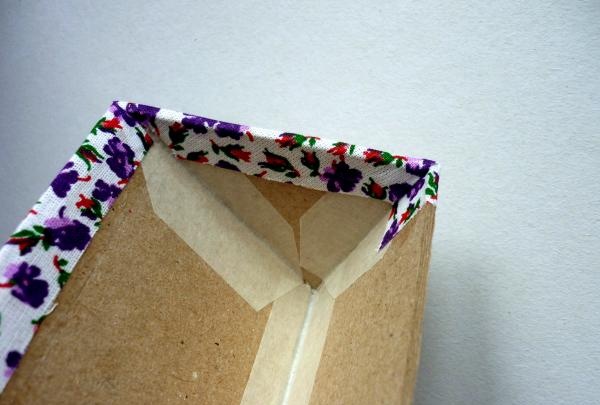
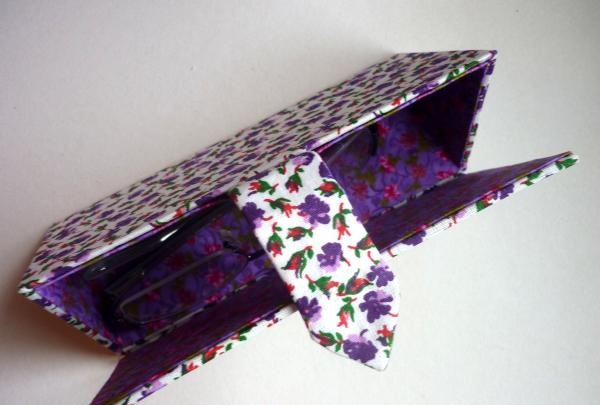
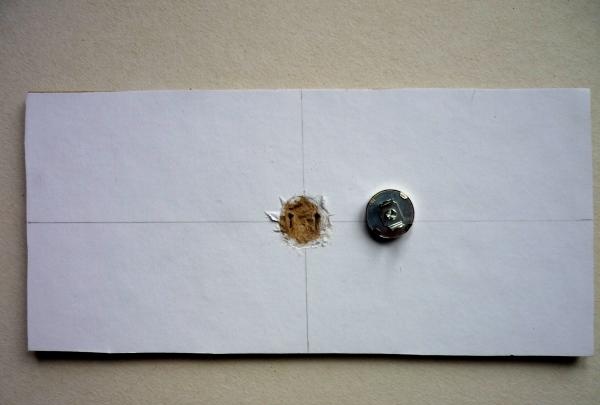
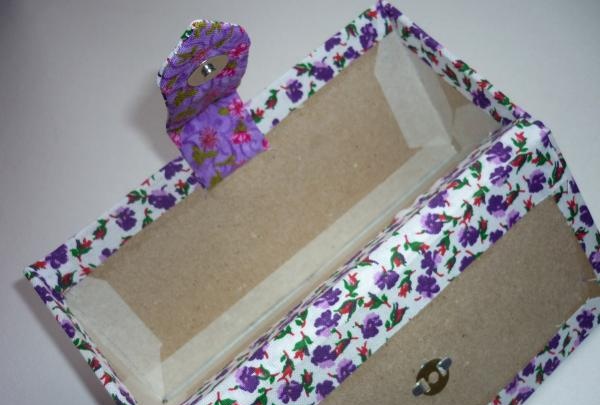
We cut out a “hole” and slots for the first part of the magnet on the inside of side b. You can use magnets without a lock.
Let's cut the fabric so that we glue side c and b at the same time. Glue the prepared piece of whatman paper for side c, gluing only three sides.
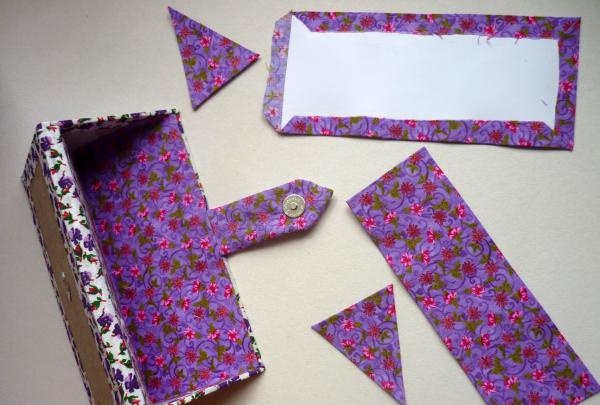
Glue this part to the base (side c). We prepare a spine 16.6 cm long (the extreme sides must be folded).
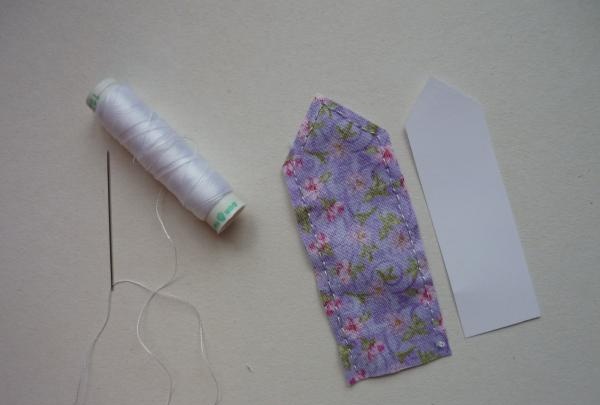
Using the layout for the lock, we sew it together and insert the layout itself from whatman paper, attaching the second part of the magnet to it.
We glue the lock (Moment glue), side b (distance from side c = 7 mm) and only then the spine (PVA glue, gluing along all bends) to the parts of the case. We insert part of the magnet from the outside, securing it from the inside.
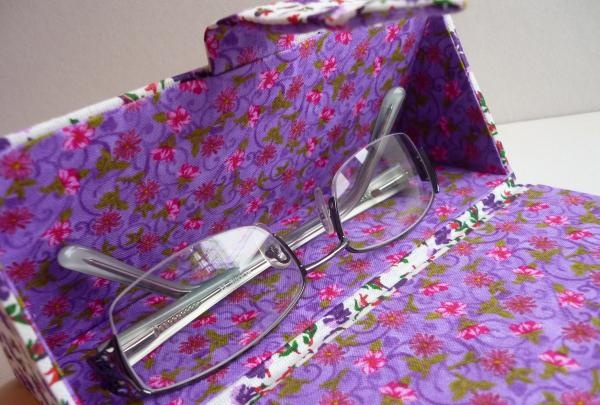
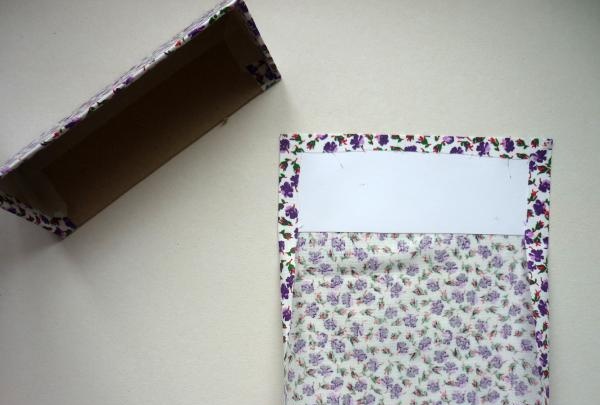
We glue the inside of the case with already prepared blanks (whatman paper is covered in size with fabric).In this case, first glue the inside of side a so that the side and bottom edges capture the remaining sides (helping to form the corners with a stack).
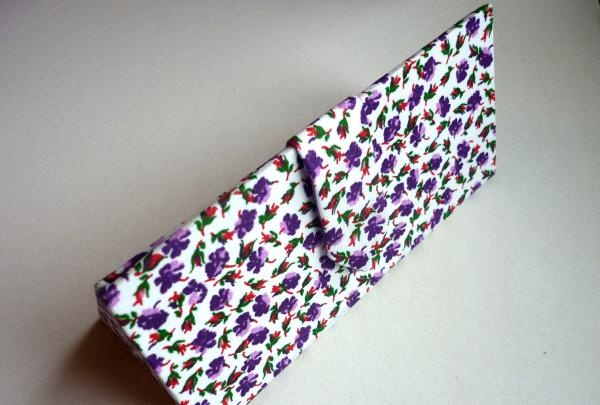
Having glued all the sides, we get this finished case.