It is impossible to imagine life without indoor plants! They surround us at home, at work and in many other institutions. They delight the eye with green leaves, bright flowers - and simply enliven everything around, giving a pleasant aroma! We all admire them, but it’s doubly nice to look at a flower if it grows in a beautiful flower pot! What if you put it in a flowerpot? Yes, something unusual! Moreover, so that no one has this! We solve the issue - you can make a flowerpot with your own hands, following the step-by-step manufacturing technique indicated below!
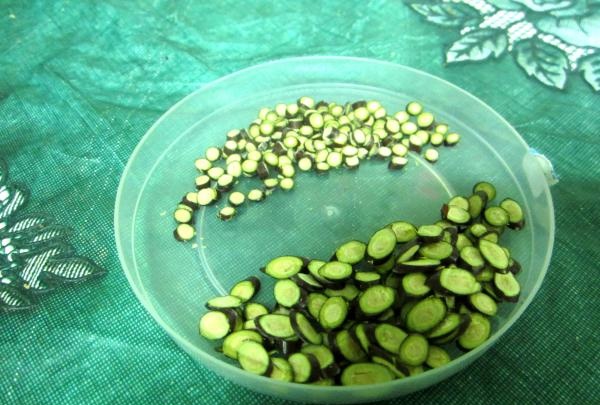
To work, you need to prepare the necessary equipment. We will need an empty plastic flower bowl, preferably a plain, dark color (if you don’t have it at home, you should buy it at the store), PVA glue, a small container (for example, a baby food cap or something else to pour the glue) . Also a simple pencil, a cutting board or wooden stand (for cutting sections from twigs), fresh cuts of twigs (American maple), a stationery knife, a needle (with thread - for safety reasons).
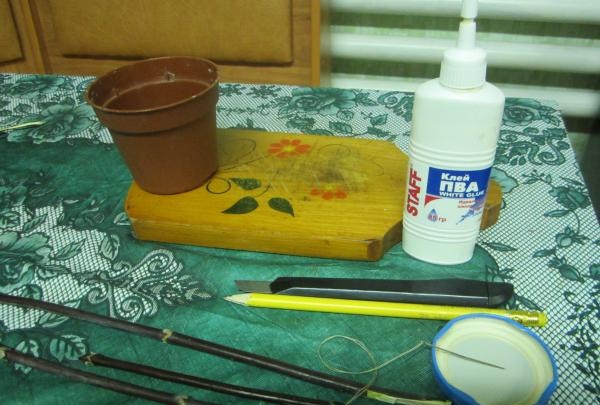
Note: it is better to take soft, but not crumbling, tree species for making cuts.In our case, we took one type of tree (if desired, you can use other trees or shrubs, for example, willow, lilac, aspen). Also, for decoration, you can take a bowl made from another material.
Step-by-step process for making a “Gift Pot”:
Step 1. Take tree branches and prepare 2 types of cuts on a wooden board with a stationery knife - round (from thinner branches) and oblong (oval) - from thicker branches. Cut oblong sections at an angle, cut round ones at right angles to the branch. Sections of each type must be proportional to each other.

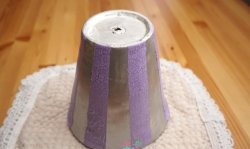
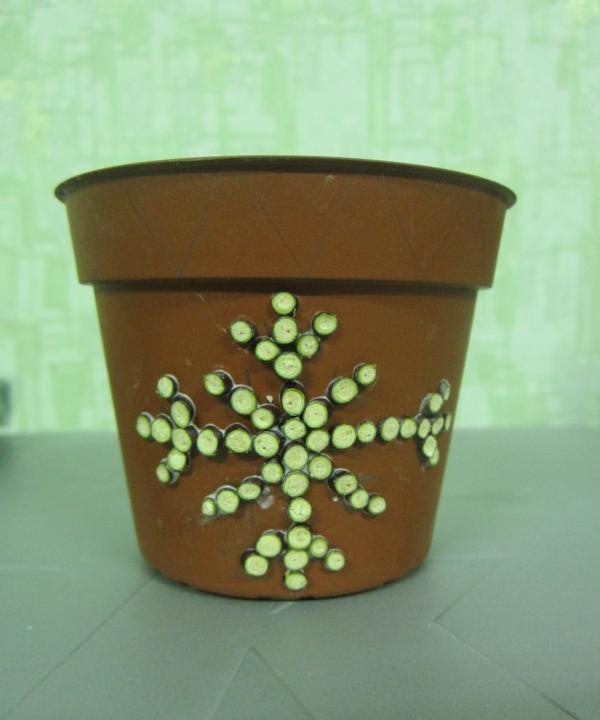
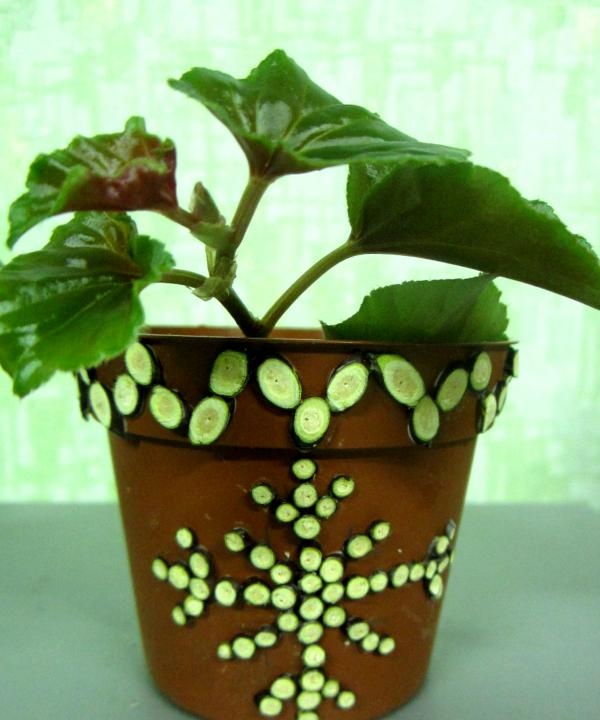
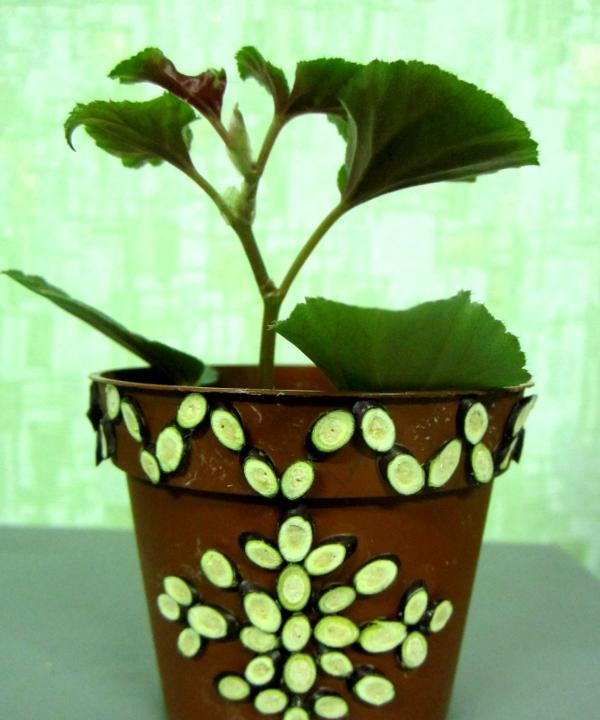
Step 2. Take a bowl and draw the outline of the drawing with a simple pencil. We draw a snowflake on one side of the bowl and on the other. Along the top edge of the bowl we draw a pattern in the form of triangles.

The drawing can be anything - it depends on your imagination!
Step 3. Pour glue into the lid. Using a needle, prick a round section with its base, then dip it in glue and place it on the outline. Using this principle, we lay out the entire drawing (on one side you will get a snowflake).

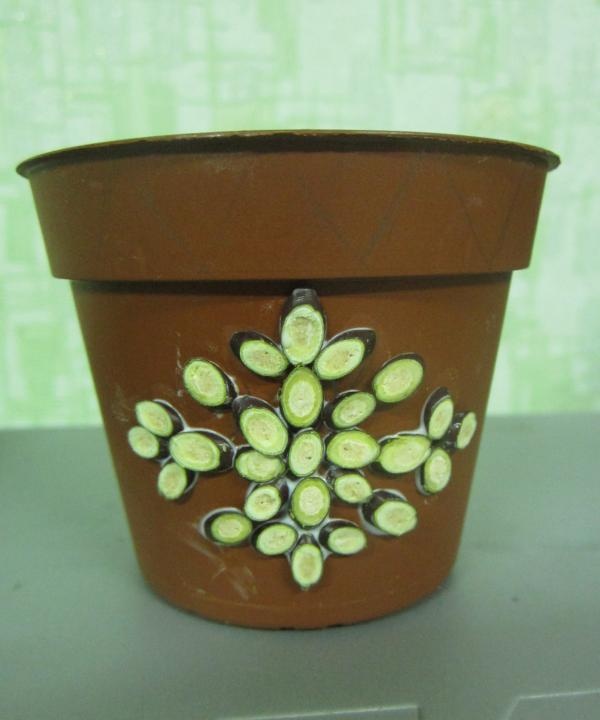
On the other hand, the snowflake will turn out a little different, since we will use oval sections.
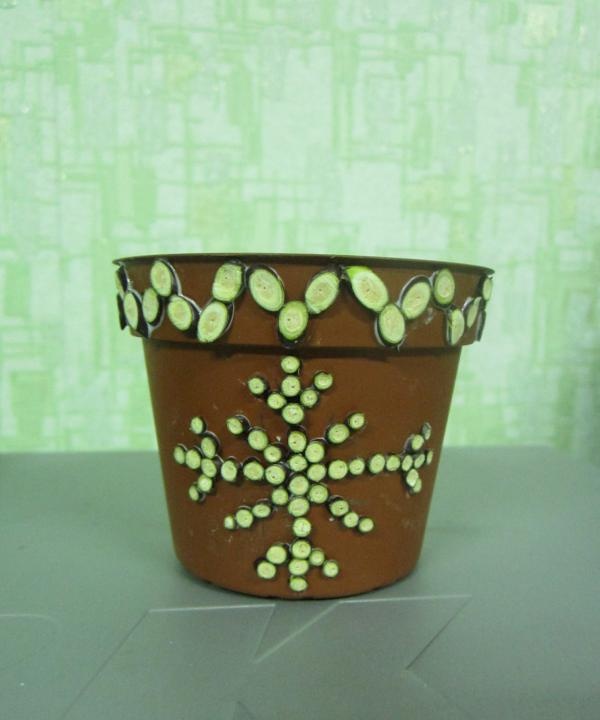
Step 4. Then we lay out the ornament with oval cuts along the upper edge of the bowl.
Step 5. After the flowerpot has dried a little, you need to wipe off the remaining glue with a cotton ball slightly moistened with water (so as not to disturb the outline of the design).
Step 6. We have a “gift pot” - now you can put a flower in it. The flowerpots can be changed sides, since the snowflakes on both sides turned out different.
Such present will appeal to every housewife who loves indoor plants and handmade souvenirs!