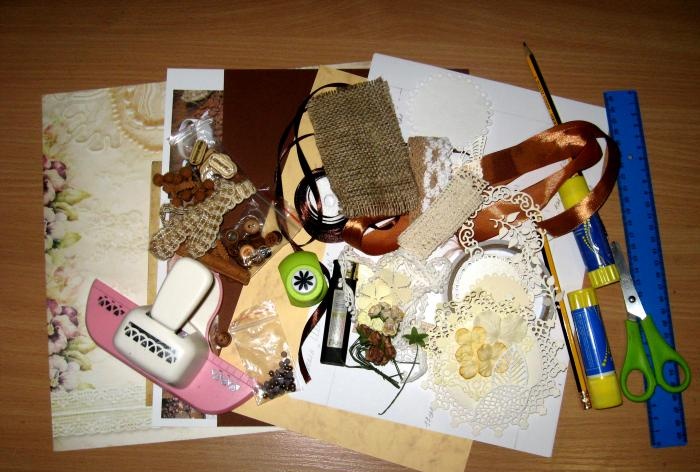
Nu vil vi se på en mesterklasse om at lave en "chokoladeæske" i en kaffestil. For at gøre det skal vi tage:
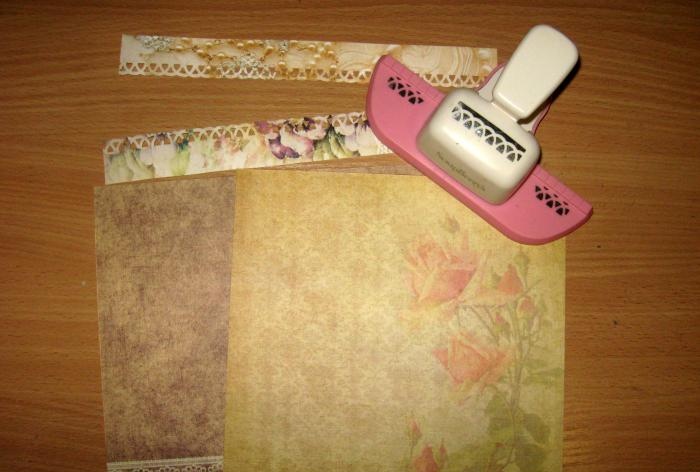
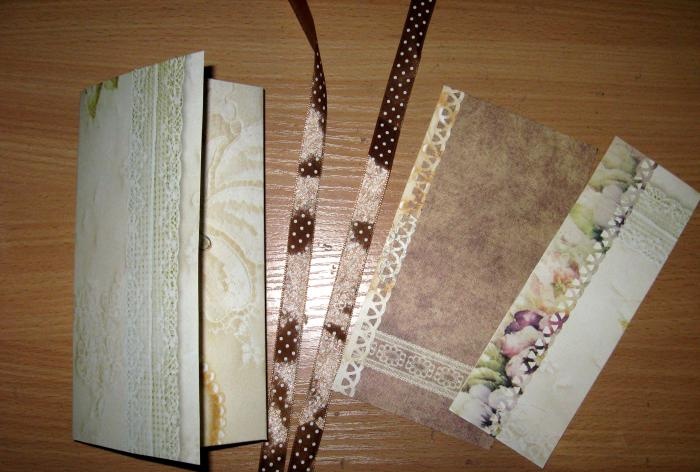
- Skrotstørrelser 30*30 cm og 20*20 cm i brun-beige farve;
- Brunt satinbånd med prikker;
- Chokolade gryde diagram;
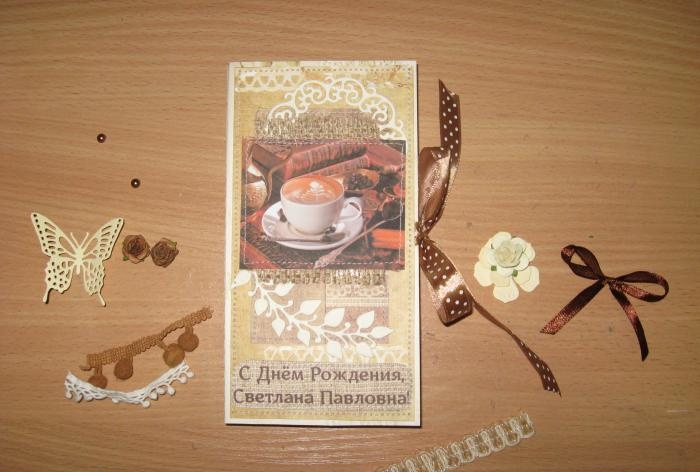
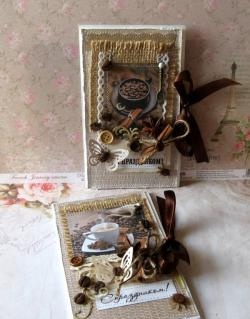
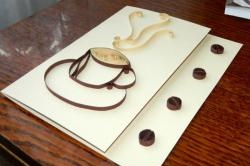
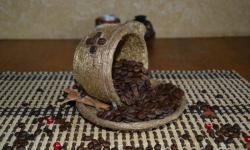
- Billede med en kop kaffe;
- Klip elementer ud: kvist, gennembrudt cirkel, sommerfugl, blomster;
- En inskription trykt med fødselsdagspersonens navn;
- Et stykke jute;
- Brune og hvide pomponbånd;
- Blonder med sejlgarn;
- Brune perle halvperler;
- Roser er beige og brune;
- Lace kant hul punch;
- Limstift;
- Dobbeltsidet tape;
- Lineal, saks, blyant.
![Kaffekort chokolademaskine](https://i.washerhouse.com/images/19/598-kofeynaya-otkrytka-shokoladnica.jpg)
![Kaffekort chokolademaskine](https://i.washerhouse.com/images/19/599-kofeynaya-otkrytka-shokoladnica.jpg)
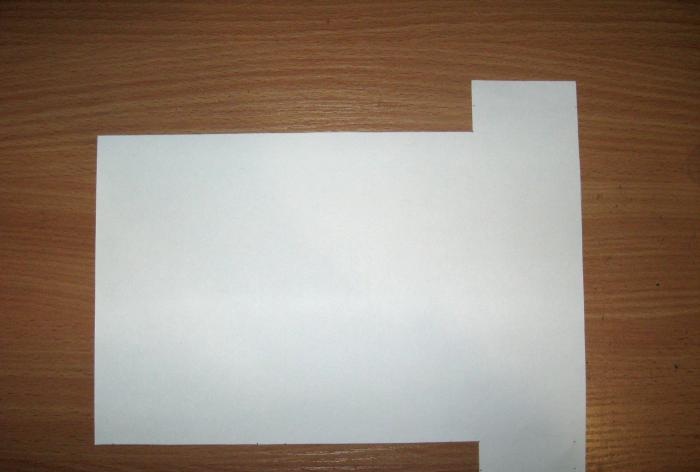
Vi lægger diagrammet ud foran os. Tag et stort stykke affaldspapir og vend det med motivet nedad.
![Kaffekort chokolademaskine](https://i.washerhouse.com/images/19/600-kofeynaya-otkrytka-shokoladnica.jpg)
![Kaffekort chokolademaskine](https://i.washerhouse.com/images/19/601-kofeynaya-otkrytka-shokoladnica.jpg)
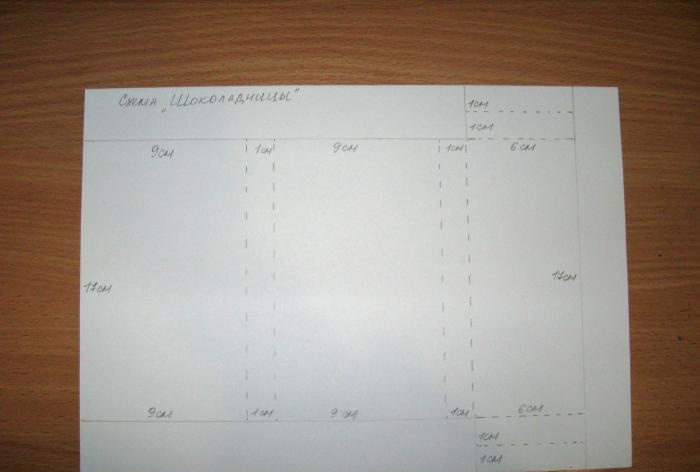
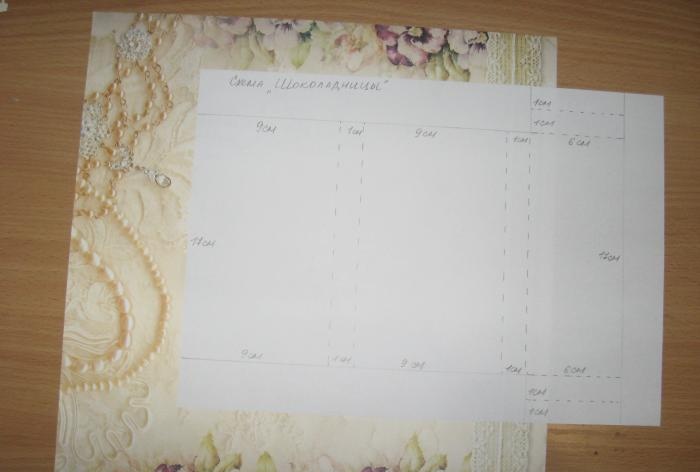
Vi overfører alle dimensioner fra diagrammet til skrotpapir. Vi tegner bøjningslinjer.
![Kaffekort chokolademaskine](https://i.washerhouse.com/images/19/602-kofeynaya-otkrytka-shokoladnica.jpg)
![Kaffekort chokolademaskine](https://i.washerhouse.com/images/19/603-kofeynaya-otkrytka-shokoladnica.jpg)
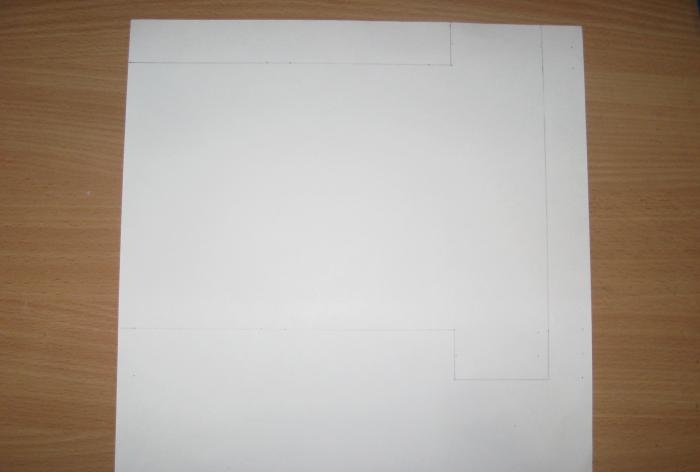
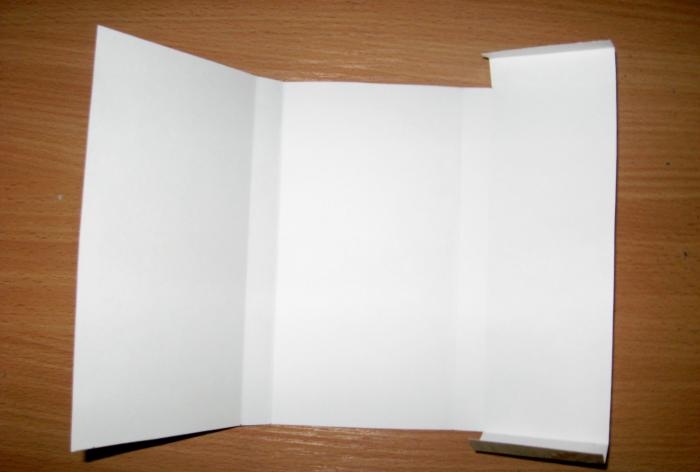
Lad os skære vores base ud. Lad os lægge det sammen og få denne base.
![Kaffekort chokolademaskine](https://i.washerhouse.com/images/19/604-kofeynaya-otkrytka-shokoladnica.jpg)
![Kaffekort chokolademaskine](https://i.washerhouse.com/images/19/605-kofeynaya-otkrytka-shokoladnica.jpg)
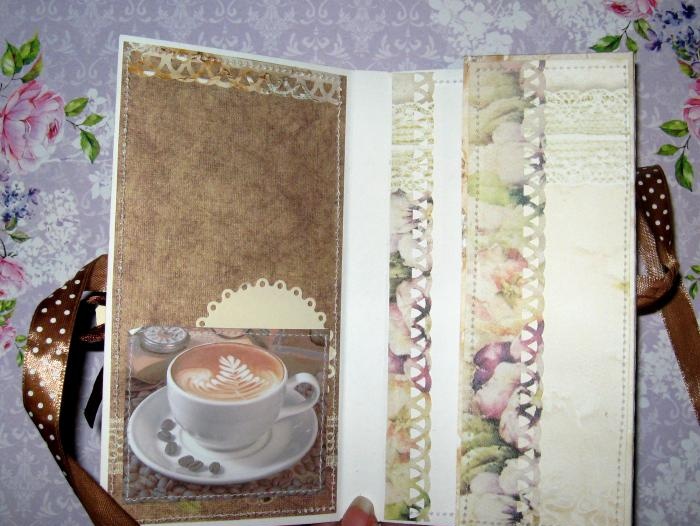
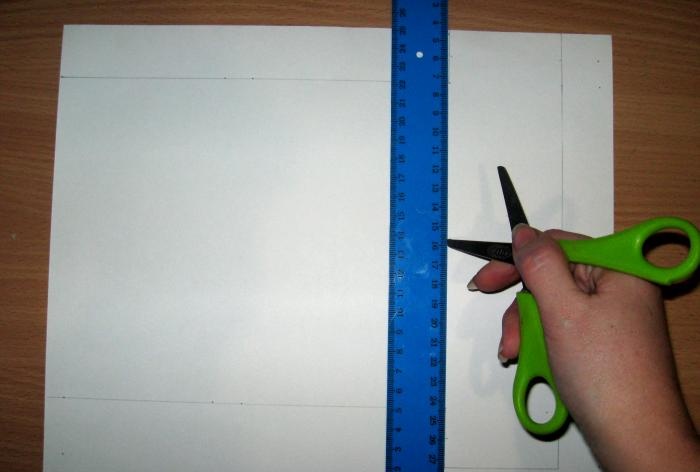
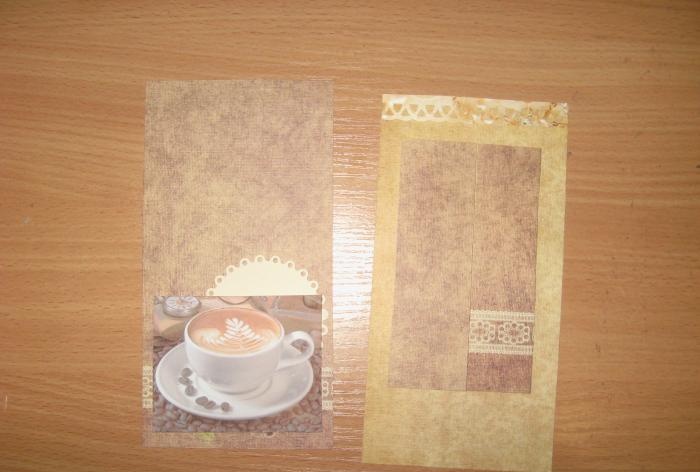
Nu tager vi mindre klippepapir og skærer disse rektangler ud. Vi bruger også en hulmaskine til at lave blondestrimler.
![Kaffekort chokolademaskine](https://i.washerhouse.com/images/19/606-kofeynaya-otkrytka-shokoladnica.jpg)
![Kaffekort chokolademaskine](https://i.washerhouse.com/images/19/607-kofeynaya-otkrytka-shokoladnica.jpg)
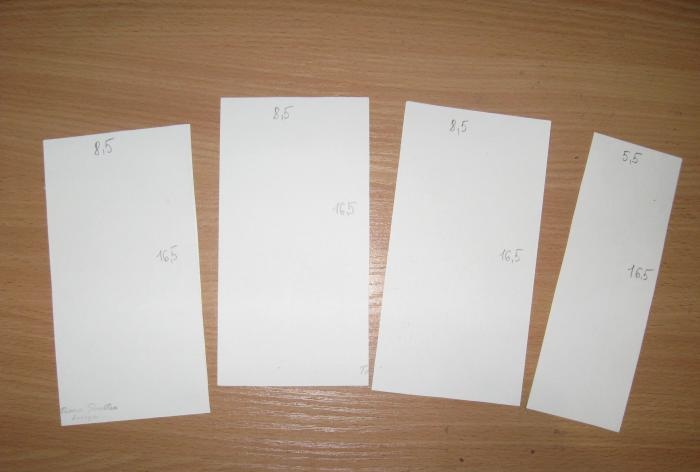
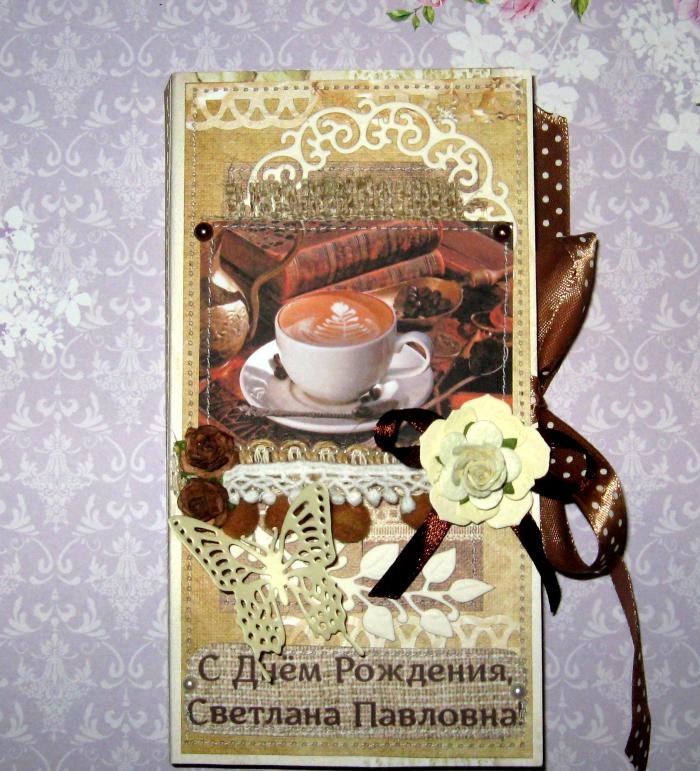
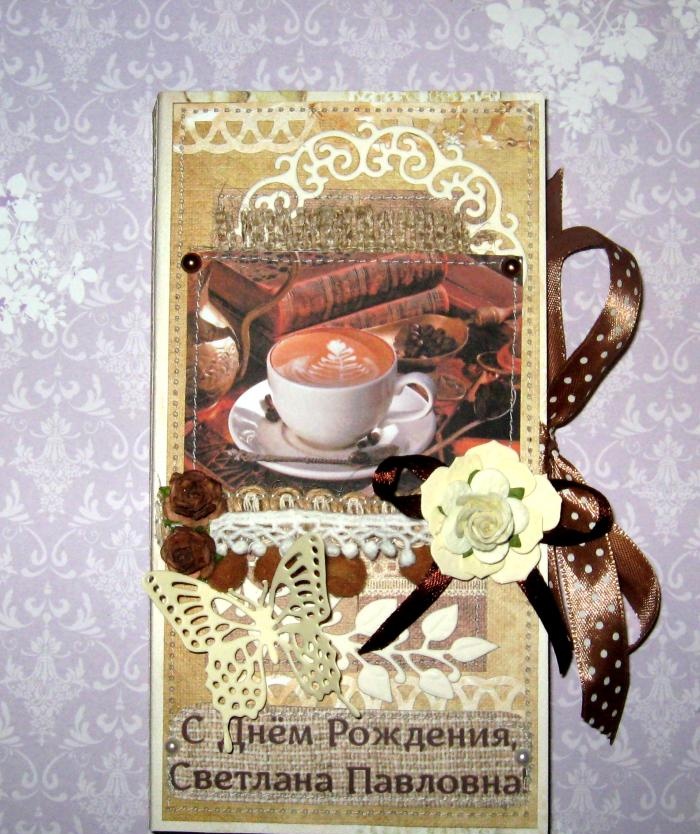
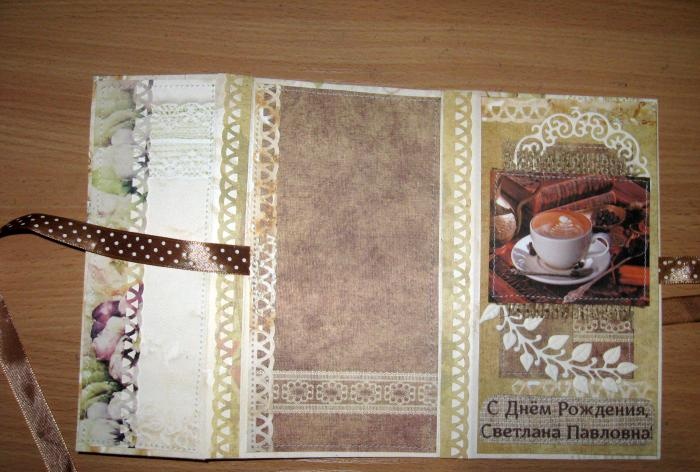
Vi vil dekorere to rektangler. Lim billeder, klipning, jute og inskription.
![Kaffekort chokolademaskine](https://i.washerhouse.com/images/19/608-kofeynaya-otkrytka-shokoladnica.jpg)
![Kaffekort chokolademaskine](https://i.washerhouse.com/images/19/609-kofeynaya-otkrytka-shokoladnica.jpg)
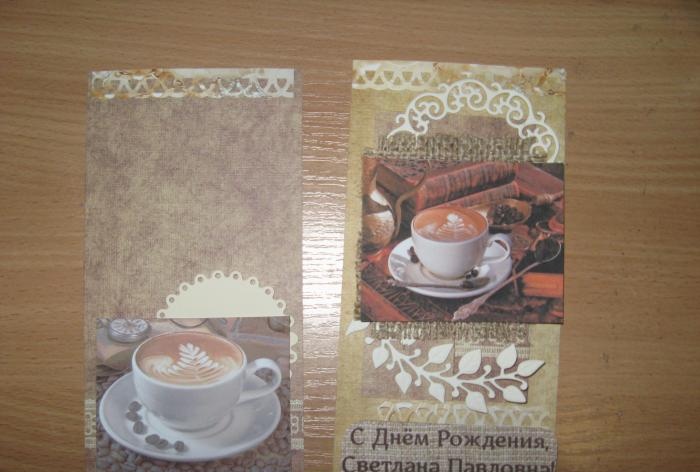
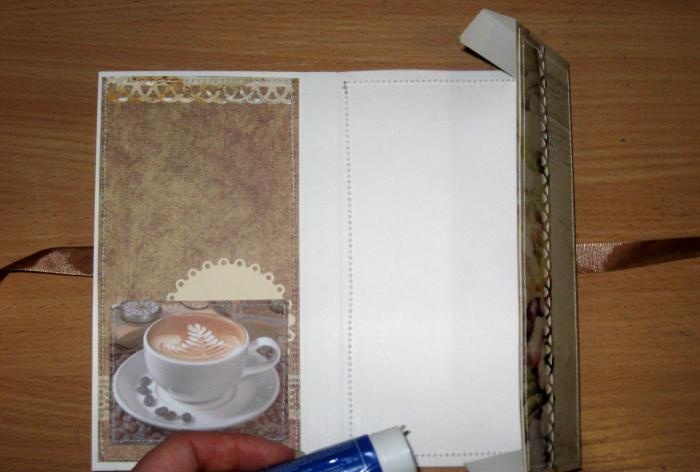
Klip to strimler tape og lim dem på bagsiden.
![Kaffekort chokolademaskine](https://i.washerhouse.com/images/19/610-kofeynaya-otkrytka-shokoladnica.jpg)
![Kaffekort chokolademaskine](https://i.washerhouse.com/images/19/611-kofeynaya-otkrytka-shokoladnica.jpg)
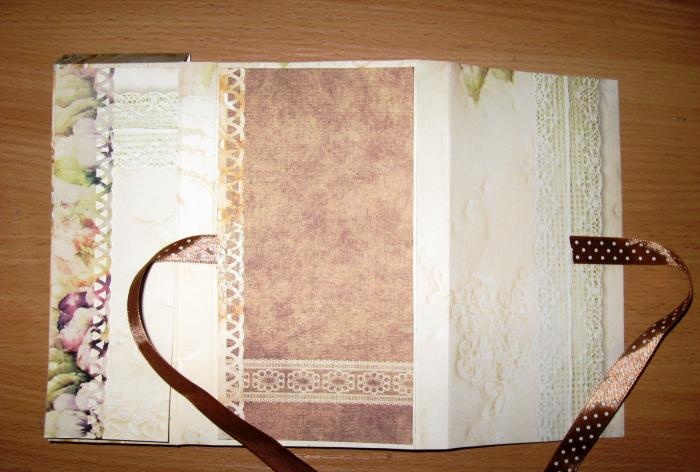
Vi syr billederne. Nu limer vi alle vores rektangler på basen. Sy i hver side.
![Kaffekort chokolademaskine](https://i.washerhouse.com/images/19/612-kofeynaya-otkrytka-shokoladnica.jpg)
![Kaffekort chokolademaskine](https://i.washerhouse.com/images/19/613-kofeynaya-otkrytka-shokoladnica.jpg)
Nu overtrækker vi halerne med en limstift og limer lommen på vores chokoladeskål.
![Kaffekort chokolademaskine](https://i.washerhouse.com/images/19/614-kofeynaya-otkrytka-shokoladnica.jpg)
![Kaffekort chokolademaskine](https://i.washerhouse.com/images/19/615-kofeynaya-otkrytka-shokoladnica.jpg)
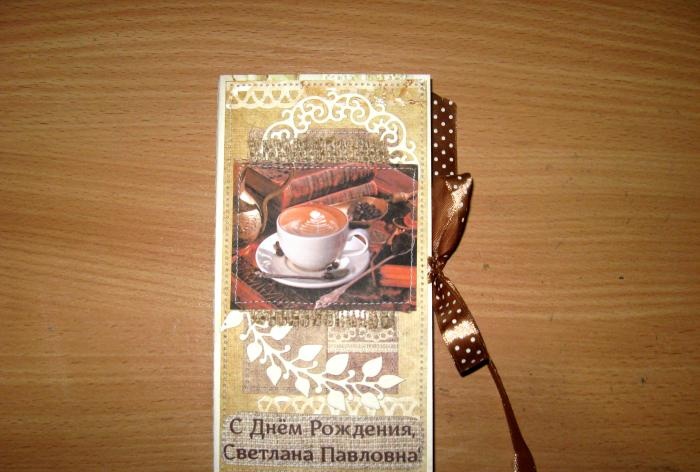
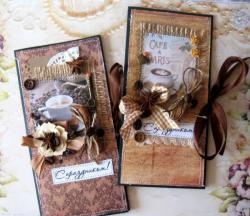
Nu pynter vi med blomster, blonder, sommerfugl og sløjfe. Nu er der kun tilbage at lime det hele indretning og chokoladeskålen er helt klar. Vi udvælger fødselarens yndlingschokolade, putter den indeni, du kan også skrive et par fine linjer med ønsker, og du er færdig. Tak til jer alle for jeres opmærksomhed, jeg håber det blev meget interessant og informativt, vi ses igen!
![Kaffekort chokolademaskine](https://i.washerhouse.com/images/19/616-kofeynaya-otkrytka-shokoladnica.jpg)
![Kaffekort chokolademaskine](https://i.washerhouse.com/images/19/617-kofeynaya-otkrytka-shokoladnica.jpg)
![Kaffekort chokolademaskine](https://i.washerhouse.com/images/19/618-kofeynaya-otkrytka-shokoladnica.jpg)