![Patriotisk bånd til Victory Day](https://i.washerhouse.com/images/10/843-patrioticheskaya-lenta-ko-dnyu-pobedy.jpg)
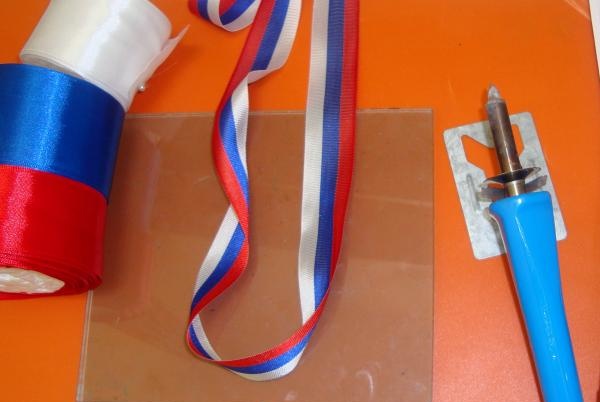
For at oprette et bånd skal du bruge:
1. Et smalt bånd, der forestiller tricoloren.
2. Satinbånd 4 eller 5 cm brede i tre farver - hvid, blå, rød.
3. Brænder og glas.
4. Varm lim.
![Patriotisk bånd til Victory Day](https://i.washerhouse.com/images/10/829-patrioticheskaya-lenta-ko-dnyu-pobedy.jpg)
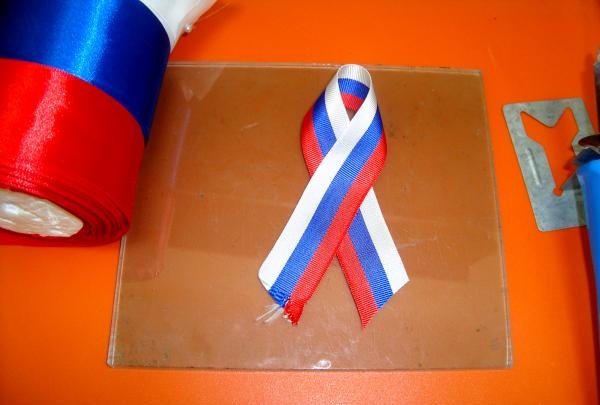
Fold båndet i midten for at danne en løkke og lim enderne af båndet, hvor de mødes.
![Patriotisk bånd til Victory Day](https://i.washerhouse.com/images/10/830-patrioticheskaya-lenta-ko-dnyu-pobedy.jpg)
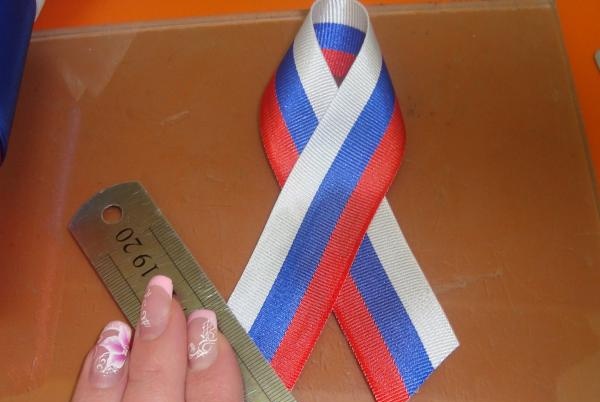
Under linealen skal du skære enderne af båndet i en spids vinkel, som på billedet:
![Patriotisk bånd til Victory Day](https://i.washerhouse.com/images/10/831-patrioticheskaya-lenta-ko-dnyu-pobedy.jpg)
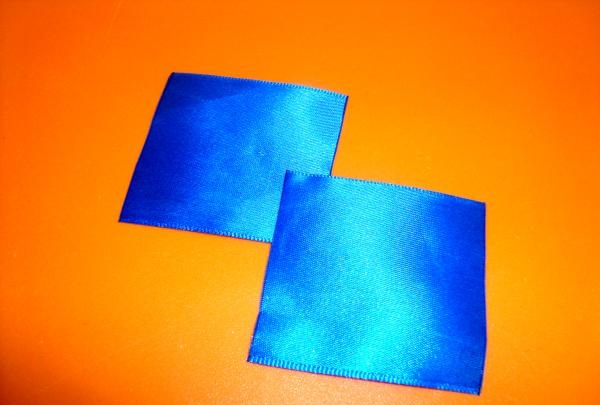
Du skal skære firkanter fra hvert bånd. Størrelsen på firkanterne er enten 5 gange 5 cm, eller 4 gange 4 cm, afhængig af bredden på båndet du vælger. Du skal bruge to emner af hver farve, undtagen rød. Der skal være tre røde firkanter.
![Patriotisk bånd til Victory Day](https://i.washerhouse.com/images/10/832-patrioticheskaya-lenta-ko-dnyu-pobedy.jpg)
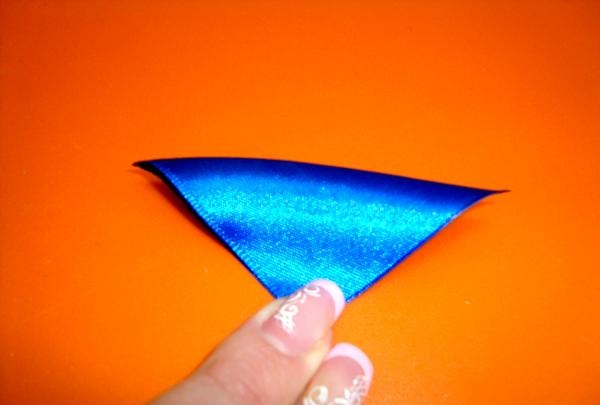
For at skabe en kvist på et bånd har du brug for skarpe buede kronblade, som er skabt ved hjælp af teknikken kanzashi. Det firkantede element skal bøjes diagonalt for at danne en stor trekant.
![Patriotisk bånd til Victory Day](https://i.washerhouse.com/images/10/833-patrioticheskaya-lenta-ko-dnyu-pobedy.jpg)
Derefter bøjes emnet igen i midten som vist på billedet.
![Patriotisk bånd til Victory Day](https://i.washerhouse.com/images/10/834-patrioticheskaya-lenta-ko-dnyu-pobedy.jpg)
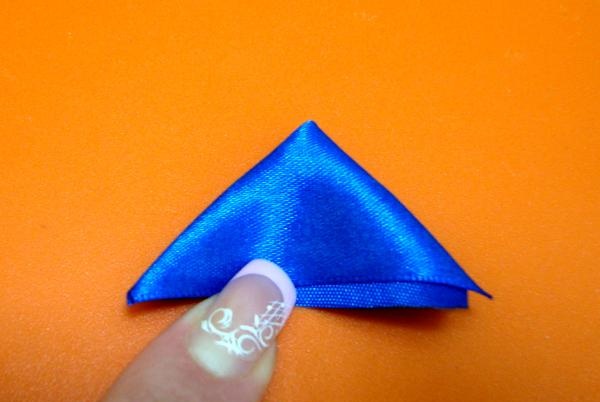
Den sidste fold udføres langs trekantens midterlinje og derefter dannes en spids vinkel i toppen af elementet.
![Patriotisk bånd til Victory Day](https://i.washerhouse.com/images/10/835-patrioticheskaya-lenta-ko-dnyu-pobedy.jpg)
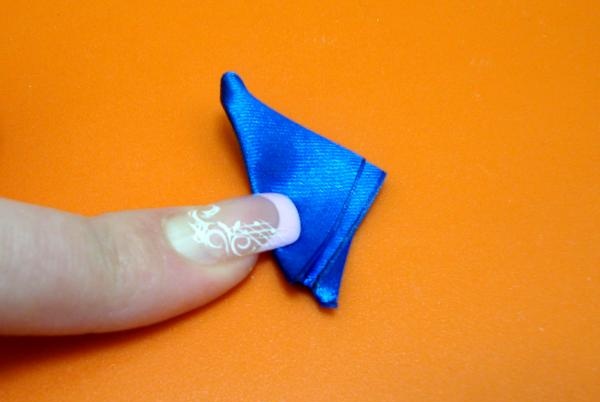
Brug en brænder til at skære bunden af det blå kronblad af. Under temperaturen loddes atlasets lag, og kronbladet fikseres.
![Patriotisk bånd til Victory Day](https://i.washerhouse.com/images/10/836-patrioticheskaya-lenta-ko-dnyu-pobedy.jpg)
Bøj kronbladet i den anden retning.
![Patriotisk bånd til Victory Day](https://i.washerhouse.com/images/10/837-patrioticheskaya-lenta-ko-dnyu-pobedy.jpg)
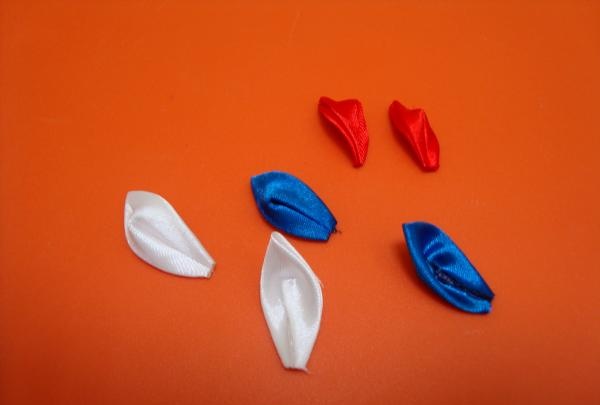
Gør lignende handlinger med alle de tomme felter, og du vil få det nødvendige antal kronblade til grenen.
![Patriotisk bånd til Victory Day](https://i.washerhouse.com/images/10/838-patrioticheskaya-lenta-ko-dnyu-pobedy.jpg)
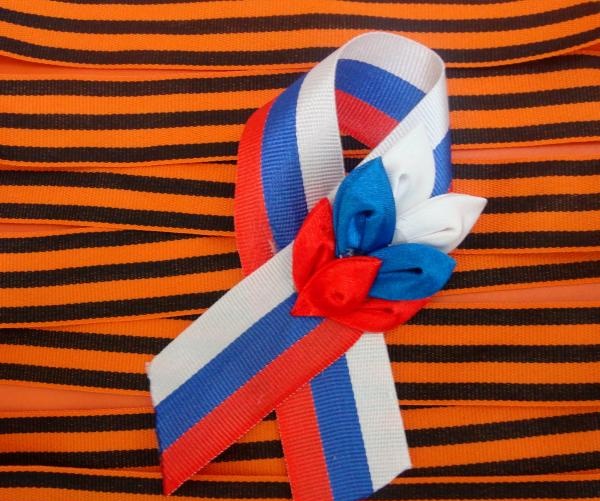
Brug varm lim til at fastgøre kronbladene i midten af hovedtapen.
![Patriotisk bånd til Victory Day](https://i.washerhouse.com/images/10/839-patrioticheskaya-lenta-ko-dnyu-pobedy.jpg)
Røde og blå farver limes parvis direkte på tapen.
![Patriotisk bånd til Victory Day](https://i.washerhouse.com/images/10/840-patrioticheskaya-lenta-ko-dnyu-pobedy.jpg)
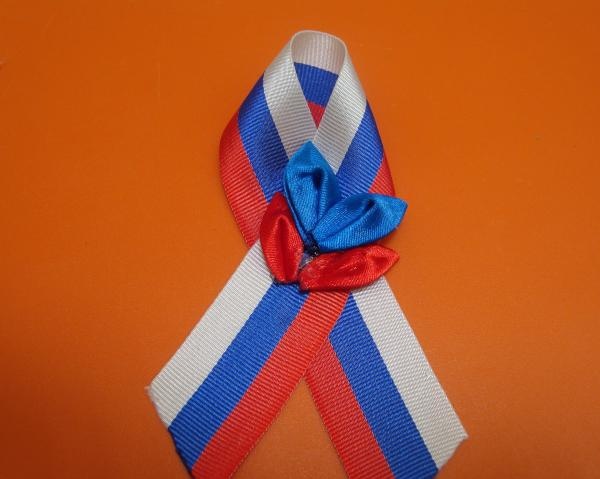
Det hvide bladpar limes først sammen.
![Patriotisk bånd til Victory Day](https://i.washerhouse.com/images/10/841-patrioticheskaya-lenta-ko-dnyu-pobedy.jpg)
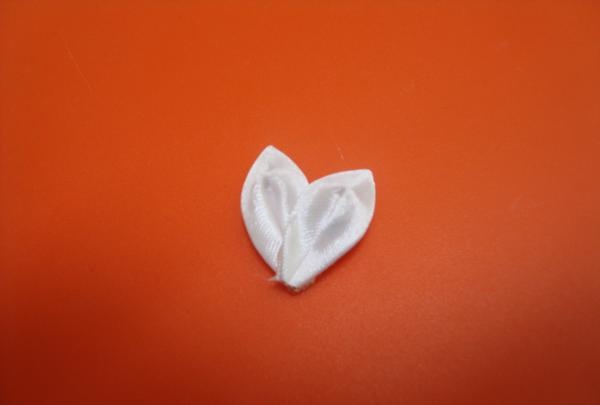
Og supplerer så kvisten på toppen.
![Patriotisk bånd til Victory Day](https://i.washerhouse.com/images/10/842-patrioticheskaya-lenta-ko-dnyu-pobedy.jpg)
Det sted, hvor grenen stammer fra, er dækket af et tredje rødt kronblad.
![Patriotisk bånd til Victory Day](https://i.washerhouse.com/images/10/843-patrioticheskaya-lenta-ko-dnyu-pobedy.jpg)
Vend arbejdet og brug lim til at fastgøre en nål i midten af stykket. Stiften er placeret vandret.
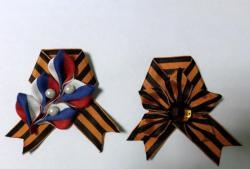
Det lyse bånd til paraden er klar!